Ir para o conteúdo principal

Disassembling Nintendo DSi Bottom case

Guia arquivado
Este guia é mantido exclusivamente para fins históricos. Use a versão atualizada do guia para executar o reparo.

O que você precisa

  1. Cuidado: as etapas de 1 a 2 são provenientes de um guia marcado como em andamento.

    Disassembling Nintendo DSi Bottom case, Battery: passo 1, imagem 1 %32
    • Loosen the two screws on the battery panel. Then lift the panel up to remove it.

  2. Disassembling Nintendo DSi Bottom case: passo 2, imagem 1 %32
    • L Button.

    • Top of the battery pack.

    • To remove the battery pack, place your fingernail or a spudger at the top of the battery near the L button. Gently lift the battery out.

  3. Cuidado: as etapas de 3 a 4 são provenientes de um guia marcado como em andamento.

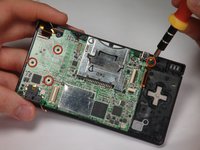
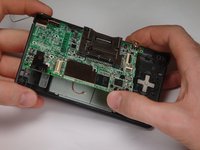
    Disassembling Nintendo DSi Bottom case, Motherboard: passo 3, imagem 1 %32 Disassembling Nintendo DSi Bottom case, Motherboard: passo 3, imagem 2 %32
    • Remove 4 Phillips screws from the board.

    • Lift the main board from the bottom end and flip it over to reveal the last connector.

    • Keep the main board fairly close to the case, making sure not to damage the last ribbon cable holding it in place.

  4. Disassembling Nintendo DSi Bottom case: passo 4, imagem 1 %32
    • Disconnect the ribbon cable by gently using a plastic opening tool to flip up the black connector latch. The cable should easily slide out from the connector.

    • The motherboard should now be free from the rest of the device.

  5. Disassembling Nintendo DSi Bottom case, Disassembling Nintendo DSi Bottom case: passo 5, imagem 1 %32
    • Remove the rubber front-panel button membranes from the device. Pay careful attention to where the buttons go, so you can replace them correctly.

    • A/B/X/Y button assembly

    • Select/Start button assembly

    • D-pad

    • Power button

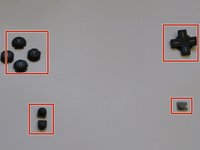
  6. Disassembling Nintendo DSi Bottom case: passo 6, imagem 1 %32 Disassembling Nintendo DSi Bottom case: passo 6, imagem 2 %32
    • Remove the plastic buttons and keep them in a safe place.

    • All of the buttons have "key" notches to prevent them from being inserted incorrectly (backwards or in the wrong place), but it can take a while to figure out where everything goes if they get shuffled around.

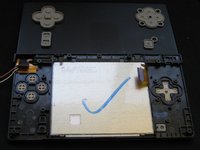
  7. Disassembling Nintendo DSi Bottom case: passo 7, imagem 1 %32 Disassembling Nintendo DSi Bottom case: passo 7, imagem 2 %32
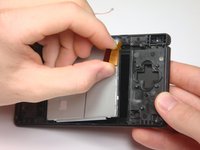
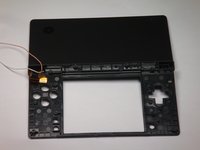
    • Flip the case open, and push the lower screen assembly out of the frame.

Conclusão

To reassemble your device, follow these instructions in reverse order.

rjcamero

Membro desde: 11/05/09

50 Reputação

Autoria de 3 guias

Equipe

Cal Poly, Team 6-1, Maness Fall 2009 Membro de Cal Poly, Team 6-1, Maness Fall 2009

CPSU-MANESS-F09S6G1

Membros da 5

Autoria de 4 guias

0 comentários

Adicione um comentário

Exibir estatísticas:

Últimas 24 horas: 1

Últimos 7 dias: 1

Últimos 30 dias: 9

Duração total: 5,335