Introdução
This guide explains how to safely disassemble the JVC GR-D290U camcorder. Each step provides clear instructions for removing external panels, disconnecting internal components, and accessing the device’s core parts for maintenance or repair. Follow carefully to avoid damaging delicate connectors and ensure an easy reassembly later.
O que você precisa
-
-
-
Open the liquid-crystal display (LCD) screen.
-
Using a Phillips #1 screwdriver, remove the two hinge screws.
-
Remove the hinge cover. Shut the screen after the cover is removed.
 Pergunte ao FixBot
-
-
-
Flip the camera over to look at the bottom panel.
-
Remove the five screws that are located along the sides of the bottom panel with a Phillips #1 screwdriver.
-
Push the eject button beneath the bottom panel to open the cassette cover.
-
Shut the cassette cover.
-
Place the camera upright.
-
-
-
-
Open the LCD screen. Move the dark gray tab located near the eyepiece aside.
-
Remove the screw located under the dark gray tab with a Phillips #1 screwdriver.
-
Replace the dark gray tab and close the LCD screen.
-
-
-
Go to the side of the camera that is opposite the LCD screen.
-
Remove the two screws located on this side of the camera with a Phillips #1 screwdriver.
-
-
-
Go to the side of the camera that has the LCD screen.
-
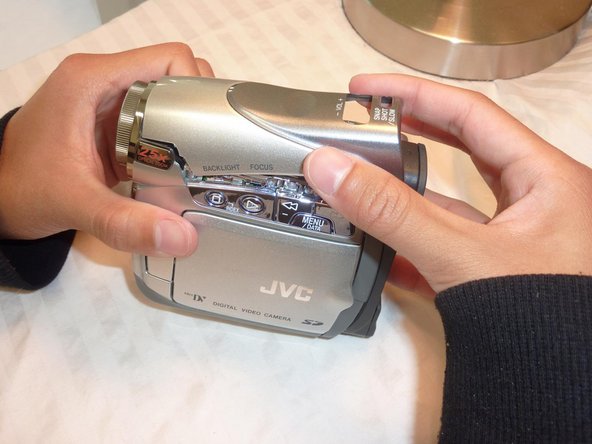
Place the plastic opening tool into the seam between the top cover and the bottom cover of the camera.
-
Pry the top cover from the bottom cover until you hear a snapping sound.
-
Gently remove the top cover from the camera base.
-
-


To reassemble your device, follow these instructions in reverse order.
Cancelar: não concluí este guia.
2 outras pessoas executaram este guia.

Equipe

Cal Poly, Team 18-69, Johann Spring 2010 Membro de Cal Poly, Team 18-69, Johann Spring 2010
CPSU-JOHANN-S10S18G69
4 Membros
Autoria de 3 guias
