Introdução
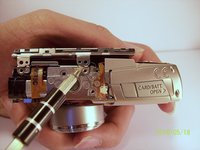
This guide is used to disassemble the lens from the camera. This will be used to further clean the lens if you experience the E18 error.
O que você precisa
-
-
Turn off the camera by pressing the power button above the LCD screen.
 Pergunte ao FixBot
-
-
-
Remove the two small screws on the bottom of the camera using a Phillips #00 screwdriver.
-
-
-
Use a Phillips #00 screwdriver to remove the two small screws on the right side of the camera.
-
-
-
Use a Phillips #00 screwdriver to remove the screw on the left of the camera under the A/V out digital label.
-
-
-
Use a Phillips #00 screwdriver to remove the screw on the bottom of the camera near the battery and memory card slots.
-
-
-
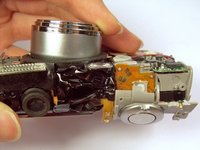
Remove the front, back, and side casings from the camera and set to the side.
-
-
-
Remove the two screws that connect the LCD and backlight to the main body of the camera.
-
-
-
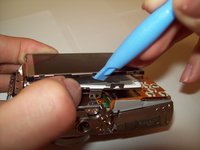
Gently pry the LCD and the backlight from the main body of the camera.
-
Gently pry the LCD from the backlight.
-
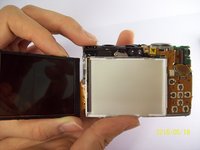
The thin ribbon cable is for the backlight.
-
The thick ribbon cable is for the LCD screen.
-
-
-
-
Carefully lift the ZIF connector that covers the thick ribbon cable.
-
This ZIF connector is fragile. Use caution when lifting it from its down position.
-
Insert the new LCD and reassemble the camera.
-
-
Ferramenta utilizada neste passo:Tweezers$4.99
-
Unplug the ribbon from the housing on the circuitry.
-
Take the new ribbon and insert it into the housing.
-
Tweezers or a tool with a sharp point can be used.
-
-
-
Detach the LCD and backlight.
-
Remove the larger screw.
-
Remove the two smaller sized screws.
-
Remove the small screw.
-
Remove the small screw.
-
-
-
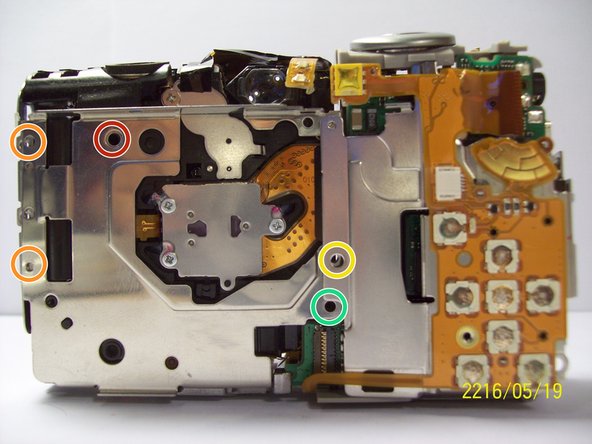
Remove the two screws near the the tripod mount using a Phillips #00 screwdriver.
-
-
-
Remove the screw next to the shutter on the top of the camera with a Phillips screwdriver.
-
-
-
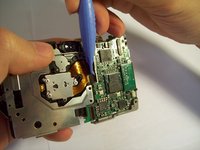
Remove the orange ribbon cable by lifting the ZIF connector attached to the ribbon with a spudger.
-
-
-
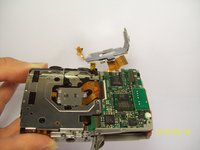
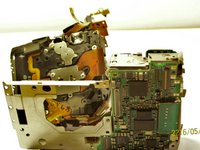
Carefully lift the shutter along with the ribbon connected to it. This will remove the casing around the motherboard.
-
-
-
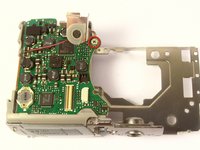
With the motherboard casing detached, remove the short orange ribbon by lifting the ZIF connector with a spudger or other plastic opening tools and slide the ribbon out. Detaching this ribbon will disconnect the side of the camera containing the motherboard from the rest of the camera.
-
-
-
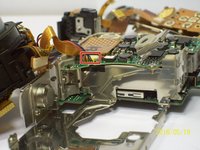
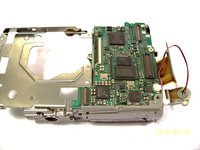
Disconnect the wires that are attached to the motherboard.
-
Remove the film by lifting it gently from the motherboard.
-
-
-
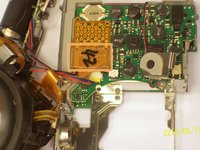
Remove the last wires connected to the motherboard by gently lifting upwards.
-
-
-
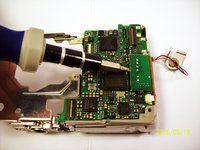
Remove the screw using a Phillips #00 screwdriver.
-
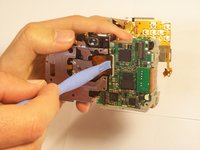
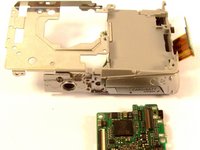
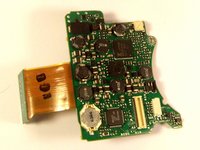
Gently lift the motherboard away from the case.
-
-
-
Remove the screw.
-
Once the screw is removed, you can remove the board.
-
-
-
Once you have removed the lens from the main chassis, gently brush off any dirt, sand, or dust that may have accumulated in the crevices. Using a compressed air canister or a brush can help remove all the dirt.
-


To reassemble your device, follow these instructions in reverse order.
Cancelar: não concluí este guia.
2 outras pessoas executaram este guia.
Equipe

Cal Poly, Team 9-71, Walters Spring 2011 Membro de Cal Poly, Team 9-71, Walters Spring 2011
CPSU-WALTERS-S11S9G71
4 Membros
Autoria de 10 guias