Ir para o conteúdo principal

Digital2 Platinum Pad 9 External Speaker Replacement

O que você precisa

  1. Digital2 Platinum Pad 9 External Speaker Replacement, External Cover: passo 1, imagem 1 %32
    • Take the plastic opening tool and insert it into the crease between the screen and the plastic casing and press down.

  2. Digital2 Platinum Pad 9 External Speaker Replacement: passo 2, imagem 1 %32 Digital2 Platinum Pad 9 External Speaker Replacement: passo 2, imagem 2 %32
    • After inserting the plastic opening tool, run it around the device a few times to loosen the external cover.

  3. Digital2 Platinum Pad 9 External Speaker Replacement: passo 3, imagem 1 %32 Digital2 Platinum Pad 9 External Speaker Replacement: passo 3, imagem 2 %32
    • Once you've gone around a few times a corner will pop up, insert the opening tool there and repeat step 2 with slightly more pressure. Do this until every section of the backing has popped up.

    • Then just remove the backing.

  4. Digital2 Platinum Pad 9 External Speaker Replacement, External Speaker: passo 4, imagem 1 %32
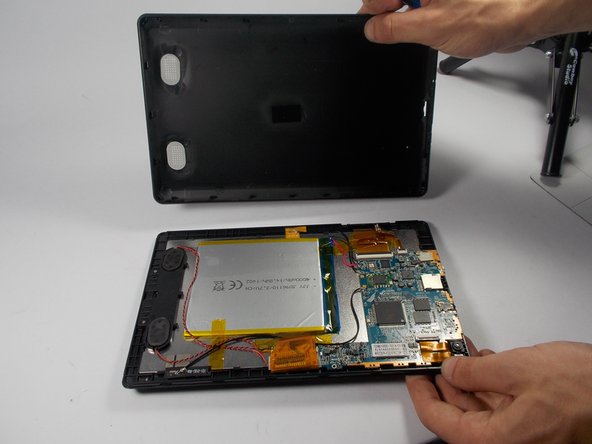
    • The external speakers are located in the black plastic fixture near the battery as pointed to in the image.

  5. Digital2 Platinum Pad 9 External Speaker Replacement: passo 5, imagem 1 %32
    • Use a J0 sized Phillips head screwdriver to remove the two 3.175mm long Phillips head screws from the speaker fixture.

  6. Digital2 Platinum Pad 9 External Speaker Replacement: passo 6, imagem 1 %32
    • Then lift up the cover holding the speakers down.

    • Remove the actual speakers along with the cover.

  7. Digital2 Platinum Pad 9 External Speaker Replacement: passo 7, imagem 1 %32
    • Remove the tape holding the wires down.

  8. Digital2 Platinum Pad 9 External Speaker Replacement: passo 8, imagem 1 %32
    • The two wires that connect the speakers to the motherboard must be removed next. In order to replace the speakers you will need to solder them back into place.

  9. Digital2 Platinum Pad 9 External Speaker Replacement: passo 9, imagem 1 %32
Conclusão

To reassemble your device, follow these instructions in reverse order.

David DeMeritt

Membro desde: 03/08/16

637 Reputação

Autoria de 6 guias

Equipe

UMass Dartmouth, Team 5-6, Landers Spring 2016 Membro de UMass Dartmouth, Team 5-6, Landers Spring 2016

UMASSD-LANDERS-S16S5G6

Membros da 3

Autoria de 6 guias

0 comentários

Adicione um comentário

Exibir estatísticas:

Últimas 24 horas: 0

Últimos 7 dias: 0

Últimos 30 dias: 5

Duração total: 124