Introdução
Use this guide to replace a full or broken Solid State Drive on your Dell Latitude E7270.
The Solid State Drive is where your computer stores all of its downloaded software/drivers/operating system. Solid State Drives are more robust than typical Hard Disk Drives, but are not immune to physical damage or onboard shorts. A damaged/full Solid State Drive can do anything from slow your computer down to make it inoperable.
Before using this guide, check out the troubleshooting page to see if your symptoms match any that represent a bad battery.
Before you begin this repair, make sure that your device is powered off and it is unplugged from the charger.
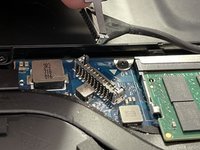
NOTE: In the absence of an SSD, a RAM stick was used as a substitute for visual and educational purposes only. The SSD in your device will resemble a RAM stick but may differ in color.
O que você precisa
-
-
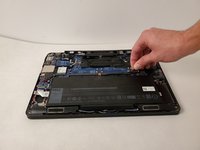
Place the device top down in front of you so that the vents are visible and are furthest from the user.
-
-
-
-
Remove the three M2.5 X 5MM screws, located above the battery, with a Phillips #00 screwdriver.
-


To reassemble your device, follow these instructions in reverse order.
To reassemble your device, follow these instructions in reverse order.
Cancelar: não concluí este guia.
2 outras pessoas executaram este guia.

Equipe

Embry-Riddle Aeronautical University, Team S16-G5, Branham Spring 2020 Membro de Embry-Riddle Aeronautical University, Team S16-G5, Branham Spring 2020
ERAU-BRANHAM-S20S16G5
3 Membros
Autoria de 6 guias
Um comentário
Thumbs down for showing a memory module and not a SSD.