Ir para o conteúdo principal
Participe da comunidade de reparos - Criar conta

Dell Inspiron 8600 LCD Replacement

O que você precisa

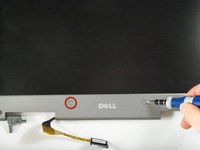
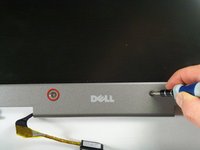
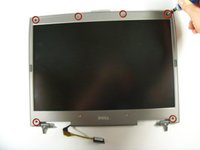
  1. Dell Inspiron 8600 LCD Replacement, Hinge Cover: passo 1, imagem 1 %32 Dell Inspiron 8600 LCD Replacement, Hinge Cover: passo 1, imagem 2 %32 Dell Inspiron 8600 LCD Replacement, Hinge Cover: passo 1, imagem 3 %32
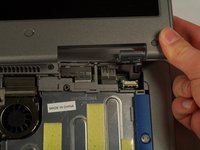
    • Insert a spudger into the notch at the far left side of the top blue panel and pry the hinge cover off.

    • You may need to pry the other side off as well. You can do this by inserting the spudger between the hinge and the top cover.

    • Be careful of the wire attached to the underside of the hinge cover.

    Pergunte ao FixBot

    Comentar

  2. Dell Inspiron 8600 LCD Replacement: passo 2, imagem 1 %32
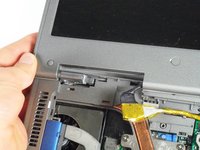
    • Pull the small black tab on the right hand side of the laptop.

    • You have now removed the hinge cover.

    Pergunte ao FixBot

    Comentar

  3. Dell Inspiron 8600 LCD Replacement, Display Module: passo 3, imagem 1 %32 Dell Inspiron 8600 LCD Replacement, Display Module: passo 3, imagem 2 %32
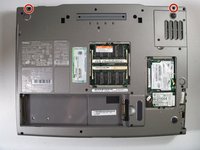
    • Flip the laptop over and remove the indicated screws.

    • Flip the laptop back over.

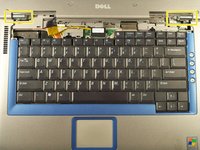
    • Find the two places where the display module is attached to the base of the computer.

    Pergunte ao FixBot

    Comentar

  4. Dell Inspiron 8600 LCD Replacement: passo 4, imagem 1 %32
    • Disconnect the video card from the display module by gently lifting upwards on the black tab.

    Pergunte ao FixBot

    Comentar

  5. Dell Inspiron 8600 LCD Replacement: passo 5, imagem 1 %32 Dell Inspiron 8600 LCD Replacement: passo 5, imagem 2 %32
    • Lift the display module directly upwards from the base of the computer.

    Pergunte ao FixBot

    Comentar

  6. Dell Inspiron 8600 LCD Replacement: passo 6, imagem 1 %32
    • Now remove the display module.

    Pergunte ao FixBot

    Comentar

  7. Dell Inspiron 8600 LCD Replacement, LCD: passo 7, imagem 1 %32 Dell Inspiron 8600 LCD Replacement, LCD: passo 7, imagem 2 %32 Dell Inspiron 8600 LCD Replacement, LCD: passo 7, imagem 3 %32
    • First, remove the plastic tabs that are covering the interior screws.

    • After removing the tabs, remove the interior screws using a #1 Philips Screwdriver.

    • Note there are 8 tabs and 8 screws in total.

    Pergunte ao FixBot

    Comentar

  8. Dell Inspiron 8600 LCD Replacement: passo 8, imagem 1 %32
    • Now that the screws are removed, press the plastic casing inward to loosen the case. Then remove the plastic case from the monitor unit.

    Pergunte ao FixBot

    Comentar

  9. Dell Inspiron 8600 LCD Replacement: passo 9, imagem 1 %32
    • Using a Philips #1 screwdriver remove the screws holding the LCD in place.

    • Note there are 8 screws in total for this step, 4 on each side of the unit.

    Pergunte ao FixBot

    Comentar

  10. Dell Inspiron 8600 LCD Replacement: passo 10, imagem 1 %32
    • Remove the broken LCD unit, and replace with new unit.

    Pergunte ao FixBot

    Comentar

Conclusão

To reassemble your device, follow these instructions in reverse order.

Cancelar: não concluí este guia.

2 outras pessoas executaram este guia.

Perry

Membro desde: 04/12/11

251 Reputação

Autoria de 4 guias

Equipe

Cal Poly, Team 18-22, Garner Spring 2011 Membro de Cal Poly, Team 18-22, Garner Spring 2011

CPSU-GARNER-S11S18G22

4 Membros

Autoria de 16 guias

1Comentário do guia

which controller board do i have to use for this model ?

bcdoor - Responder Compartilhar

Comentar

Visualizações:

Últimas 24 horas: 0

Últimos 7 dias: 2

Últimos 30 dias: 22

Ao todo: 5,020