Ir para o conteúdo principal
Dell Inspiron 7568 Keyboard Replacement Guide

Dell Inspiron 7568 Keyboard Replacement Guide

Luis Velez

Luis Velez e 7 outros colaboradores

Última atualização em March 22, 2023

30 minutos
Difícil
Precisa de melhores imagens

Introdução

Ir para o passo 1

These instructions will guide you through the replacement of your Dell Inspiron, model 15-7568, keyboard. The keyboard is an essential part of your laptop, and is utilized for most key functions on your device. If your keyboard is missing pieces, has sticking keys, or not working properly, this guide will walk you through the proper replacement for your Dell Inspiron 15-7568 keyboard. For best results, follow the steps in a consecutive order. Note, prior to beginning make sure your battery is taken out of your laptop, refer to our Dell Inspiron 7568 Battery Replacement Guide for information on how to remover your battery. Be careful when maneuvering small pieces, as well as keep all tools and parts organized as to not misplace any piece.

O que você precisa

Ferramentas

Exibir mais…

  1. Dell Inspiron 7568 Keyboard Replacement Guide, Battery: passo 1, imagem 1 %32 Dell Inspiron 7568 Keyboard Replacement Guide, Battery: passo 1, imagem 2 %32
    • Remove the ten 7mm Phillips #1 screws on the bottom cover.

    • Remove the bottom cover.

  2. Dell Inspiron 7568 Keyboard Replacement Guide: passo 2, imagem 1 %32 Dell Inspiron 7568 Keyboard Replacement Guide: passo 2, imagem 2 %32
    • Remove the four 3mm Phillips #1 screws holding the battery.

    • Unhinge the connector cable to the battery.

    • Remove the battery.

  3. Dell Inspiron 7568 Keyboard Replacement Guide, Display Assembly: passo 3, imagem 1 %32 Dell Inspiron 7568 Keyboard Replacement Guide, Display Assembly: passo 3, imagem 2 %32
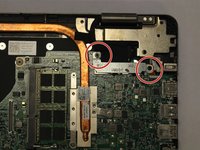
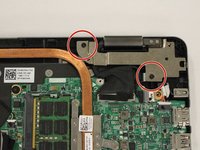
    • Unscrew & remove the two 3mm screws (using a ph1 screwdriver bit) and the cable bracket, above the motherboard

    • Doing this will allow one to access the LCD-motherboard connector cables.

  4. Dell Inspiron 7568 Keyboard Replacement Guide: passo 4, imagem 1 %32 Dell Inspiron 7568 Keyboard Replacement Guide: passo 4, imagem 2 %32
    • Unscrew the 7mm screws that secure the left and right hinges (using a ph1 screwdriver bit).

  5. Dell Inspiron 7568 Keyboard Replacement Guide: passo 5, imagem 1 %32 Dell Inspiron 7568 Keyboard Replacement Guide: passo 5, imagem 2 %32 Dell Inspiron 7568 Keyboard Replacement Guide: passo 5, imagem 3 %32
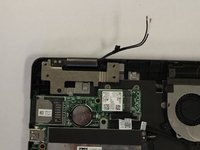
    • Disconnect the antenna cable (under the left hinge)

    • Disconnect the LCD and Touchscreen display cables under the right hinge.

    • These are a set of two cables. For better image see image two in step one of this guide.

  6. Dell Inspiron 7568 Keyboard Replacement Guide: passo 6, imagem 1 %32
    • Carefully separate the screen from the bottom half of the device.

  7. Dell Inspiron 7568 Keyboard Replacement Guide, Cooling Fan: passo 7, imagem 1 %32 Dell Inspiron 7568 Keyboard Replacement Guide, Cooling Fan: passo 7, imagem 2 %32
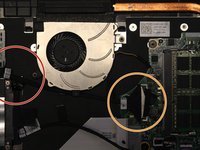
    • Begin by unclipping the cable connecting the fan and the motherboard.

    • Gently separate the motherboard cable from the clamp at the bottom of the fan.

    • Remove the cable.

  8. Dell Inspiron 7568 Keyboard Replacement Guide: passo 8, imagem 1 %32 Dell Inspiron 7568 Keyboard Replacement Guide: passo 8, imagem 2 %32
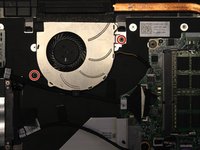
    • Remove the two 3mm Phillips #1 screws that hold the fan into place.

    • Remove the fan.

  9. Dell Inspiron 7568 Keyboard Replacement Guide, Keyboard: passo 9, imagem 1 %32 Dell Inspiron 7568 Keyboard Replacement Guide, Keyboard: passo 9, imagem 2 %32 Dell Inspiron 7568 Keyboard Replacement Guide, Keyboard: passo 9, imagem 3 %32
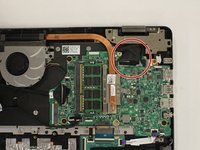
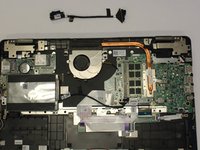
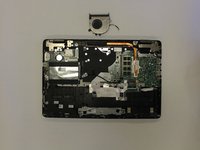
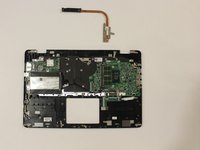
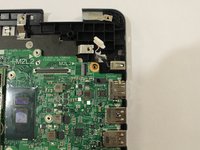
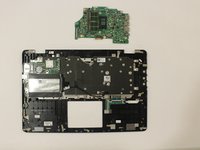
    • Once the battery, screen, cooling fan, trackpad are out, the device would resemble the one in the first picture of this step.

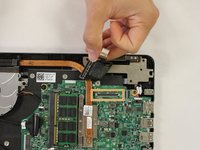
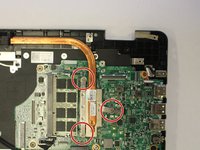
    • Unscrew the three screws connecting the copper pipe to the motherboard.

    • Remove the copper pipe.

  10. Dell Inspiron 7568 Keyboard Replacement Guide: passo 10, imagem 1 %32 Dell Inspiron 7568 Keyboard Replacement Guide: passo 10, imagem 2 %32 Dell Inspiron 7568 Keyboard Replacement Guide: passo 10, imagem 3 %32
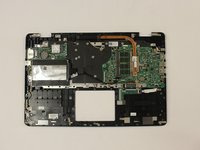
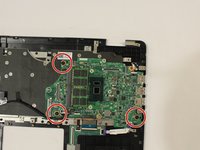
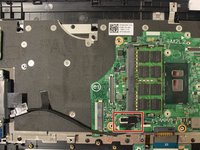
    • Unscrew the three 2mm wafer screws holding the motherboard.

    • Unplug the DC cable from the motherboard.

  11. Dell Inspiron 7568 Keyboard Replacement Guide: passo 11, imagem 1 %32 Dell Inspiron 7568 Keyboard Replacement Guide: passo 11, imagem 2 %32
    • Unplug the connecting strip

  12. Dell Inspiron 7568 Keyboard Replacement Guide: passo 12, imagem 1 %32 Dell Inspiron 7568 Keyboard Replacement Guide: passo 12, imagem 2 %32 Dell Inspiron 7568 Keyboard Replacement Guide: passo 12, imagem 3 %32
    • Unplug the hard-drive cable

    • Remove the motherboard

  13. Dell Inspiron 7568 Keyboard Replacement Guide: passo 13, imagem 1 %32 Dell Inspiron 7568 Keyboard Replacement Guide: passo 13, imagem 2 %32
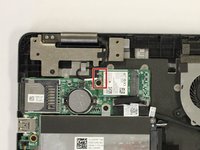
    • Unscrew the three 3mm screws holding the hard drive (using a ph1 screwdriver bit)

    • Remove the hard drive

  14. Dell Inspiron 7568 Keyboard Replacement Guide: passo 14, imagem 1 %32 Dell Inspiron 7568 Keyboard Replacement Guide: passo 14, imagem 2 %32
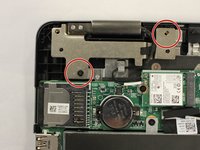
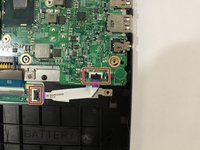
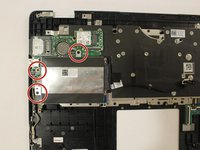
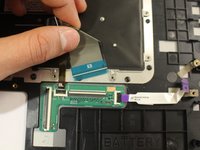
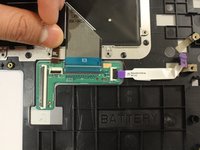
    • Unscrew the two 3mm screws holding the daughter board (using the ph1 screwdriver bit).

    • Set the daughterboard aside. NOTE: the daughter board doesn't have to be removed

  15. Dell Inspiron 7568 Keyboard Replacement Guide: passo 15, imagem 1 %32 Dell Inspiron 7568 Keyboard Replacement Guide: passo 15, imagem 2 %32
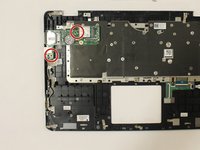
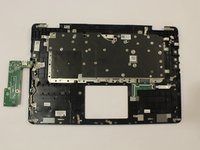
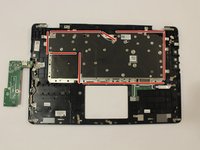
    • Unscrew & remove the twenty-eight 2mm bracket screws holding the keyboard bracket (using a PH000 screwdriver bit)

    • Remove the keyboard bracket

  16. Dell Inspiron 7568 Keyboard Replacement Guide: passo 16, imagem 1 %32
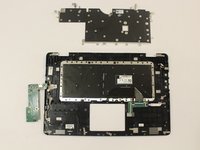
    • Unscrew & remove the sixteen 2mm screws holding the keyboard (using a PH000 screwdriver bit)

  17. Dell Inspiron 7568 Keyboard Replacement Guide: passo 17, imagem 1 %32 Dell Inspiron 7568 Keyboard Replacement Guide: passo 17, imagem 2 %32 Dell Inspiron 7568 Keyboard Replacement Guide: passo 17, imagem 3 %32
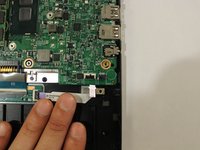
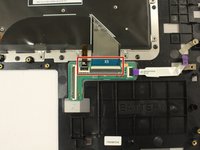
    • Unplug the keyboard ("KB") and backlight ("BL") cable

    • Remove the keyboard.

Conclusão

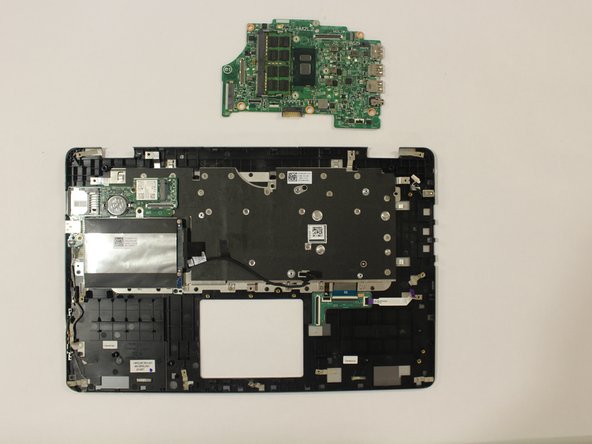
To reassemble your device, follow these instructions in reverse order.

2 outras pessoas executaram este guia.

Luis Velez

Membro desde: 02/19/17

452 Reputação

Autoria de 2 guias

Equipe

USF Tampa, Team S2-G2, Lacy Spring 2017 Membro de USF Tampa, Team S2-G2, Lacy Spring 2017

USFT-LACY-S17S2G2

4 Membros

Autoria de 7 guias

0Comentários do guia

Comentar

Visualizações:

Últimas 24 horas: 0

Últimos 7 dias: 1

Últimos 30 dias: 6

Ao todo: 1,139