Ir para o conteúdo principal
Dell AC511 Front Panel Replacement

Dell AC511 Front Panel Replacement

William Cook

William Cook e 2 outros colaboradores

Última atualização em June 24, 2024

30 minutos - 1 hora
Fácil
Melhor Introdução

Introdução

Ir para o passo 1

Taking off the front panel is a requirement for replacing any part inside or around the speaker, and if improperly done may lead to damage to the speaker or self.

O que você precisa

Ferramentas

Exibir mais…

  1. Dell AC511 Front Panel Replacement, Front Panel: passo 1, imagem 1 %32 Dell AC511 Front Panel Replacement, Front Panel: passo 1, imagem 2 %32 Dell AC511 Front Panel Replacement, Front Panel: passo 1, imagem 3 %32
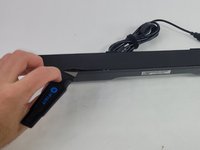
    • Use a Jimmy to peel off the screen stuck to the front of the speaker.

    • Start from any corner and use the Jimmy to get under the screen. Once one side lifts up, you can use your fingers to peel the rest off.

    • Be careful to avoid damage to the rest of the speaker and especially to yourself.

    • Don't worry if it tears; use the Jimmy again to peel off the rest.

  2. Dell AC511 Front Panel Replacement: passo 2, imagem 1 %32 Dell AC511 Front Panel Replacement: passo 2, imagem 2 %32
    • Remove ten 6 mm screws using a Phillips #1 screwdriver.

  3. Dell AC511 Front Panel Replacement: passo 3, imagem 1 %32 Dell AC511 Front Panel Replacement: passo 3, imagem 2 %32
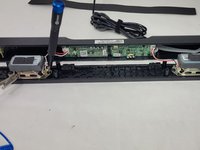
    • Lift the front panel off of the rest of the device.

    • The speakers will still be attached to the front panel. Being too rough could damage them.

    • Remove the 4 mm screws from the speakers using a JIS #1 screwdriver.

    • Remove the front panel from the device.

Conclusão

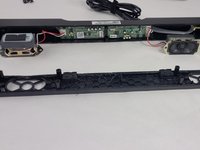
To reassemble your device, follow these instructions in reverse order.

William Cook

Membro desde: 03/19/24

617 Reputação

Autoria de 6 guias

Equipe

0 comentários

Comentar

Exibir estatísticas:

Últimas 24 horas: 2

Últimos 7 dias: 17

Últimos 30 dias: 66

Ao todo: 407