Ir para o conteúdo principal
Participe da comunidade de reparos - Criar conta

Commodore 64 3AG fuse Replacement

O que você precisa

  1. Commodore 64 3AG fuse Replacement, Removing screws: passo 1, imagem 1 %32 Commodore 64 3AG fuse Replacement, Removing screws: passo 1, imagem 2 %32 Commodore 64 3AG fuse Replacement, Removing screws: passo 1, imagem 3 %32
    • 1. Remove three 6.75mm ph2 screw heads from the casing

  2. Commodore 64 3AG fuse Replacement, Opening: passo 2, imagem 1 %32 Commodore 64 3AG fuse Replacement, Opening: passo 2, imagem 2 %32
    • 2. Split the case of the C64 open by pulling up on the case towards you

    • Do not pull too hard that you break the clips.

  3. Commodore 64 3AG fuse Replacement, Detach Keyboard from motherboard: passo 3, imagem 1 %32 Commodore 64 3AG fuse Replacement, Detach Keyboard from motherboard: passo 3, imagem 2 %32
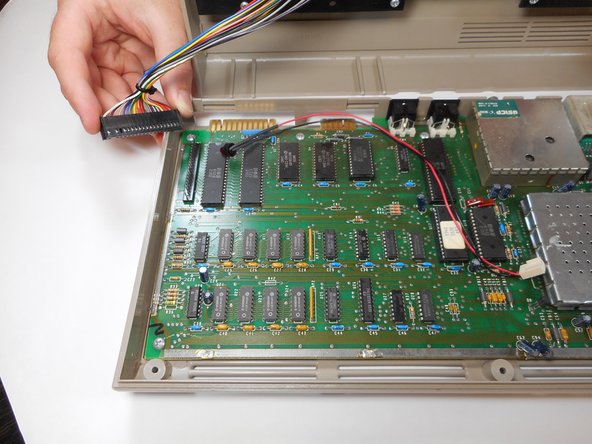
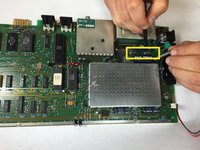
    • 1. Detach the multi-colored wire bundles that's connected to the motherboard

    • In this picture, the power indication LED (connected to the black and red wires) is not fastened to the keyboard panel, yours might be different.

  4. Commodore 64 3AG fuse Replacement, Locate 3AG fuse: passo 4, imagem 1 %32
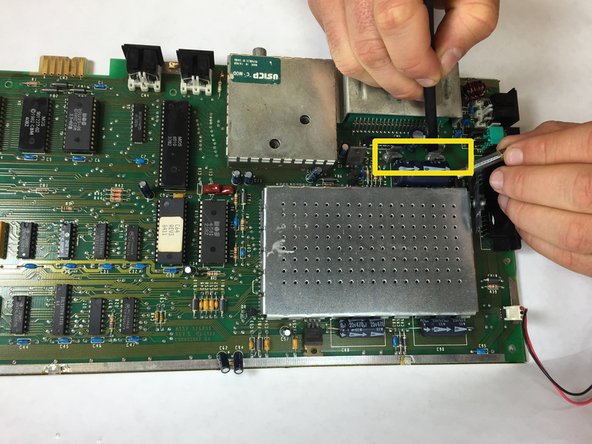
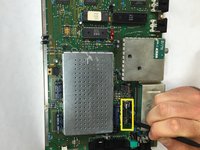
    • 2. Find the 3AG fuse located next to the joystick ports and On/Off switch

  5. Commodore 64 3AG fuse Replacement, Removing the 3AG fuse: passo 5, imagem 1 %32 Commodore 64 3AG fuse Replacement, Removing the 3AG fuse: passo 5, imagem 2 %32
    • 3. Using the ifixit splugger, prop out the 3AG fuse from the clip.

    • * Replace the 3AG fuse by inserting the new fuse and letting it pop into the clip

Conclusão

To reassemble your device, follow these instructions in reverse order.

4 outras pessoas executaram este guia.

Silvanus Clarke

Membro desde: 09/26/14

677 Reputação

Autoria de 5 guias

Equipe

USF Tampa, Team 13-6, Staggers Fall 2014 Membro de USF Tampa, Team 13-6, Staggers Fall 2014

USFT-STAGGERS-F14S13G6

4 Membros

Autoria de 15 guias

2Comentários do guia

The fuse is 1.5 Amp, not 3

JC Andy - Responder Compartilhar

3AG does NOT mean a fast acting fuse. It could be either fast or slow blow. The 3 means it's 1 1/4 " long, the "A" means it has Axial connections, and the "G" means it's made of glass.

Toon Konings - Responder Compartilhar

Comentar

Visualizações:

Últimas 24 horas: 2

Últimos 7 dias: 21

Últimos 30 dias: 63

Ao todo: 4,697