Introdução
If the 'on'/'off' switch of the device is stuck in the 'off' position, the device will not turn on. This guide will show how to access and replace the switch from within.
O que você precisa
-
-
Place the meter face down, and the back panel and screws can be seen.
 Pergunte ao FixBot
-
-
-
Unscrew the two 9mm screws on the back panel using a #0 Phillips screwdriver.
-
-
-
Remove the back panel of the device by lifting upward.
-
Remove the battery from the meter before continuing.
-
-
-
-
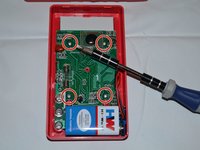
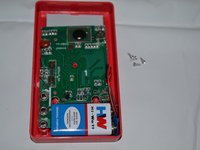
Remove the four 7mm Phillips screws holding the circuit board in place.
-
-
-
Gently lift the circuit board away from the device casing.
-
-
-
The 'on'/'off' switch is located directly beneath the dial.
-
-
-
Gently remove switch from device by lifting upward.
-
Either clean or replace switch.
-




To reassemble your device, follow these instructions in reverse order.
Cancelar: não concluí este guia.
5 outras pessoas executaram este guia.

Equipe

Clemson, Team 2-4, Benson Fall 2014 Membro de Clemson, Team 2-4, Benson Fall 2014
CLEM-BENSON-F14S2G4
4 Membros
Autoria de 6 guias
1Comentário do guia
Hi Great site love it, Where can you purchase the copper contacts and is there a technical name for them didn’t know that I could have repaired much craftsman 82040 meter by piecing out the harbor freight free meterand using the contacts which were worn out and non repairable and started to hand make them and then ran across this site. Thanks for the tutorial and being part of the solution as i am an automotive parts rebuilder keeping land fills few of good core since 1988.
