Esta versão pode conter edições incorretas. Mude para o último instantâneo verificado.
O que você precisa
-
Este passo não foi traduzido. Ajude a traduzi-lo
-
Locate the battery cover on the bottom of your camera.
-
Slide the tab to the right to open the battery cover.
-
-
Este passo não foi traduzido. Ajude a traduzi-lo
-
Flip the battery cover open.
-
Using your fingers, slide the battery out of the camera.
-
-
Este passo não foi traduzido. Ajude a traduzi-lo
-
Push down on the memory card until it clicks and releases.
-
Pull up on the memory card to remove it.
-
-
Este passo não foi traduzido. Ajude a traduzi-lo
-
Using the Phillips #00 screwdriver, remove the two 3.1mm screws from the bottom of the camera.
-
-
Este passo não foi traduzido. Ajude a traduzi-lo
-
Ensure that the screen is facing you, and then rotate it till you see the screws on the side of the camera.
-
Use the Phillips #00 screwdriver to remove the two 3.1 mm screws.
-
-
Este passo não foi traduzido. Ajude a traduzi-lo
-
With the screen still facing you, rotate the camera 180 degrees.
-
-
Este passo não foi traduzido. Ajude a traduzi-lo
-
Use the Philips #00 screwdriver to pry open the charging port cover.
-
Once you pry open the charging port cover, rotate the cover so that you have access to the screw underneath. Which is seen in the next image.
-
Remove both 3.1 mm screws using the Phillips #00 screwdriver.
-
-
Este passo não foi traduzido. Ajude a traduzi-lo
-
Turn the camera so the bottom is once again facing up.
-
With the battery door still open, use a spudger to remove the cover from the front of the camera.
-
-
-
Este passo não foi traduzido. Ajude a traduzi-lo
-
Once the entire front cover has been released carefully pull it off.
-
-
Este passo não foi traduzido. Ajude a traduzi-lo
-
Just like Step 4-6 , carefully use the Spudger to remove the back cover.
-
-
Este passo não foi traduzido. Ajude a traduzi-lo
-
Gently remove the tabs surrounding the power button on the housing of the camera.
-
-
Este passo não foi traduzido. Ajude a traduzi-lo
-
Cut the wires half way between the microphone and body of camera.
-
-
Este passo não foi traduzido. Ajude a traduzi-lo
-
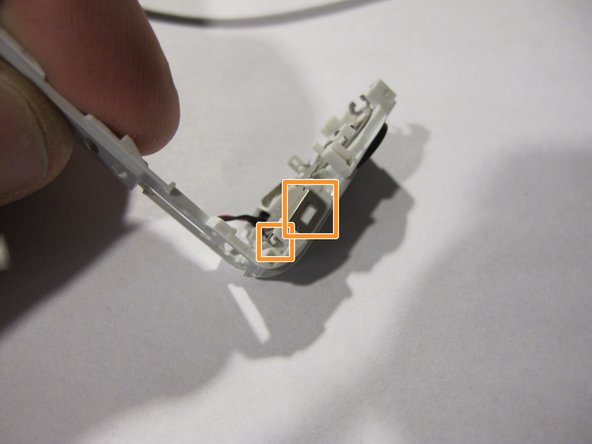
Remove the 3.1mm screw holding speaker to the housing.
-
Remove the two clips and the metal cover will be released
-
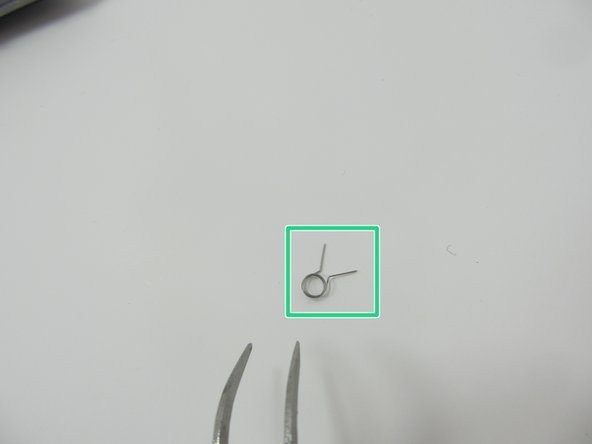
Take note of the spring and its orientation, it will need to be re-installed later
-
Image of the spring
-
-
Este passo não foi traduzido. Ajude a traduzi-lo
-
Using tweezers, grab the wires to pull the speaker from the plastic housing.
-
-
Este passo não foi traduzido. Ajude a traduzi-lo
-
Test the heat of the soldering iron by touching it to the tip of a paperclip.
-
-
Este passo não foi traduzido. Ajude a traduzi-lo
-
Solder the red wire to the right terminal, and the black wire to the left terminal.
-
-
Este passo não foi traduzido. Ajude a traduzi-lo
-
Lift up the corner of the metal cover and slide the spring in so it rests around the screw hole.
-
After the spring is around the screw hole post, replace the screw so that the cover stays in place.
-
-
Este passo não foi traduzido. Ajude a traduzi-lo
-
To reattach the speaker housing to the rest of the camera, make sure the pins and clips are aligned.
-


Cancelar: não concluí este guia.
2 outras pessoas executaram este guia.
Documentos anexados
Equipe

Michigan Tech, Team 1-10, Lauer Spring 2015 Membro de Michigan Tech, Team 1-10, Lauer Spring 2015
MTU-LAUER-S15S1G10
Membros da 2
Autoria de 5 guias