Ir para o conteúdo principal
Participe da comunidade de reparos - Criar conta

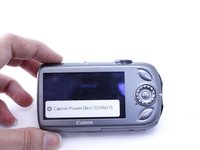
Canon PowerShot SD960 IS Camera Lens Replacement

O que você precisa

  1. Canon PowerShot SD960 IS Camera Lens Replacement, Battery: passo 1, imagem 1 %32
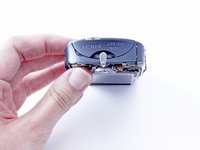
    • Turn the camera over so that the bottom of the camera is facing up.

    Pergunte ao FixBot

    Comentar

  2. Canon PowerShot SD960 IS Camera Lens Replacement: passo 2, imagem 1 %32 Canon PowerShot SD960 IS Camera Lens Replacement: passo 2, imagem 2 %32
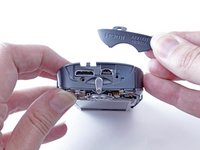
    • Apply slight pressure to the battery door and slide your finger over the release button in the direction of the arrows to open the battery door.

    • The battery door will open, allowing you to access the battery.

    Pergunte ao FixBot

    Comentar

  3. Canon PowerShot SD960 IS Camera Lens Replacement: passo 3, imagem 1 %32
    • Push the the orange battery lock back to release the battery.

    • Remove the battery.

    Pergunte ao FixBot

    Comentar

  4. Canon PowerShot SD960 IS Camera Lens Replacement, LCD Screen: passo 4, imagem 1 %32
    • Working on your electronic device while it is powered on can result in electric shock. Power off, unplug, and remove the battery of your device before continuing.

    • Close the battery door, and turn the camera over so that the bottom of the camera is facing up.

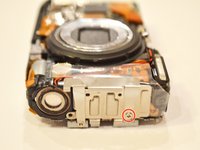
    • Using a PH000 screwdriver, remove the two 5.5mm screws.

    Pergunte ao FixBot

    Comentar

  5. Canon PowerShot SD960 IS Camera Lens Replacement: passo 5, imagem 1 %32
    • Turn the camera over to the side

    • Remove the two 4mm PH000 screws from the side of the camera.

    Pergunte ao FixBot

    Comentar

  6. Canon PowerShot SD960 IS Camera Lens Replacement: passo 6, imagem 1 %32 Canon PowerShot SD960 IS Camera Lens Replacement: passo 6, imagem 2 %32
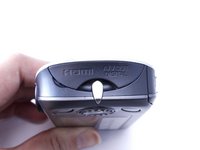
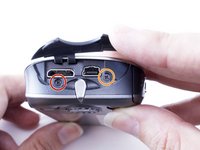
    • Turn camera over to the data port side with the panel that reads A/V Out.

    • Lift open the latch that covers the camera's data ports.

    • Remove the one 2.4mm PH000 screw on the left.

    • Remove the one 4mm PH000 screw on the right.

    Pergunte ao FixBot

    Comentar

  7. Canon PowerShot SD960 IS Camera Lens Replacement: passo 7, imagem 1 %32 Canon PowerShot SD960 IS Camera Lens Replacement: passo 7, imagem 2 %32
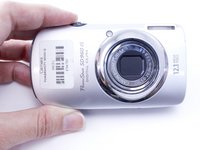
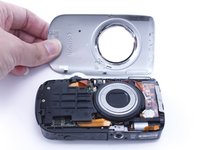
    • Turn the camera over so the lens is facing up.

    • Remove the front cover.

    Pergunte ao FixBot

    Comentar

  8. Canon PowerShot SD960 IS Camera Lens Replacement: passo 8, imagem 1 %32 Canon PowerShot SD960 IS Camera Lens Replacement: passo 8, imagem 2 %32
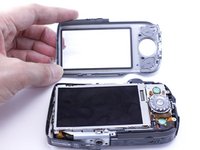
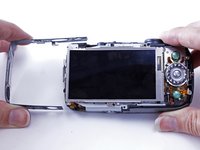
    • Turn the camera over so that the screen is facing up.

    • Remove the back cover.

    Pergunte ao FixBot

    Comentar

  9. Canon PowerShot SD960 IS Camera Lens Replacement: passo 9, imagem 1 %32 Canon PowerShot SD960 IS Camera Lens Replacement: passo 9, imagem 2 %32
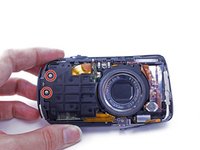
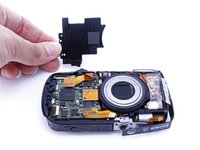
    • Turn the camera over so the lens is facing up.

    • Remove two 2.4mm PH000 screws from the plate on the front of camera.

    • Gently remove the plate.

    Pergunte ao FixBot

    Comentar

  10. Canon PowerShot SD960 IS Camera Lens Replacement: passo 10, imagem 1 %32 Canon PowerShot SD960 IS Camera Lens Replacement: passo 10, imagem 2 %32
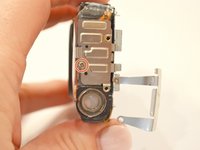
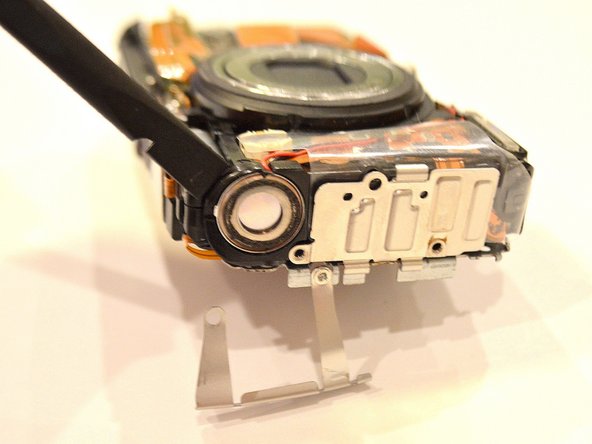
    • Turn the camera over to the data port side again.

    • After removing the front panel in the previous step, the AV/OUT panel should be free to remove. Gently slide out the A/V panel.

    Pergunte ao FixBot

    Comentar

  11. Canon PowerShot SD960 IS Camera Lens Replacement: passo 11, imagem 1 %32 Canon PowerShot SD960 IS Camera Lens Replacement: passo 11, imagem 2 %32
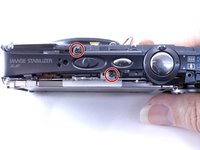
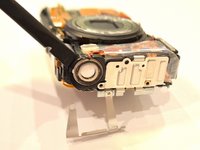
    • Turn the camera over so the top panel that reads "Image Stabilizer" is facing up.

    • Remove the two 2.4mm PH000 screws from the top of the camera to the left of the power on/off switch.

    • Gently remove the panel from the side of the camera.

    Pergunte ao FixBot

    Comentar

  12. Canon PowerShot SD960 IS Camera Lens Replacement: passo 12, imagem 1 %32 Canon PowerShot SD960 IS Camera Lens Replacement: passo 12, imagem 2 %32
    • Turn the camera over so the screen is facing up.

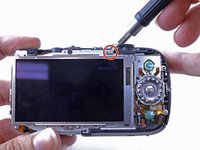
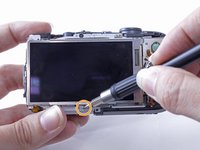
    • Remove one 3.2mm PH000 screw from the top of the LCD screen.

    • Remove one 3.2mm PH000 screw from the bottom of the LCD screen.

    Pergunte ao FixBot

    Comentar

  13. Canon PowerShot SD960 IS Camera Lens Replacement: passo 13, imagem 1 %32 Canon PowerShot SD960 IS Camera Lens Replacement: passo 13, imagem 2 %32
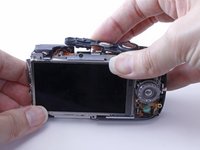
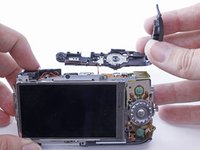
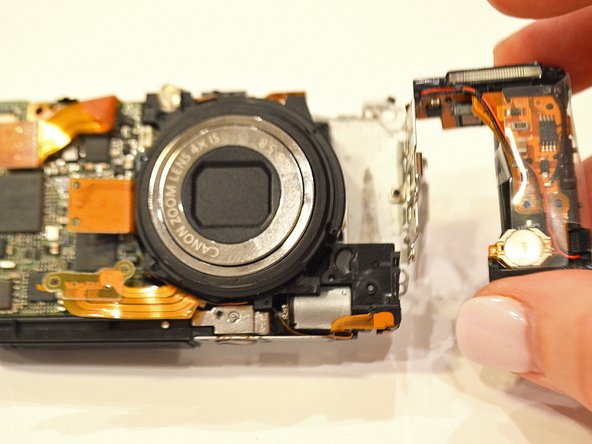
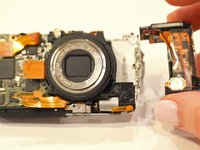
    • When you remove the top panel it will remain attached by a small orange cable. You can leave the cable attached; it will not obstruct you from completing the following steps.

    • Gently remove the top panel.

    Pergunte ao FixBot

    Comentar

  14. Canon PowerShot SD960 IS Camera Lens Replacement: passo 14, imagem 1 %32
    • Remove two 3.2mm PH000 screws on the side of the camera, to the right of the button that reads "Func. Set."

    Pergunte ao FixBot

    Comentar

  15. Canon PowerShot SD960 IS Camera Lens Replacement: passo 15, imagem 1 %32 Canon PowerShot SD960 IS Camera Lens Replacement: passo 15, imagem 2 %32
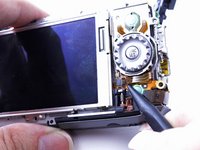
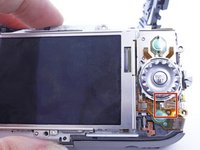
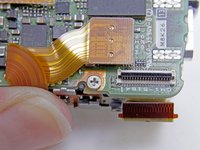
    • Use a nylon spudger to flip open the teeth holding the small, orange data cable in place.

    • Gently remove the small, orange data cable. The cable should now hang free.

    Pergunte ao FixBot

    Comentar

  16. Canon PowerShot SD960 IS Camera Lens Replacement: passo 16, imagem 1 %32
    • Once the data cable is removed, the panel to the right of the LCD screen with the button that reads "Func. Set" will be free to remove.

    • Gently remove the panel to the right of the LCD screen.

    Pergunte ao FixBot

    Comentar

  17. Canon PowerShot SD960 IS Camera Lens Replacement: passo 17, imagem 1 %32 Canon PowerShot SD960 IS Camera Lens Replacement: passo 17, imagem 2 %32
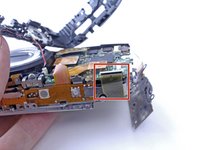
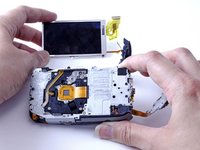
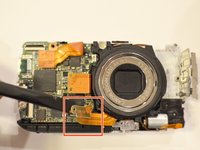
    • Locate the large, yellow data cable by turning the camera over so the lens is facing up.

    • Find where the data cable connects on the front of the camera.

    Pergunte ao FixBot

    Comentar

  18. Canon PowerShot SD960 IS Camera Lens Replacement: passo 18, imagem 1 %32 Canon PowerShot SD960 IS Camera Lens Replacement: passo 18, imagem 2 %32
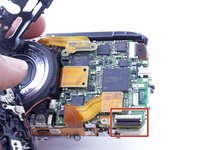
    • Use a nylon spudger to flip open the teeth that are holding the large, yellow data cable in place.

    • Gently remove the data cable.

    Pergunte ao FixBot

    Comentar

  19. Canon PowerShot SD960 IS Camera Lens Replacement: passo 19, imagem 1 %32 Canon PowerShot SD960 IS Camera Lens Replacement: passo 19, imagem 2 %32 Canon PowerShot SD960 IS Camera Lens Replacement: passo 19, imagem 3 %32
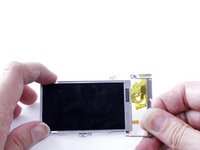
    • Turn the camera over so the screen is facing up.

    • Remove the LCD screen.

    Pergunte ao FixBot

    Comentar

  20. Canon PowerShot SD960 IS Camera Lens Replacement: passo 20, imagem 1 %32 Canon PowerShot SD960 IS Camera Lens Replacement: passo 20, imagem 2 %32 Canon PowerShot SD960 IS Camera Lens Replacement: passo 20, imagem 3 %32
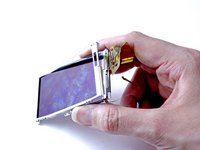
    • To remove the casing around the LCD screen, begin by removing the top of the casing (which is in two pieces). First, remove the small hinge on the right side.

    • Then, remove the rest of the casing.

    • The top of the LCD screen casing should now be removed.

    Pergunte ao FixBot

    Comentar

  21. Canon PowerShot SD960 IS Camera Lens Replacement: passo 21, imagem 1 %32 Canon PowerShot SD960 IS Camera Lens Replacement: passo 21, imagem 2 %32 Canon PowerShot SD960 IS Camera Lens Replacement: passo 21, imagem 3 %32
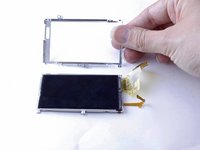
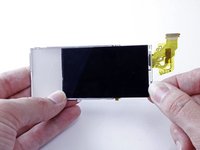
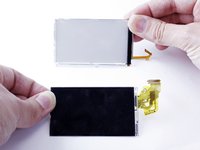
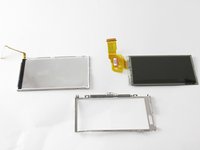
    • Carefully slide out the LCD screen from the back part of the casing.

    • You should now have three components: The back of the LCD screen casing, the LCD screen, and the front of the LCD screen casing.

    • The LCD screen is now removed and can be replaced or set aside to access other camera components.

    Pergunte ao FixBot

    Comentar

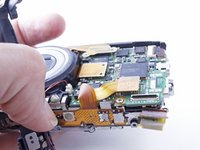
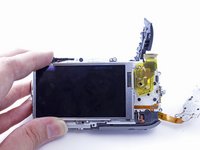
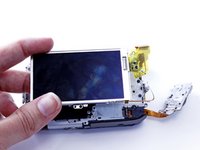
  22. Canon PowerShot SD960 IS Camera Lens Replacement, Camera Lens: passo 22, imagem 1 %32
    • The LCD screen should now be removed from the body of the camera.

    Pergunte ao FixBot

    Comentar

  23. Canon PowerShot SD960 IS Camera Lens Replacement: passo 23, imagem 1 %32 Canon PowerShot SD960 IS Camera Lens Replacement: passo 23, imagem 2 %32
    • To remove the flash assembly located on the right side of the camera, remove the 1.8mm screw from the right side of the bracket that is holding the flash assembly in place.

    • Swivel the bracket away from the body of the camera, and remove the remaining 1.8mm screw underneath.

    Pergunte ao FixBot

    Comentar

  24. Canon PowerShot SD960 IS Camera Lens Replacement: passo 24, imagem 1 %32
    Ferramenta utilizada neste passo:
    Tweezers
    $4.99
    • From the top of the camera, detach the flash assembly ribbon behind the flash bulb using the point of the spudger or small tweezers.

    Pergunte ao FixBot

    Comentar

  25. Canon PowerShot SD960 IS Camera Lens Replacement: passo 25, imagem 1 %32 Canon PowerShot SD960 IS Camera Lens Replacement: passo 25, imagem 2 %32 Canon PowerShot SD960 IS Camera Lens Replacement: passo 25, imagem 3 %32
    • Using your fingers, remove the flash assembly.

    • If difficult to remove, use the flat end of the spudger to lift the flash assembly from the bottom.

    • The flash assembly should now be free from the camera.

    Pergunte ao FixBot

    Comentar

  26. Canon PowerShot SD960 IS Camera Lens Replacement: passo 26, imagem 1 %32
    • Using a Philips 000 screwdriver, remove the 5-(2.7mm long) screws from the silver plate that the lens is mounted to on the back (screen side) of the camera.

    Pergunte ao FixBot

    Comentar

  27. Canon PowerShot SD960 IS Camera Lens Replacement: passo 27, imagem 1 %32 Canon PowerShot SD960 IS Camera Lens Replacement: passo 27, imagem 2 %32
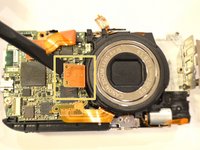
    • From the front (lens side) of the camera, gently lift the first lens ribbon at the bottom of the circuit board using the spudger.

    • Gently lift the second lens ribbon in the center of the circuit board using the spudger.

    Pergunte ao FixBot

    Comentar

  28. Canon PowerShot SD960 IS Camera Lens Replacement: passo 28, imagem 1 %32 Canon PowerShot SD960 IS Camera Lens Replacement: passo 28, imagem 2 %32
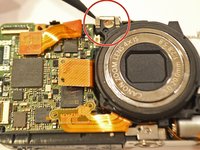
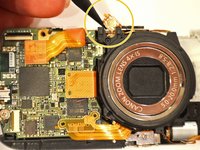
    • Using the point of the spudger, carefully lift the bracket off of the LED light on the upper-left corner of the lens.

    • The bracket is spring loaded and will bounce off.

    • Lift the LED light gently away from the camera.

    • It will remain attached to the circuit board.

    Pergunte ao FixBot

    Comentar

  29. Canon PowerShot SD960 IS Camera Lens Replacement: passo 29, imagem 1 %32
    • The lens should now be free to remove.

    • Gripping the lens with your fingers, remove the lens from the front (lens side) of the camera.

    Pergunte ao FixBot

    Comentar

Conclusão

To reassemble your device, follow these instructions in reverse order.

Cancelar: não concluí este guia.

Uma outra pessoa concluiu este guia.

0Comentários do guia

Comentar

Visualizações:

Últimas 24 horas: 3

Últimos 7 dias: 10

Últimos 30 dias: 39

Ao todo: 1,191