Ir para o conteúdo principal
Participe da comunidade de reparos - Criar conta

Canon PowerShot SD700 Motherboard Replacement

O que você precisa

  1. Canon PowerShot SD700 Motherboard Replacement, Outside Case: passo 1, imagem 1 %32
    • Turn off the camera by pressing the power button above the LCD screen.

  2. Canon PowerShot SD700 Motherboard Replacement: passo 2, imagem 1 %32
    • Remove the two small screws on the bottom of the camera using a Phillips #00 screwdriver.

  3. Canon PowerShot SD700 Motherboard Replacement: passo 3, imagem 1 %32
    • Use a Phillips #00 screwdriver to remove the two small screws on the right side of the camera.

  4. Canon PowerShot SD700 Motherboard Replacement: passo 4, imagem 1 %32
    • Use a Phillips #00 screwdriver to remove the screw on the left of the camera under the A/V out digital label.

  5. Canon PowerShot SD700 Motherboard Replacement: passo 5, imagem 1 %32
    • Use a Phillips #00 screwdriver to remove the screw on the bottom of the camera near the battery and memory card slots.

    • This screw will be longer than the rest of the screws.

  6. Canon PowerShot SD700 Motherboard Replacement: passo 6, imagem 1 %32
    • Remove the front, back, and side casings from the camera and set to the side.

  7. Canon PowerShot SD700 Motherboard Replacement, Motherboard: passo 7, imagem 1 %32
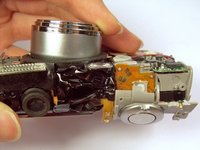
    • Detach the LCD and backlight.

    • Remove the larger screw.

    • Remove the two smaller sized screws.

    • Remove the small screw.

    • Remove the small screw.

  8. Canon PowerShot SD700 Motherboard Replacement: passo 8, imagem 1 %32
    • Remove the two screws near the the tripod mount using a Phillips #00 screwdriver.

  9. Canon PowerShot SD700 Motherboard Replacement: passo 9, imagem 1 %32
    • Remove the screw next to the shutter on the top of the camera with a Phillips screwdriver.

  10. Canon PowerShot SD700 Motherboard Replacement: passo 10, imagem 1 %32
    • Remove the orange ribbon cable by lifting the ZIF connector attached to the ribbon with a spudger.

  11. Canon PowerShot SD700 Motherboard Replacement: passo 11, imagem 1 %32 Canon PowerShot SD700 Motherboard Replacement: passo 11, imagem 2 %32
    • Carefully lift the shutter along with the ribbon connected to it. This will remove the casing around the motherboard.

  12. Canon PowerShot SD700 Motherboard Replacement: passo 12, imagem 1 %32 Canon PowerShot SD700 Motherboard Replacement: passo 12, imagem 2 %32 Canon PowerShot SD700 Motherboard Replacement: passo 12, imagem 3 %32
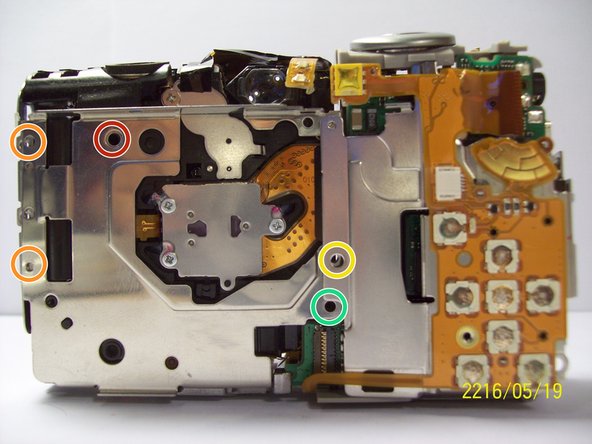
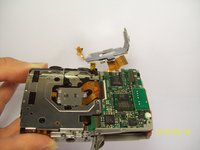
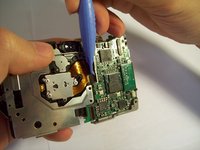
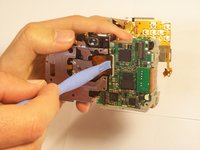
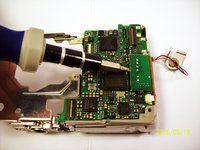
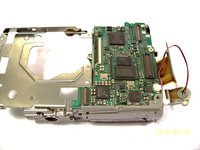
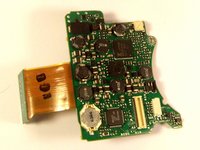
    • With the motherboard casing detached, remove the short orange ribbon by lifting the ZIF connector with a spudger or other plastic opening tools and slide the ribbon out. Detaching this ribbon will disconnect the side of the camera containing the motherboard from the rest of the camera.

  13. Canon PowerShot SD700 Motherboard Replacement: passo 13, imagem 1 %32 Canon PowerShot SD700 Motherboard Replacement: passo 13, imagem 2 %32
    • Disconnect the wires that are attached to the motherboard.

    • Remove the film by lifting it gently from the motherboard.

  14. Canon PowerShot SD700 Motherboard Replacement: passo 14, imagem 1 %32
    • Remove the last wires connected to the motherboard by gently lifting upwards.

  15. Canon PowerShot SD700 Motherboard Replacement: passo 15, imagem 1 %32 Canon PowerShot SD700 Motherboard Replacement: passo 15, imagem 2 %32
    • Use a spudger to gently lift the circuit board.

  16. Canon PowerShot SD700 Motherboard Replacement: passo 16, imagem 1 %32 Canon PowerShot SD700 Motherboard Replacement: passo 16, imagem 2 %32
    • Remove the screw using a Phillips #00 screwdriver.

    • Gently lift the motherboard away from the case.

  17. Canon PowerShot SD700 Motherboard Replacement: passo 17, imagem 1 %32 Canon PowerShot SD700 Motherboard Replacement: passo 17, imagem 2 %32
    • Remove the screw.

    • Once the screw is removed, you can remove the board.

Conclusão

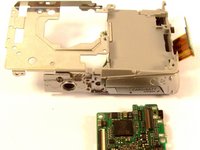
To reassemble your device, follow these instructions in reverse order.

Kenneth Lim

Membro desde: 04/07/11

61 Reputação

Autoria de 2 guias

Equipe

Cal Poly, Team 9-71, Walters Spring 2011 Membro de Cal Poly, Team 9-71, Walters Spring 2011

CPSU-WALTERS-S11S9G71

4 Membros

Autoria de 9 guias

0Comentários do guia

Comentar

Visualizações:

Últimas 24 horas: 3

Últimos 7 dias: 24

Últimos 30 dias: 74

Ao todo: 1,642