Essa tradução foi gerada por um programa e ainda não foi revisada por uma pessoa. Falas essa língua? Dá uma olhada.
Introdução
Siga estes passos para remover e instalar uma nova tela LCD.
O que você precisa
-
-
-
Desligue a câmera pressionando o botão LIGA/DESLIGA acima da tela LCD.
 Pergunte ao FixBot
-
-
-
Remova os dois parafusos pequenos na parte inferior da câmera usando uma chave Phillips #00.
-
-
-
Use uma chave Phillips #00 para remover os dois parafusos pequenos no lado direito da câmera.
-
-
-
-
Use uma chave Phillips #00 para remover o parafuso à esquerda da câmera, abaixo da etiqueta digital A/V out.
-
-
-
Use uma chave Phillips #00 para remover o parafuso na parte inferior da câmera, próximo aos slots da bateria e do cartão de memória.
-
-
-
Remova as carcaças frontal, traseira e lateral da câmera e coloque-as de lado.
-
-
-
-
-
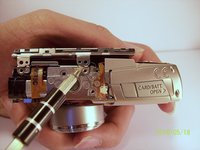
Remova os dois parafusos que conectam o LCD e a luz de fundo ao corpo principal da câmera.
-
-
-
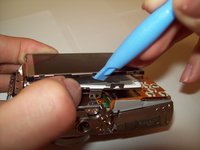
Faça alavanca suavemente para separar o LCD e a retroiluminação do corpo principal da câmera.
-
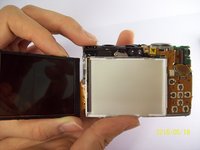
Faça alavanca suavemente para separar o LCD da retroiluminação.
-
O cabo plano fino é para a retroiluminação.
-
O cabo plano grosso é para a tela LCD.
-
-
-
Levante cuidadosamente a aba do conector ZIF que cobre o cabo plano grosso.
-
Este conector ZIF é frágil. Tenha cuidado ao levantá-lo da posição travada.
-
Insira a nova tela LCD e remonte a câmera.
-
-



Para a remontagem de seu dispositivo, siga estas instruções na ordem inversa.
Cancelar: não concluí este guia.
2 outras pessoas executaram este guia.

Equipe

Cal Poly, Team 9-71, Walters Spring 2011 Membro de Cal Poly, Team 9-71, Walters Spring 2011
CPSU-WALTERS-S11S9G71
4 Membros
Autoria de 96 guias
