Introdução
The flash of the Canon PowerShot G3 camera is operated by the discharge of a capacitor. A capacitor is an energy storing device that stores a charge between two conducting plates. Before the capacitor can discharge, it must be charged by the battery.
Note:
1.) There are many screws to be removed before you can reach the capacitor.
2.) To install a new capacitor you must know how to solder wires to the capacitor.
3.) Do not continue unless you have a magnetic pad to place the screws and a soldering iron.
O que você precisa
-
-
-
Start to remove all of the screws around the camera: from the front, back, sides, and bottom.
 Pergunte ao FixBot
-
-
-
Once the screws have been removed, Remove the back panel. The panel should be able to be removed by hand.
-
-
-
Next remove the front panel and right side panels (the left side is part of the front).
-
-
-
-
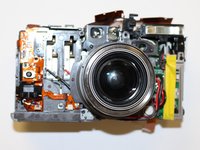
The front of camera should now resemble the picture shown.
-
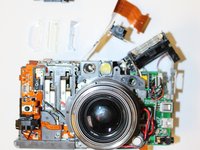
To remove the circuit ribbon (the brown strips) pull them out of the plastic pieces they are connected to.
-
-
-
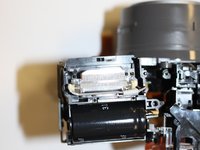
After that you can lift up the capacitor housing by using your finger nail, or other small object, to lift it up around the edges.
-
-
-
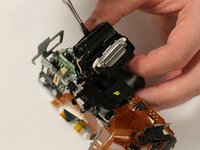
Use a spudger, or other thin object, to remove the capacitor from the housing. (Image 2)
-
To remove the red and yellow wires connected to the capacitor, use a soldering iron to heat up the solder and a vacuum to suck up the solder. Any other methods you know of will also work.
-
Take the capacitor to you local electronics store or order another capacitor online by reading the capacity off of the side of the capacitor. It should be in microFarads (µF).
-
Once you have a new capacitor, solder on the red and yellow wires to the same place as the old capacitor.
-
-




To reassemble your device, follow these instructions in reverse order.

Equipe

University of Memphis, Team 3-2, Kim Fall 2015 Membro de University of Memphis, Team 3-2, Kim Fall 2015
UM-KIM-F15S3G2
4 Membros
Autoria de 6 guias
1Comentário do guia
Better discharge that cap,so you don't suffer a 250V shock.
