Ir para o conteúdo principal
Participe da comunidade de reparos - Criar conta

Canon PowerShot ELPH 310 HS Lens Replacement

O que você precisa

    1. Canon PowerShot ELPH 310 HS Lens  Replacement, External Panels: passo 1, imagem 1 %32
      • Use the Phillips #000 screwdriver from the iFixit tool kit to unscrew the two image stabilizer panel’s 2 mm Phillips head screws.

      • Using your hands, remove the image stabilizer panel.

      Pergunte ao FixBot

      Comentar

    2. Canon PowerShot ELPH 310 HS Lens  Replacement: passo 2, imagem 1 %32 Canon PowerShot ELPH 310 HS Lens  Replacement: passo 2, imagem 2 %32
      • Unscrew the two 4 mm Phillips head screws from the bottom side of the camera.

      Pergunte ao FixBot

      Comentar

    3. Canon PowerShot ELPH 310 HS Lens  Replacement: passo 3, imagem 1 %32 Canon PowerShot ELPH 310 HS Lens  Replacement: passo 3, imagem 2 %32
      • Using your hand, open the battery portal located on the bottom left of the camera. The screw is in the bottom left of the battery portal.

      • Unscrew the hidden 4mm Phillips head screw inside the battery portal.

      Pergunte ao FixBot

      Comentar

    4. Canon PowerShot ELPH 310 HS Lens  Replacement: passo 4, imagem 1 %32 Canon PowerShot ELPH 310 HS Lens  Replacement: passo 4, imagem 2 %32
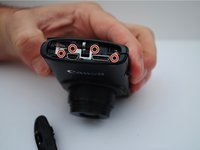
      • Remove the HDMI side panel with your hands.

      • Unscrew the four 4 mm Phillips head screws from the inside of the camera.

      Pergunte ao FixBot

      Comentar

    5. Canon PowerShot ELPH 310 HS Lens  Replacement: passo 5, imagem 1 %32
      • The back side of the camera should pop off or be removed by hand.

      Pergunte ao FixBot

      Comentar

    6. Canon PowerShot ELPH 310 HS Lens  Replacement: passo 6, imagem 1 %32 Canon PowerShot ELPH 310 HS Lens  Replacement: passo 6, imagem 2 %32
      • Unscrew the one 3 mm Phillips head screw on the top of the camera.

      Pergunte ao FixBot

      Comentar

    7. Canon PowerShot ELPH 310 HS Lens  Replacement: passo 7, imagem 1 %32
      • Manually remove the front panel from the camera.

      Pergunte ao FixBot

      Comentar

    1. Canon PowerShot ELPH 310 HS Lens  Replacement, LCD Screen: passo 8, imagem 1 %32 Canon PowerShot ELPH 310 HS Lens  Replacement, LCD Screen: passo 8, imagem 2 %32
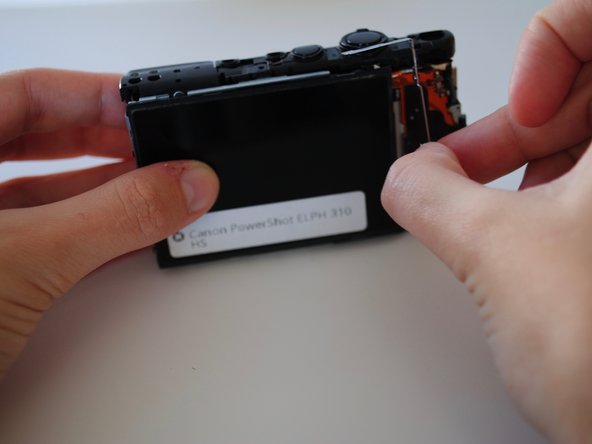
      • Using your hands, remove the metal piece (surrounding the right side of the screen) from the right side of the camera.

      Pergunte ao FixBot

      Comentar

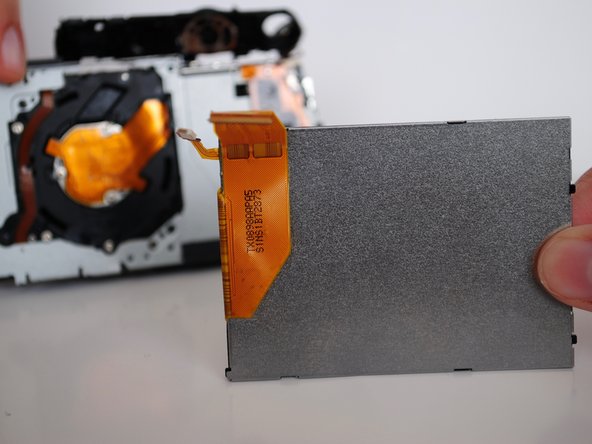
    2. Canon PowerShot ELPH 310 HS Lens  Replacement: passo 9, imagem 1 %32
      • Using your hands, lift up the screen.

      • The screen is fragile!

      Pergunte ao FixBot

      Comentar

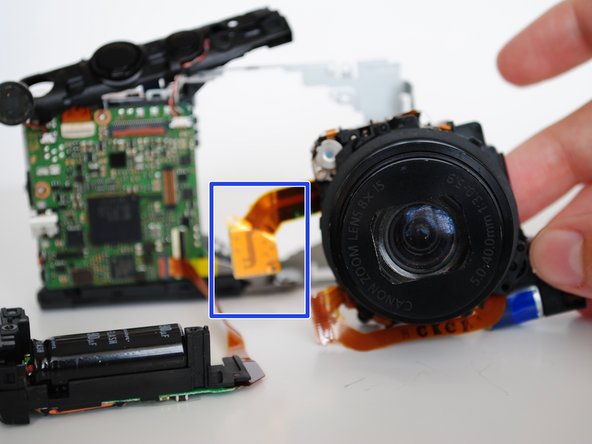
    3. Canon PowerShot ELPH 310 HS Lens  Replacement: passo 10, imagem 1 %32 Canon PowerShot ELPH 310 HS Lens  Replacement: passo 10, imagem 2 %32 Canon PowerShot ELPH 310 HS Lens  Replacement: passo 10, imagem 3 %32
      • The strip tears easily!

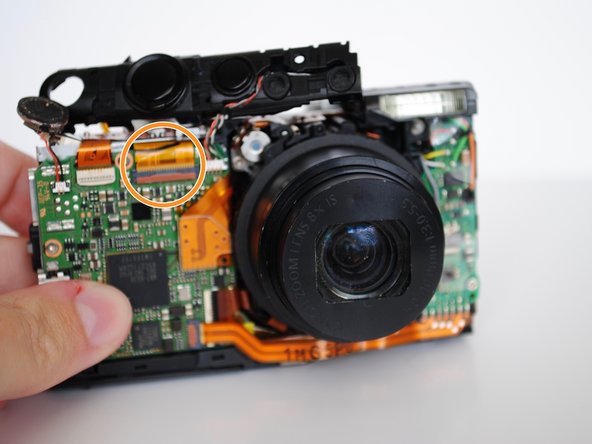
      • Manually lift the shutter button plate and remove the white ZIF connector, which is the white clasp underneath.

      • On the front of the camera, using your fingers, undo the orange ribbon from the gray clasp and pull the ribbon through the shutter deck.

      Pergunte ao FixBot

      Comentar

    1. Canon PowerShot ELPH 310 HS Lens  Replacement, Lens: passo 11, imagem 1 %32 Canon PowerShot ELPH 310 HS Lens  Replacement, Lens: passo 11, imagem 2 %32
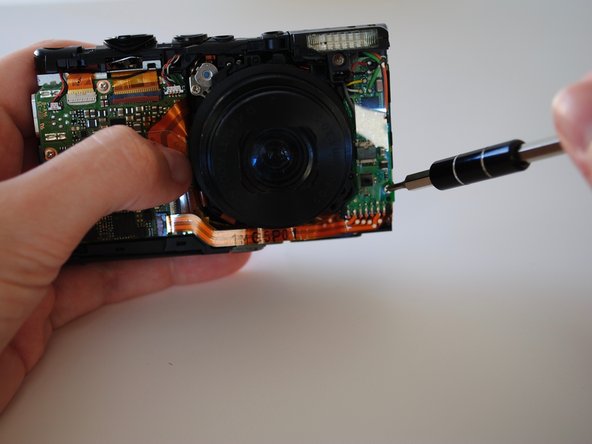
      • On the front motherboard, unscrew the one bottom right 3 mm Phillips head screw.

      Pergunte ao FixBot

      Comentar

    2. Canon PowerShot ELPH 310 HS Lens  Replacement: passo 12, imagem 1 %32 Canon PowerShot ELPH 310 HS Lens  Replacement: passo 12, imagem 2 %32 Canon PowerShot ELPH 310 HS Lens  Replacement: passo 12, imagem 3 %32
      • Unscrew the four 3 mm Phillips head screws attached to the metal casing on the back of the camera, behind where the LCD screen once was.

      Pergunte ao FixBot

      Comentar

    3. Canon PowerShot ELPH 310 HS Lens  Replacement: passo 13, imagem 1 %32 Canon PowerShot ELPH 310 HS Lens  Replacement: passo 13, imagem 2 %32
      • Using your hands, carefully lift the flash housing up and remove it from the area.

      Pergunte ao FixBot

      Comentar

    4. Canon PowerShot ELPH 310 HS Lens  Replacement: passo 14, imagem 1 %32
      • Using a plastic spudger, remove the bottom front ZIF connector.

      Pergunte ao FixBot

      Comentar

    5. Canon PowerShot ELPH 310 HS Lens  Replacement: passo 15, imagem 1 %32 Canon PowerShot ELPH 310 HS Lens  Replacement: passo 15, imagem 2 %32
      • Using your hands, carefully remove the center ribbon.

      • Manually remove the lens.

      Pergunte ao FixBot

      Comentar

Conclusão

To reassemble your device, follow these instructions in reverse order.

Cancelar: não concluí este guia.

5 outras pessoas executaram este guia.

1Comentário do guia

excellent procedure. nice pix too. hint about those fragile flex cables is important, they are thinner than a human hair!

Happy Fixer - Responder Compartilhar

Comentar

Visualizações:

Últimas 24 horas: 0

Últimos 7 dias: 8

Últimos 30 dias: 48

Ao todo: 3,314