Ir para o conteúdo principal
Participe da comunidade de reparos - Criar conta

Canon PowerShot A80 Internal Battery Replacement

O que você precisa

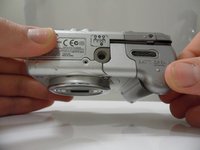
    1. Canon PowerShot A80 Internal Battery Replacement, Back Cover: passo 1, imagem 1 %32
      • Remove the three Phillips #00 screws from the bottom of the camera.

      Pergunte ao FixBot

      Comentar

    2. Canon PowerShot A80 Internal Battery Replacement: passo 2, imagem 1 %32 Canon PowerShot A80 Internal Battery Replacement: passo 2, imagem 2 %32
      • Open the door to the CompactFlash memory card slot by sliding it towards you and swinging it open.

      • Remove the memory card if it is still in the camera.

      • Use the Phillips #00 screwdriver to remove the single screw underneath the memory card slot door.

      Pergunte ao FixBot

      Comentar

    3. Canon PowerShot A80 Internal Battery Replacement: passo 3, imagem 1 %32
      • Remove the Phillips #00 screw located inside the top of the memory card compartment.

      Pergunte ao FixBot

      Comentar

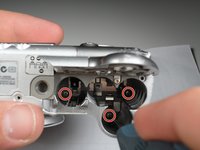
    4. Canon PowerShot A80 Internal Battery Replacement: passo 4, imagem 1 %32 Canon PowerShot A80 Internal Battery Replacement: passo 4, imagem 2 %32
      • Open the battery compartment door at the bottom of the camera by sliding the latch to the right and then sliding the door down.

      • Remove the batteries from the compartment.

      • Remove the three Phillips #00 screws located inside the battery compartment.

      • The screw on the left is longer than the other two.

      Pergunte ao FixBot

      Comentar

    5. Canon PowerShot A80 Internal Battery Replacement: passo 5, imagem 1 %32
      • Remove the top lid of the camera.

      • Be cautious of the fragile mylar cable that connects the lid to the main body of the camera.

      • Removing the lid takes a little force. Do this gently. There may be a snapping sound.

      • The door to the memory card compartment will be freed and should be removable now.

      • In other versions of this camera, there is a tab that secures the top from the wrist strap. If yours has this, you won't be able to completely separate the top until you have removed the top screw in Step 8.

      Pergunte ao FixBot

      Comentar

    6. Canon PowerShot A80 Internal Battery Replacement: passo 6, imagem 1 %32
      • Remove the two Phillips #00 screws from the side of the camera.

      • Open the small rubber door below this screw that covers the connectors.

      Pergunte ao FixBot

      Comentar

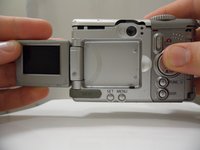
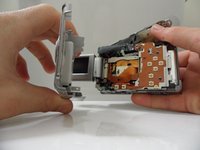
    7. Canon PowerShot A80 Internal Battery Replacement: passo 7, imagem 1 %32 Canon PowerShot A80 Internal Battery Replacement: passo 7, imagem 2 %32
      • Open and pivot the LCD screen to its widest open position.

      • Remove the rear cover by pulling it straight away from the body of the camera.

      • When reassembling the camera, remember to replace the screws in the same location from which you removed them. Otherwise, you may damage the camera.

      Pergunte ao FixBot

      Comentar

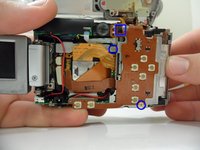
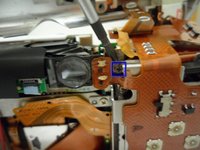
    1. Canon PowerShot A80 Internal Battery Replacement, Internal Battery: passo 8, imagem 1 %32 Canon PowerShot A80 Internal Battery Replacement, Internal Battery: passo 8, imagem 2 %32
      • Unscrew the top 3.9mm, middle 2.7 mm, and bottom 2.9mm screws that hold the metal foundation covering the internal battery.

      • See next photo for zoomed image of the boxed screw.

      Pergunte ao FixBot

      Comentar

    2. Canon PowerShot A80 Internal Battery Replacement: passo 9, imagem 1 %32
      • Remove the marked 2.9mm screw shown.

      Pergunte ao FixBot

      Comentar

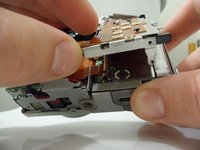
    3. Canon PowerShot A80 Internal Battery Replacement: passo 10, imagem 1 %32
      • Lift open the battery cover and unscrew the 3.8mm screw as shown.

      Pergunte ao FixBot

      Comentar

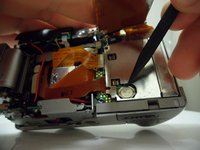
    4. Canon PowerShot A80 Internal Battery Replacement: passo 11, imagem 1 %32 Canon PowerShot A80 Internal Battery Replacement: passo 11, imagem 2 %32
      • Gently lift up the plate as shown.

      • Loosen and gently pry the internal battery with the point blade probe.

      Pergunte ao FixBot

      Comentar

Conclusão

To reassemble your device, follow these instructions in reverse order.

Cancelar: não concluí este guia.

4 outras pessoas executaram este guia.

konrad

Membro desde: 01/11/11

220 Reputação

Autoria de 3 guias

Equipe

Cal Poly, Team 7-31, Regan Winter 2011 Membro de Cal Poly, Team 7-31, Regan Winter 2011

CPSU-REGAN-W11S7G31

6 Membros

Autoria de 12 guias

2Comentários do guia

Excellent guide. Congratulations.

Bryn Thomas

Wales

Bryn Thomas - Responder Compartilhar

What kind of battery is used internally?

Sarah Schmeltz - Responder Compartilhar

Comentar

Visualizações:

Últimas 24 horas: 2

Últimos 7 dias: 20

Últimos 30 dias: 83

Ao todo: 10,518