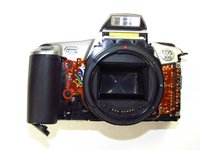
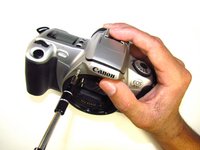
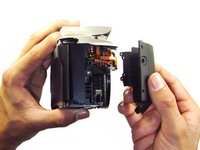
Ir para o conteúdo principal

Canon EOS 300 Command Dial Replacement

O que você precisa

  1. Canon EOS 300 Command Dial Replacement, Batteries: passo 1, imagem 1 %32 Canon EOS 300 Command Dial Replacement, Batteries: passo 1, imagem 2 %32 Canon EOS 300 Command Dial Replacement, Batteries: passo 1, imagem 3 %32
    • Open up the battery door.

  2. Canon EOS 300 Command Dial Replacement: passo 2, imagem 1 %32 Canon EOS 300 Command Dial Replacement: passo 2, imagem 2 %32
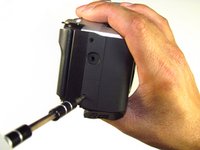
    • Remove the batteries from the camera by sliding them out into your palm.

  3. Canon EOS 300 Command Dial Replacement, Side Panel with Lever: passo 3, imagem 1 %32 Canon EOS 300 Command Dial Replacement, Side Panel with Lever: passo 3, imagem 2 %32
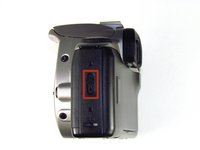
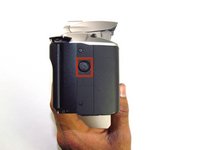
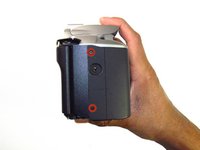
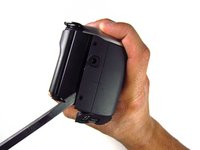
    • Release the side latch to open the back panel.

  4. Canon EOS 300 Command Dial Replacement: passo 4, imagem 1 %32 Canon EOS 300 Command Dial Replacement: passo 4, imagem 2 %32
    • Remove the two black 4.5mm screws above and below the latch.

  5. Canon EOS 300 Command Dial Replacement: passo 5, imagem 1 %32 Canon EOS 300 Command Dial Replacement: passo 5, imagem 2 %32
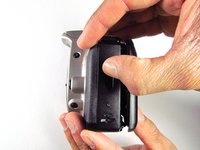
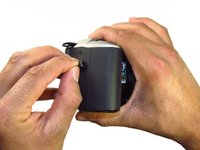
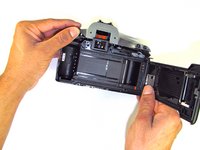
    • Using your finger, carefully pry open the side panel from the top of camera.

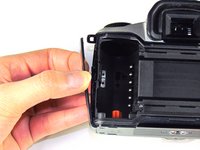
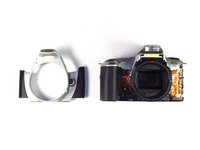
    • Pull panel downwards to remove.

    • Make sure to keep track of the small black piece of rubber under the latch.

  6. Canon EOS 300 Command Dial Replacement, Front Panel: passo 6, imagem 1 %32 Canon EOS 300 Command Dial Replacement, Front Panel: passo 6, imagem 2 %32
    • Remove the two silver 6mm Phillips #1 screws.

  7. Canon EOS 300 Command Dial Replacement: passo 7, imagem 1 %32 Canon EOS 300 Command Dial Replacement: passo 7, imagem 2 %32
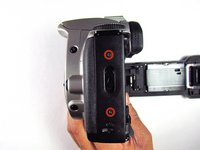
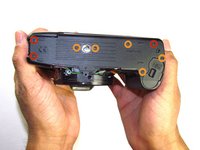
    • Flip camera over to the bottom.

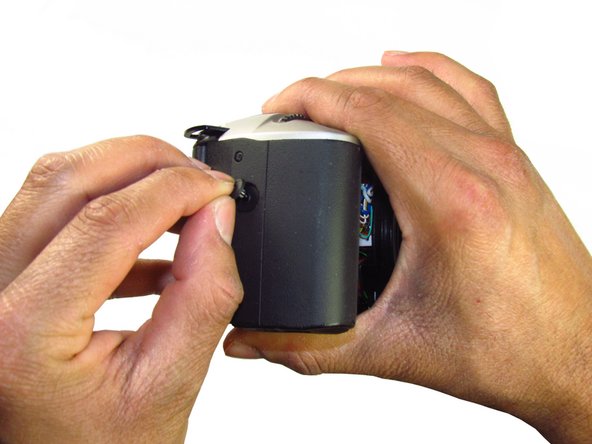
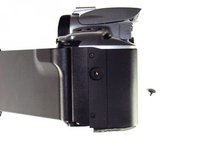
    • Remove the one 5mm Phillips #1 silver screw.

  8. Canon EOS 300 Command Dial Replacement: passo 8, imagem 1 %32 Canon EOS 300 Command Dial Replacement: passo 8, imagem 2 %32
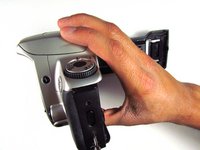
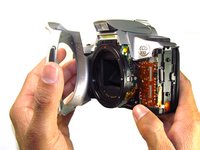
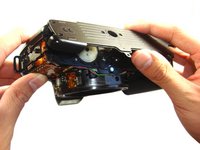
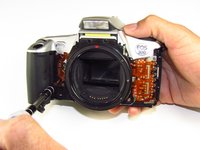
    • Remove the front panel by pulling away from the side with the lever.

  9. Canon EOS 300 Command Dial Replacement, Bottom Panel: passo 9, imagem 1 %32 Canon EOS 300 Command Dial Replacement, Bottom Panel: passo 9, imagem 2 %32
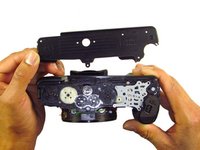
    • Remove three black 7.3mm Phillips #1 screws located on the corners of the camera.

    • Remove five black 4.8mm Phillips #1 screws.

  10. Canon EOS 300 Command Dial Replacement: passo 10, imagem 1 %32 Canon EOS 300 Command Dial Replacement: passo 10, imagem 2 %32 Canon EOS 300 Command Dial Replacement: passo 10, imagem 3 %32
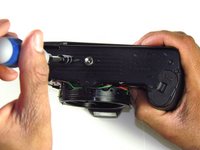
    • Simply remove the bottom panel by prying it off with your finger.

    • When removing the panel, be sure the bottom of the camera is facing upright. There are loose gears that may fall out.

    • Be wary of a loose piece of foam attached to the bottom panel.

  11. Canon EOS 300 Command Dial Replacement, Side Panel with Grip: passo 11, imagem 1 %32 Canon EOS 300 Command Dial Replacement, Side Panel with Grip: passo 11, imagem 2 %32 Canon EOS 300 Command Dial Replacement, Side Panel with Grip: passo 11, imagem 3 %32
    • Remove the remote control socket cover.

  12. Canon EOS 300 Command Dial Replacement: passo 12, imagem 1 %32 Canon EOS 300 Command Dial Replacement: passo 12, imagem 2 %32
    • Remove two black 4.5mm Phillips #1 screws.

  13. Canon EOS 300 Command Dial Replacement: passo 13, imagem 1 %32 Canon EOS 300 Command Dial Replacement: passo 13, imagem 2 %32
    • Remove two black 4.8mm Phillips #1 screws on the front of the camera.

  14. Canon EOS 300 Command Dial Replacement: passo 14, imagem 1 %32 Canon EOS 300 Command Dial Replacement: passo 14, imagem 2 %32
    • Pry open the side grip using a spudger.

  15. Canon EOS 300 Command Dial Replacement, Eyecup: passo 15, imagem 1 %32 Canon EOS 300 Command Dial Replacement, Eyecup: passo 15, imagem 2 %32
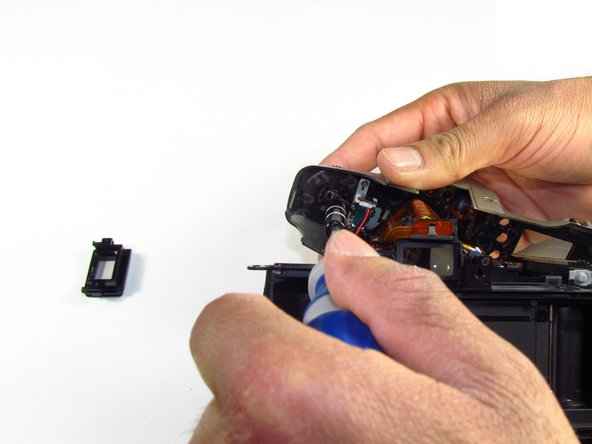
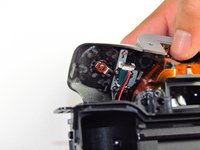
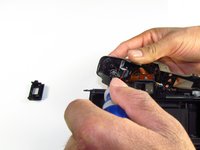
    • With your hands, remove the rubber grip from the eye piece.

  16. Canon EOS 300 Command Dial Replacement: passo 16, imagem 1 %32
    • Remove the eyecup from the eyepiece by pushing the eyecup up.

  17. Canon EOS 300 Command Dial Replacement, Top Panel: passo 17, imagem 1 %32 Canon EOS 300 Command Dial Replacement, Top Panel: passo 17, imagem 2 %32
    • Remove two silver 5.0mm Phillips #1 screws.

  18. Canon EOS 300 Command Dial Replacement: passo 18, imagem 1 %32
    • Remove the silver 5.5mm Phillips #1 screw.

  19. Canon EOS 300 Command Dial Replacement: passo 19, imagem 1 %32 Canon EOS 300 Command Dial Replacement: passo 19, imagem 2 %32
    • Pry the top silver part of the camera off.

    • Buttons may slip out of the camera's top as the top is pulled off the camera (shown in picture two).

  20. Canon EOS 300 Command Dial Replacement, Command Dial: passo 20, imagem 1 %32 Canon EOS 300 Command Dial Replacement, Command Dial: passo 20, imagem 2 %32 Canon EOS 300 Command Dial Replacement, Command Dial: passo 20, imagem 3 %32
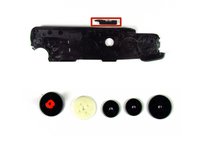
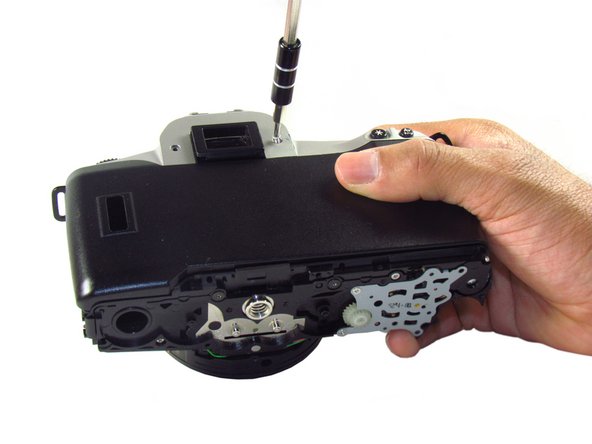
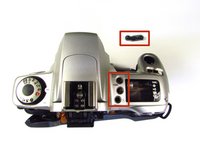
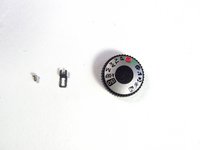
    • On the top panel, remove the silver 3.8mm Phillips #1 screw right below the command dial.

    • A small metal piece will come off with the screw.

Conclusão

To reassemble your device, follow these instructions in reverse order.

Tammy Kong

Membro desde: 01/23/14

771 Reputação

Autoria de 6 guias

Equipe

Cal Poly, Team 6-20, Maness Winter 2014 Membro de Cal Poly, Team 6-20, Maness Winter 2014

CPSU-MANESS-W14S6G20

Membros da 4

Autoria de 32 guias

0 comentários

Adicione um comentário

Exibir estatísticas:

Últimas 24 horas: 0

Últimos 7 dias: 0

Últimos 30 dias: 6

Duração total: 1,452