Introdução
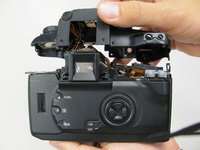
The top panel can be safely separated from the camera body, but it will remain attached by several wires and a ribbon cable. Separating the top panel allows access to several important components.
O que você precisa
-
-
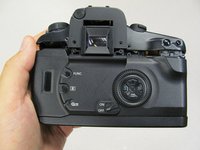
Remove the two 4.8 mm black screws above the lens on the front of the camera.
 Pergunte ao FixBot
-
-
-
Remove the 4.3 mm black screw under the lens ring, and the 4.8 mm black screw under the camera.
-
-
-
-
Remove the two 4.75 mm black screws located on the top of the camera.
-
-
-
Remove the four 4.3 mm black screws near the bottom corners of the eyepiece at the back of the camera.
-
-
-
Slowly separate the top panel from the camera by pushing it upward.
-


To reassemble your device, follow these instructions in reverse order.
Cancelar: não concluí este guia.
Uma outra pessoa concluiu este guia.
Equipe

Cal Poly, Team 8-8, Regan Spring 2011 Membro de Cal Poly, Team 8-8, Regan Spring 2011
CPSU-REGAN-S11S8G8
5 Membros
Autoria de 22 guias