Introdução
This guide will show you how to access, remove, and replace the LCD screen. The process is safe and uncomplicated.
O que você precisa
-
-
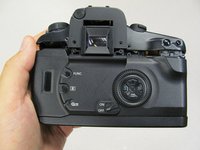
Remove the two 4.8 mm black screws above the lens on the front of the camera.
 Pergunte ao FixBot
-
-
-
Remove the 4.3 mm black screw under the lens ring, and the 4.8 mm black screw under the camera.
-
-
-
-
Remove the two 4.75 mm black screws located on the top of the camera.
-
-
-
Remove the four 4.3 mm black screws near the bottom corners of the eyepiece at the back of the camera.
-
-
-
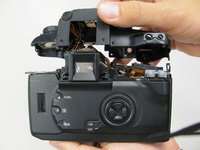
Slowly separate the top panel from the camera by pushing it upward.
-
-
-
To unclip gold connector push the edge up and away from the lcd screen. A plastic opening tool is recommended.
-
The gold connector can fall into the camera, but it will remain attached and can be pulled back up.
-


To reassemble your device, follow these instructions in reverse order.
Cancelar: não concluí este guia.
4 outras pessoas executaram este guia.
Equipe

Cal Poly, Team 8-8, Regan Spring 2011 Membro de Cal Poly, Team 8-8, Regan Spring 2011
CPSU-REGAN-S11S8G8
5 Membros
Autoria de 22 guias
2Comentários do guia
Thank's , your tutorial nice ... gracias
Where do you find replacement lcd screen if the one on the camera is cracked?