Introdução
To replace the scanner bar, the glass must first be removed, and then the scanner bar can be easily removed and replaced.
O que você precisa
-
-
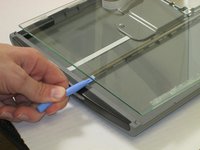
Slide plastic opening tool under the plastic.
-
Gently pry the plastic framing off the glass.
-
Repeat on the other side.
 Pergunte ao FixBot
-
-
-
-
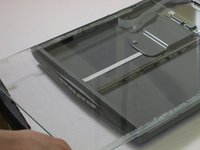
Wedge the plastic opening tool under the glass.
-
Pull up against glass.
-
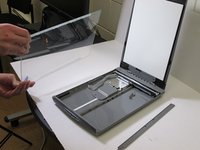
Slide the glass forward.
-
Remove the glass.
-
-
-
Remove the scanner bar.
-
Replace the scanner bar back onto metal center bar.
-


To reassemble your device, follow these instructions in reverse order.
Cancelar: não concluí este guia.
2 outras pessoas executaram este guia.
Equipe

University of Maine, Team 1-89, Diaz Fall 2013 Membro de University of Maine, Team 1-89, Diaz Fall 2013
UMAINE-DIAZ-F13S1G89
3 Membros
Autoria de 3 guias
1Comentário do guia
Hello Nick, thank you for the guide.
My CanoScan LiDE 220 has started to introduce a line down the middle of the page when I scan with VueScan. Not sure if this guide applies.