Introdução
Warning: Lithium-ion batteries like that found in the NK CoxBoxes can be hazardous. Please be aware of the hazards and take appropriate precautions.
The original battery pack is an 11.1v 2600 mAH battery pack with three wires. It was not currently in production according to the manufacturer, and not in stock at distributers like Digikey or others found through Octopart.
Replacing the battery with a two-wire battery pack does not work - the CoxBox electronics reads the thermistor attached to the middle and ground wires and if the thermistor is not present thinks the battery is too cold to charge.
In order for the CoxBox to function properly it needs a three-wire pack. Unfortunately, I was unable to find one, probably because most of the battery management systems (BMSes) in the current packs handle temperature control internally so just expose the power leads. To remedy this problem, a 10K negative temperature coefficient (NTC) thermistor is needed to provide the appropriate resistance to the CoxBox.
Parts can be sourced from amazon.com, aliexpress.us, digikey.com, etc.
O que você precisa
-
-
-
If you can source a Zeus Battery Products PCLI18650-3s1P TH you can skip this guide. Otherwise, this guide assumes you have purchased an 11.1v 2600mAH battery with a JST XH 2.54mm male plug. Searching for IMW888 or IMW889 battery on Amazon should provide relevant results.
 Pergunte ao FixBot
-
-
-
Build Molex Micro-Fit 3.0 (MX3.0) male connector if needed
-
Female pins are used in the male connectors. Orientation is important, they should click into place without excessive force, and should then be locked in place.
-
JST XH 2.5 (2.54)mm plugs can be built, but can also be purchased pre-built in bulk, though on Amazon they seem to be sold only with matching male connectors. Aliexpress has just the correct pre-wired female connectors.
-
Check the color of the wiring before purchase - it's less confusing if the wire colors match that on the battery when plugged in.
-
-
-
-
Solder the red and black wires of the Molex connector to the matching wires on the JST connector. The two leads of the thermistor are connected to the middle and black wires of the Molex.
-
Picture shows Molex on left, JST on right, thermistor already soldered in place. Heat shrink wrap is over the soldered connections but not yet shrunk.
-
-
-
Heat shrink the thermistor and connectors, just to make everything a little less flimsy.
-
-
-
Connect the adapter to the battery pack and add foam inserts to the pack (just to prevent battery movement).
-
Tape the thermistor to the battery pack (can just put under foam).
-
CHECK THE POLARITY!
-
The polarity on the Molex 3-pin connector should be the same as on the battery pack you remove from the CoxBox.
-
-

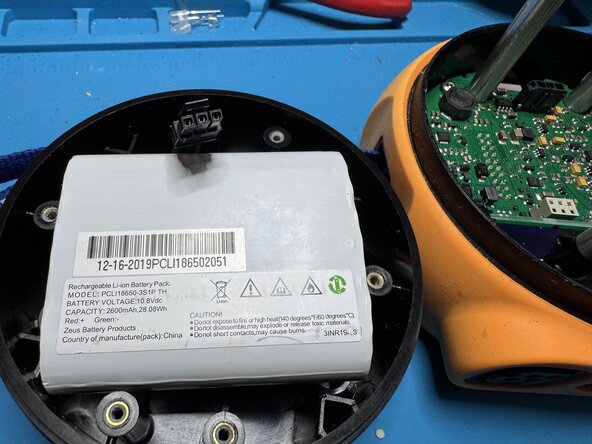


Check that the polarity of the Molex connector matches that of the original battery once you've attached the battery adapter to the battery you are using.

