Ir para o conteúdo principal

Bose QuietComfort 25 Motherboard Replacement

O que você precisa

  1. Bose QuietComfort 25 Motherboard Replacement, Motherboard: passo 1, imagem 1 %32
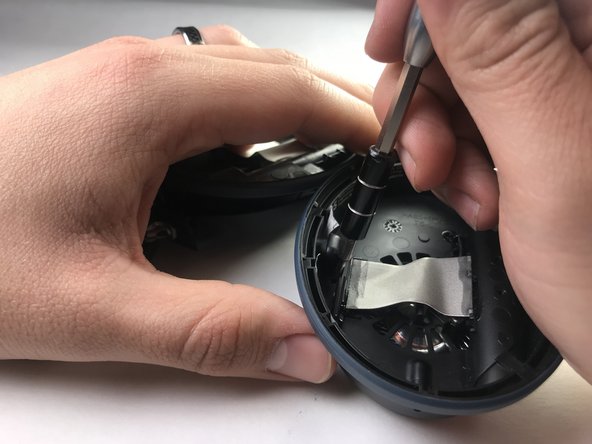
    • Begin repair by removing the ear cushion.

    • The cushion is held on by a few small plastic clips. Pry carefully with plastic opening tool or fingernails.

  2. Bose QuietComfort 25 Motherboard Replacement: passo 2, imagem 1 %32
    • Next, remove the soft lining behind the cushion. This is held on with adhesive and is easily removed by hand.

  3. Bose QuietComfort 25 Motherboard Replacement: passo 3, imagem 1 %32 Bose QuietComfort 25 Motherboard Replacement: passo 3, imagem 2 %32 Bose QuietComfort 25 Motherboard Replacement: passo 3, imagem 3 %32
    • Once the soft lining is removed from behind the ear cushion, two screws will be exposed.

    • Carefully remove the two 5 mm screws with a precision screwdriver (PH00) and put aside.

  4. Bose QuietComfort 25 Motherboard Replacement: passo 4, imagem 1 %32
    • Flip the earphones back over and carefully pry around the outside cover of the earpiece.

    • Try a plastic opening tool before moving on to harder metal tools.

    • This cover will come loose with moderate pressure.

  5. Bose QuietComfort 25 Motherboard Replacement: passo 5, imagem 1 %32 Bose QuietComfort 25 Motherboard Replacement: passo 5, imagem 2 %32 Bose QuietComfort 25 Motherboard Replacement: passo 5, imagem 3 %32
    • There are 3 screws holding the motherboard to the earpiece.

    • Remove these screws to make the next step easier.

  6. Bose QuietComfort 25 Motherboard Replacement: passo 6, imagem 1 %32
    • Once the motherboard is exposed, all of the soldered connection will need to be removed.

    • Be careful of this step and take note of the position of each wire.

    • This should only be attempted by someone with experience soldering small components, as irreparable damage may be result from improper methods. For help with this step see this guide on Como soldar e dessoldar contatos

  7. Bose QuietComfort 25 Motherboard Replacement: passo 7, imagem 1 %32
    • After removing all the soldered joints, the motherboard can be removed by hand.

    • The connections will all need to be re-soldered into their respective locations.

Conclusão

To reassemble your device, follow these instructions in reverse order.

6 outras pessoas executaram este guia.

Samuel Coss

Membro desde: 03/26/18

339 Reputação

Autoria de 1 guia

Equipe

IUPUI, Team S2-G3, Harley Spring 2018 Membro de IUPUI, Team S2-G3, Harley Spring 2018

IUPUI-HARLEY-S18S2G3

Membros da 3

Autoria de 6 guias

0 comentários

Adicione um comentário

Exibir estatísticas:

Últimas 24 horas: 0

Últimos 7 dias: 31

Últimos 30 dias: 112

Duração total: 10,984