Ir para o conteúdo principal

Black and Decker PS1800 Switch Replacement

O que você precisa

  1. Black and Decker PS1800  Switch Replacement, Open the Outer Drill Case: passo 1, imagem 1 %32 Black and Decker PS1800  Switch Replacement, Open the Outer Drill Case: passo 1, imagem 2 %32
    • Lay the drill on its side, assuring that the screw holes are facing upwards.

    • Remove seven 12 mm screws using a Phillips #00 screwdriver.

  2. Black and Decker PS1800  Switch Replacement: passo 2, imagem 1 %32
    • Separate the outer drill case to expose the components and switch.

  3. Black and Decker PS1800  Switch Replacement, Switch: passo 3, imagem 1 %32 Black and Decker PS1800  Switch Replacement, Switch: passo 3, imagem 2 %32
    • Identify the switch in center of the drill.

    • Remove the screws from the switch.

    • Remove the switch cover.

  4. Black and Decker PS1800  Switch Replacement: passo 4, imagem 1 %32
    • Locate the switch inside the drill.

    • Remove the switch from the drill.

  5. Black and Decker PS1800  Switch Replacement: passo 5, imagem 1 %32 Black and Decker PS1800  Switch Replacement: passo 5, imagem 2 %32
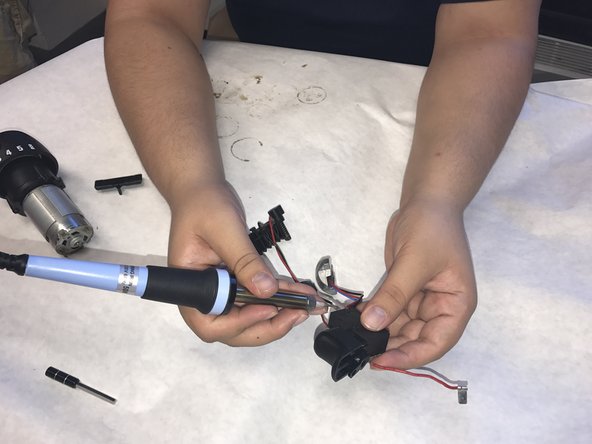
    • Solder off all the joints.

    • Remove the switch assembly.

Conclusão

To reassemble your device, follow these instructions in reverse order.

Uma outra pessoa concluiu este guia.

Hamza Nawaz

Membro desde: 11/20/16

247 Reputação

Autoria de 2 guias

Equipe

IUPUI, Team 2-3, Baechle Fall 2016 Membro de IUPUI, Team 2-3, Baechle Fall 2016

IUPUI-BAECHLE-F16S2G3

Membros da 5

Autoria de 6 guias

0 comentários

Adicione um comentário

Exibir estatísticas:

Últimas 24 horas: 0

Últimos 7 dias: 7

Últimos 30 dias: 19

Duração total: 921