Ir para o conteúdo principal
Participe da comunidade de reparos - Criar conta

Battery Replacement

O que você precisa

  1. Battery Replacement, removal of bottom case: passo 1, imagem 1 %32 Battery Replacement, removal of bottom case: passo 1, imagem 2 %32
    • remove the feet with a spudger

  2. Battery Replacement: passo 2, imagem 1 %32 Battery Replacement: passo 2, imagem 2 %32
    • Remove the 11 screw with a PH0 screwdriver.

    • The screws are identical

  3. Battery Replacement: passo 3, imagem 1 %32 Battery Replacement: passo 3, imagem 2 %32
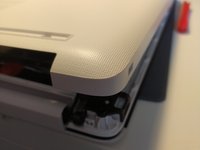
    • Insert a spudger between the bottom cover and the keyboard module, then go around the whole cover to uncip everything.

    • Remove the bottom cover from the computer.

  4. Battery Replacement: passo 4, imagem 1 %32
    • You now have acces to the inside of the machine.

  5. Battery Replacement, Battery: passo 5, imagem 1 %32
    • Remove the 3 screws that keep the battery in place, using a Phillips screwdriver.

  6. Battery Replacement: passo 6, imagem 1 %32
    • Disconnect the battery by gently lifting it.

    • Don't lift the battery too forcefully! It is held together by notches on the opposite side of the connector.

    • Pull the battery toward the top of the computer to dislodge it.

Conclusão

To put your device back together, follow the instructions in reverse order.

Um agradecimento especial a esses tradutores:

fr en

100%

Estes tradutores estão nos ajudando a consertar o mundo! Quer contribuir?
Comece a traduzir ›

Léo FRAYSSE

Membro desde: 09/03/18

1.379 Reputação

Autoria de 6 guias

0Comentários do guia

Comentar

Visualizações:

Últimas 24 horas: 2

Últimos 7 dias: 10

Últimos 30 dias: 48

Ao todo: 339