Ir para o conteúdo principal
Participe da comunidade de reparos - Criar conta

BMS Replacement Replacement

  1. BMS Replacement Replacement, Set up: passo 1, imagem 1 %32
    • Start with a clean work bench

    • Remove all conductive a tools from your work bench

    • Wear safety glasses

    Pergunte ao FixBot

    Comentar

  2. BMS Replacement Replacement, Open the case: passo 2, imagem 1 %32 BMS Replacement Replacement, Open the case: passo 2, imagem 2 %32 BMS Replacement Replacement, Open the case: passo 2, imagem 3 %32
    • Use a stanley knife to cut though the sealant of the battery case

    • Use caution when doing this

    Pergunte ao FixBot

    Comentar

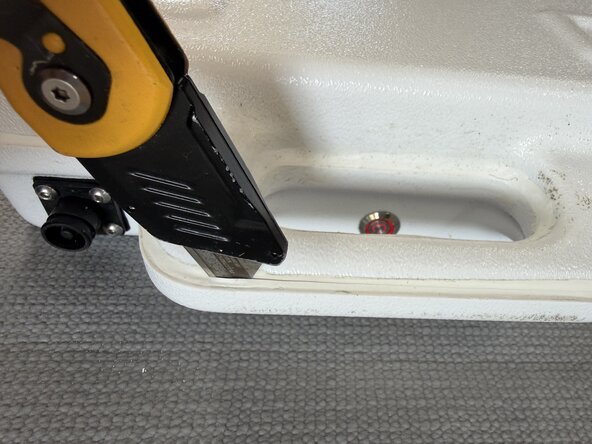
  3. BMS Replacement Replacement, Start opening the case: passo 3, imagem 1 %32 BMS Replacement Replacement, Start opening the case: passo 3, imagem 2 %32
    • Slowly lever the case apart.

    • Start at the bottom and work your way around to the handle

    Pergunte ao FixBot

    Comentar

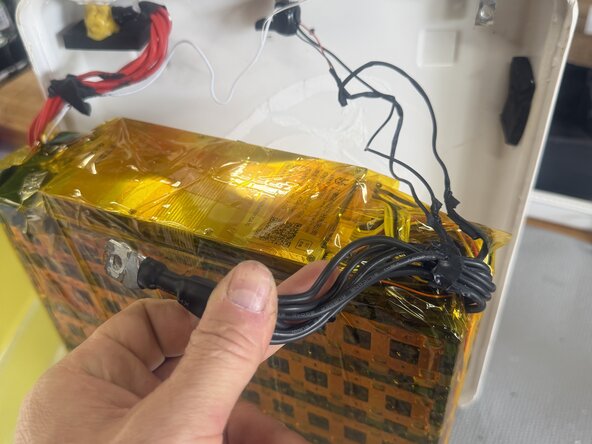
  4. BMS Replacement Replacement, Completely open the case: passo 4, imagem 1 %32 BMS Replacement Replacement, Completely open the case: passo 4, imagem 2 %32 BMS Replacement Replacement, Completely open the case: passo 4, imagem 3 %32
    • Fully open the case

    • The glue is quite strong, use you hand inside to seperate the case from the heat shrink

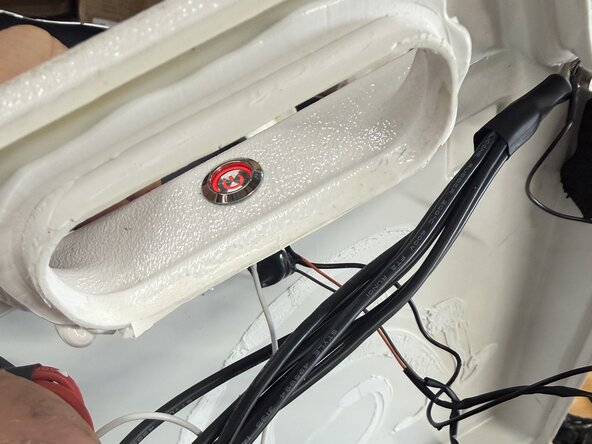
    • Be careful to not damage the delicate switch wires

    Pergunte ao FixBot

    Comentar

  5. BMS Replacement Replacement, Removing the battery pack: passo 5, imagem 1 %32 BMS Replacement Replacement, Removing the battery pack: passo 5, imagem 2 %32 BMS Replacement Replacement, Removing the battery pack: passo 5, imagem 3 %32
    • Cut off the thick black shrink wrap

    • The main power cables and switch remain connected to the top cover.

    • Gently release and remove the switch cables from any adhesive so that they are not under stain when opening the case.

    • Rest the top cover on a box or similar to prevent staining the cables

    Pergunte ao FixBot

    Comentar

  6. BMS Replacement Replacement, Remove heat shrink: passo 6, imagem 1 %32 BMS Replacement Replacement, Remove heat shrink: passo 6, imagem 2 %32 BMS Replacement Replacement, Remove heat shrink: passo 6, imagem 3 %32
    • Remove the heat shrink from the battery pack.

    • go slowly at the cable end as to not break or stain any thinn switch cables

    Pergunte ao FixBot

    Comentar

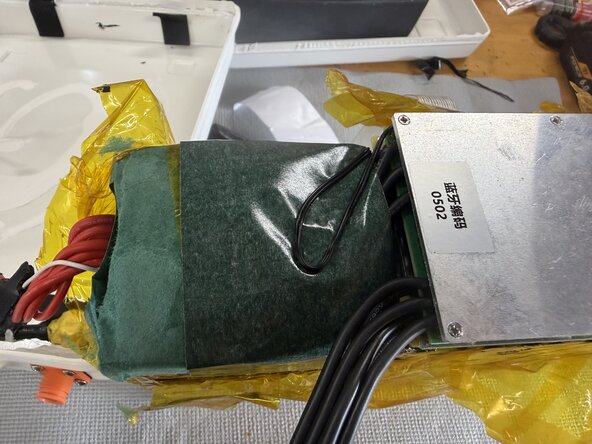
  7. BMS Replacement Replacement: passo 7, imagem 1 %32 BMS Replacement Replacement: passo 7, imagem 2 %32
    • Remove the fiberglass sheeting from the pack

    Pergunte ao FixBot

    Comentar

  8. BMS Replacement Replacement, Remove the negative terminal: passo 8, imagem 1 %32 BMS Replacement Replacement, Remove the negative terminal: passo 8, imagem 2 %32
    • Remove the negative terminal

    • Cover the negative terminal with tape

    Pergunte ao FixBot

    Comentar

  9. BMS Replacement Replacement, Disconnect old BMS: passo 9, imagem 1 %32 BMS Replacement Replacement, Disconnect old BMS: passo 9, imagem 2 %32 BMS Replacement Replacement, Disconnect old BMS: passo 9, imagem 3 %32
    • Unplug the 4 connectors from the BMS. these will all be reused. do not cut.

    • Cut the large main negative cables from the BMS. There are 3-4 at each end of the BMS.

    Pergunte ao FixBot

    Comentar

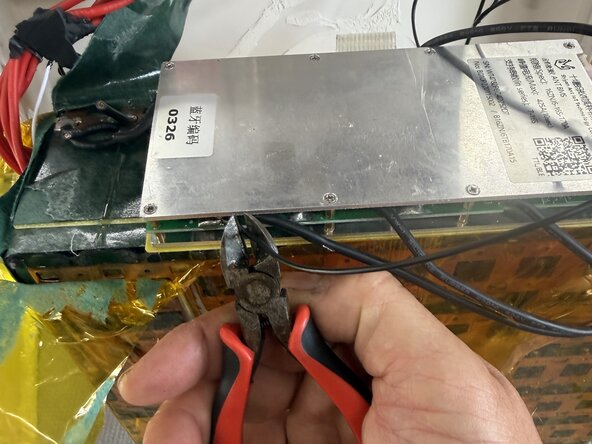
  10. BMS Replacement Replacement, Cut switch light wire: passo 10, imagem 1 %32 BMS Replacement Replacement, Cut switch light wire: passo 10, imagem 2 %32
    • Cut the black switch light wire as close to the BMS as possible.

    • A connector is soldered to this in step 14

    Pergunte ao FixBot

    Comentar

  11. BMS Replacement Replacement, Remove old BMS: passo 11, imagem 1 %32 BMS Replacement Replacement, Remove old BMS: passo 11, imagem 2 %32 BMS Replacement Replacement, Remove old BMS: passo 11, imagem 3 %32
    • Fully remove old BMS

    • Desolder short wires from the main negative

    • Ensure all old solder locations are smooth

    Pergunte ao FixBot

    Comentar

  12. BMS Replacement Replacement, Prepare New BMS: passo 12, imagem 1 %32 BMS Replacement Replacement, Prepare New BMS: passo 12, imagem 2 %32 BMS Replacement Replacement, Prepare New BMS: passo 12, imagem 3 %32
    • Remove fibreglass from old BMS and install on New BMS

    • Locate new BMS as shown

    • Solder main Negatives as shown

    • The new BMS has all of the connections from one end only.

    Pergunte ao FixBot

    Comentar

  13. BMS Replacement Replacement: passo 13, imagem 1 %32 BMS Replacement Replacement: passo 13, imagem 2 %32
    • Only after soldering the main negative plug in the ballance, switch and temperature connections

    • Arrange as neatly as possible to avoid pinch points

    • Tape down to secure BMS in place

    Pergunte ao FixBot

    Comentar

  14. BMS Replacement Replacement, Switch light cable: passo 14, imagem 1 %32
    • The light for the switch is illuminated when the pack is turned.

    • Solder or crimp the eye terminal to the switch light wire that was cut in step 10

    Pergunte ao FixBot

    Comentar

  15. BMS Replacement Replacement, Cable Routing: passo 15, imagem 1 %32 BMS Replacement Replacement, Cable Routing: passo 15, imagem 2 %32 BMS Replacement Replacement, Cable Routing: passo 15, imagem 3 %32
    • The New BMS has different cable routing than the old one

    • Cut a slot in the fibreglass for the for the new BMS cables

    • Wrap the fiberglass sheets back around the BMS

    • Use duct of fiberglass tape close and seal the fiberglass sheets around the battery pack

    Pergunte ao FixBot

    Comentar

  16. BMS Replacement Replacement: passo 16, imagem 1 %32 BMS Replacement Replacement: passo 16, imagem 2 %32
    • Connect the main negative to the terminal on the battery case.

    • Correct order is Terminal - main negative lug - eyelet - bolt

    Pergunte ao FixBot

    Comentar

  17. BMS Replacement Replacement, Functionality check: passo 17, imagem 1 %32 BMS Replacement Replacement, Functionality check: passo 17, imagem 2 %32
    • Turn the switch on and off to check that the red light turns on and off.

    • Check the BMS app to ensure the all cells and connected to the ballance leads

    • Use ant BMS V2 app from the app store

    Pergunte ao FixBot

    Comentar

  18. BMS Replacement Replacement, Heat shrink the pack: passo 18, imagem 1 %32 BMS Replacement Replacement, Heat shrink the pack: passo 18, imagem 2 %32 BMS Replacement Replacement, Heat shrink the pack: passo 18, imagem 3 %32
    • Insert wisdom here.

    Pergunte ao FixBot

    Comentar

Conclusão

To reassemble your device, follow these instructions in reverse order.

Cancelar: não concluí este guia.

Mark Duyvesteyn

Membro desde: 02/11/26

1.269 Reputação

Autoria de 6 guias

0Comentários do guia

Comentar

Visualizações:

Últimas 24 horas: 1

Últimos 7 dias: 4

Últimos 30 dias: 20

Ao todo: 70