Introdução
A placa-mãe do BLU Studio G também contém a entrada para fone de ouvido, a antena e a porta de carregamento. Se qualquer um desses componentes quebrar, talvez você precise fazer a substituição completa da placa-mãe para solucionar o problema.
O que você precisa
-
Passo 1 Remoção da capa traseira
Cuidado: os passos de 1 a 8 são provenientes de um guia marcado como em andamento.
-
Para remover a capa traseira, vire o dispositivo e localize o entalhe de segurança no canto inferior esquerdo com a tela voltada para baixo.
-
Usando o dedo (ou uma espátula), force para cima para destacar a capa traseira adequadamente do restante do dispositivo.
 Pergunte ao FixBot
-
-
-
Localize o entalhe na parte inferior da bateria para uma remoção segura.
-
Com cuidado, levante a bateria pelo entalhe, certificando-se de não perfurar o revestimento de borracha da bateria.
-
-
-
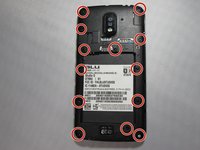
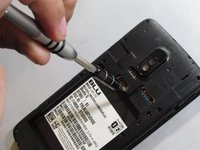
Desparafuse os 13 parafusos Phillips #0 da parte traseira do celular.
-
-
-
-
Para remover o painel traseiro, deslize a espátula de metal nas 3 ranhuras das bordas externas esquerda e direita do dispositivo.
-
Com uma pressão lenta, mas forte, insira a espátula e solte o painel do restante do dispositivo. Clipes pequenos, porém resistentes, mantêm o painel traseiro fixado.
-
-
-
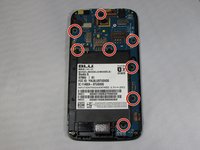
Remova todos os oito parafusos de 3,2 mm que prendem a placa-mãe no lugar.
-
Remova-os girando no sentido anti-horário usando uma ponta Phillips #0 com a chave Phillips correta, aplicando pressão média/firme e garantindo que você não espanará os parafusos.
-
Reserve-os
-
-
-
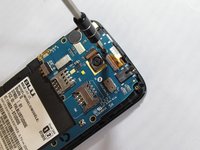
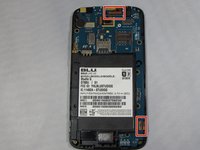
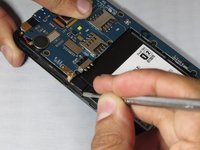
Localize os dois clipes dos conectores na placa-mãe.
-
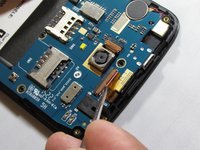
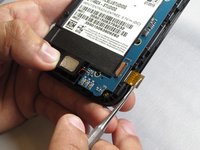
Com cuidado, coloque a ponta de uma pinça de precisão ou de uma espátula de metal sob o pequeno clipe de plástico marrom-claro. Isso liberará os conectores.
-
Puxe suavemente os conectores para fora dos encaixes dos clipes, puxando lentamente para longe do dispositivo com a ajuda de uma pinça de precisão.
-
-
-
Localize o alto-falante na parte inferior do dispositivo e, lentamente, force-o para cima e para a direita, pois ele está conectado à placa-mãe por meio de fiação.
-
-
-
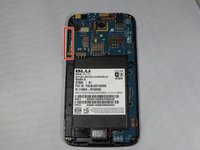
Localize a fita do botão de volume no lado esquerdo do dispositivo e, lentamente, force-a para fora de uma extremidade à outra para removê-la do dispositivo.
-
Puxe cuidadosamente sobre a placa-mãe.
-








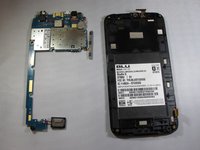
Para a remontagem de seu dispositivo, siga estas instruções na ordem inversa.
Um agradecimento especial a esses tradutores:
100%

Translation Bot está nos ajudando a consertar o mundo! Quer contribuir?
Comece a traduzir ›

Equipe

Eastern Washington University, Team S1-G3, Rowley Spring 2019 Membro de Eastern Washington University, Team S1-G3, Rowley Spring 2019
EWU-ROWLEY-S19S1G3
4 Membros
Autoria de 16 guias
