Introdução
The Asus X551CA CMOS battery provides power to the motherboard while the laptop is turned off so that information such as the date, time, and system settings are not erased.
O que você precisa
-
-
Turn the laptop upside-down and remove the following screws using a Phillips #0 driver:
-
Two 9.5 mm screws in the middle of the back edge, and one 9.5 mm screw in the right edge
-
Two 4.3 mm screws in the back corners
-
One 17.5 mm screw at the left edge near the optical drive
-
Three 4.3 mm screws in the front edge
 Pergunte ao FixBot
-
-
-
Use the plastic opening tool to separate the keyboard plate cover from the bottom cover. In order to do this, insert the plastic opening tool in between the keyboard plate cover and the bottom cover, then slide along edges to pry open.
-
-
-
Locate the three ribbons connecting the keyboard plate cover to the bottom cover.
-
-
-
Invert the laptop in order to gain access to the ribbons.
-
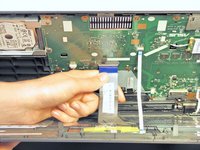
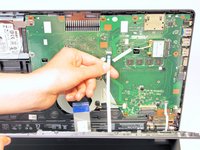
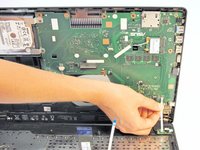
Remove each ribbon by flipping the small white plastic flap up and gently pulling on the ribbon.
-
-
-
Now that the ribbons have been detached from the bottom cover, carefully remove the keyboard plate cover. Once it has been removed, place it in a safe and moisture free area so it does not get damaged.
-
-
-
Unscrew the three 5.5 mm Phillips #0 screws with the Phillips #0 Screwdriver.
-
-
-
Once the screws have been removed, place your fingers on the left corners and push the hard drive towards the right edge of the laptop (relative to the picture).
-
-
-
-
Using the Phillips #0 Screwdriver, unscrew the 5.5 mm Phillips #0 screw that holds the spacer in place.
-
-
-
Remove the spacer from the laptop by gently sliding it towards the right edge of the laptop.
-
-
-
Use the Phillips #0 Screwdriver to unscrew the 3.2 mm Phillips #0 screw which attaches the WiFi card to the motherboard.
-
-
-
Disconnect the Wifi card from the motherboard by gently sliding it towards the right edge of the laptop.
-
-
-
Remove each of the two small antenna connections by disconnecting one wire at a time. Each wire should easily unsnap from the Wifi card.
-
-
-
Remove the battery from the laptop by applying pressure on both ends and lifting it out of the case.
-
-
-
With the Phillips #0 Screwdriver, remove the nine 5.5 mm Phillips #0 screws which hold the motherboard in place.
-
-
-
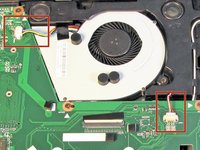
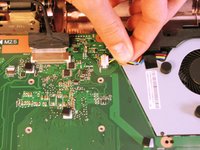
Remove the wires by easily pulling them parallel to the motherboard's surface.
-
-
-
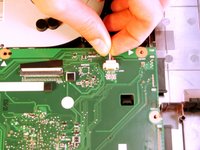
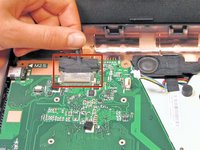
Remove the LCD display connection by gently pulling on the attached wire.
-
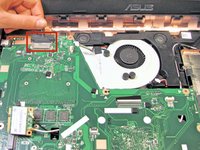
Gently lift any tape that may be holding the connection.
-
-
-
Remove the motherboard from the case by gently lifting it upward.
-
-
-
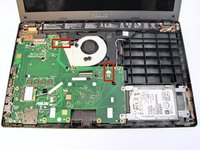
Flip over the motherboard and locate the CMOS battery.
-
-
-
Use the plastic opening tool to pry the battery out of its plastic casing in the motherboard.
-










To reassemble your device, follow these instructions in reverse order.
Cancelar: não concluí este guia.
25 outras pessoas executaram este guia.

Equipe

Cal Poly, Team 7-22, Regan Spring 2014 Membro de Cal Poly, Team 7-22, Regan Spring 2014
CPSU-REGAN-S14S7G22
5 Membros
Autoria de 15 guias
6Comentários do guia
What is the correct battery to use? Where can I purchase it?
the battery is a cr2032. Its one of the most common battery sizes available just about anywhere from a grocery store to amazon.
does replacing this battery improve battery life?
Hello, my Asus x550za suddenly shut off and will not boot. No power, no lights. I've verified 19 volts coming through the AC adapter, power jack and power jack port. I noticed that one side of the CMOS battery holder came unsoldered from the motherboard and is hanging. Could this have caused the laptop to suddenly turn off and to not be able to boot?
Thanks.
I have a f541s laptop…it has a cmos battery problem but when i open the laptop i can't seem to find the battery on the motherboard,is it possible that it's a built in?
