Ir para o conteúdo principal
Participe da comunidade de reparos - Criar conta

Asus X200MA Fan Replacement

O que você precisa

    1. Asus X200MA Fan Replacement, Back Panel: passo 1, imagem 1 %32
      • Remove the following six screws:

      • Six 4 mm screws using a Phillips #0 screwdriver.

      • Remove the following one screw:

      • One 14 mm screw using a Phillips #0 screwdriver.

      • The 14mm screw goes in the center.

      Pergunte ao FixBot

      Comentar

    2. Asus X200MA Fan Replacement: passo 2, imagem 1 %32
      • Take two rubber caps off the back side of the laptop.

      • Use a Phillips #0 screwdriver to remove the two 14 mm screws under the rubber caps.

      Pergunte ao FixBot

      Comentar

    3. Asus X200MA Fan Replacement: passo 3, imagem 1 %32
      • Use a plastic or metal spudger to separate the keyboard from the back panel and lift the keyboard out of place.

      Pergunte ao FixBot

      Comentar

    1. Asus X200MA Fan Replacement, Battery: passo 4, imagem 1 %32
      • Take two rubber caps off the back side of the laptop.

      Pergunte ao FixBot

      Comentar

    2. Asus X200MA Fan Replacement: passo 5, imagem 1 %32
      • Remove the following two screws under the rubber caps.

      • Two 14 mm screws using the Phillips #0 screw driver.

      Pergunte ao FixBot

      Comentar

    3. Asus X200MA Fan Replacement: passo 6, imagem 1 %32
      • Flip up the following:

      • The two latches holding the two cables shown(white and black)

      • Pull the cables free from the latches

      • Lift the keyboard from the computer

      Pergunte ao FixBot

      Comentar

    4. Asus X200MA Fan Replacement: passo 7, imagem 1 %32
      • Remove the following screws from the inside of the laptop:

      • Two 4 mm screws using the Phillips #0 phillips screwdriver.

      • One 5 mm screw using the Phillips #0 Phillips screwdriver located in the center a little below the battery.

      Pergunte ao FixBot

      Comentar

    5. Asus X200MA Fan Replacement: passo 8, imagem 1 %32
      • Slide the battery up and out.

      Pergunte ao FixBot

      Comentar

    1. Asus X200MA Fan Replacement, Fan: passo 9, imagem 1 %32
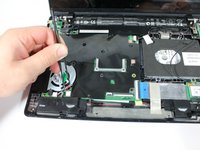
      • Remove the Two 4 mm screws using Phillips #0 phillips screwdriver.

      Pergunte ao FixBot

      Comentar

    2. Asus X200MA Fan Replacement: passo 10, imagem 1 %32 Asus X200MA Fan Replacement: passo 10, imagem 2 %32
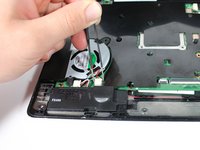
      • Unplug the set of wires located at bottom corner on fan.

      Pergunte ao FixBot

      Comentar

    3. Asus X200MA Fan Replacement: passo 11, imagem 1 %32 Asus X200MA Fan Replacement: passo 11, imagem 2 %32
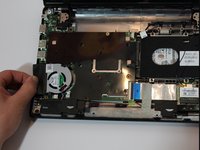
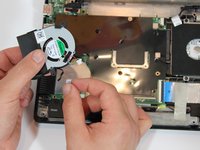
      • Lift up and out to completely the remove fan component.

      Pergunte ao FixBot

      Comentar

Conclusão

To reassemble your device, follow these instructions in reverse order.

Cancelar: não concluí este guia.

3 outras pessoas executaram este guia.

Vanessa Garcia

Membro desde: 01/22/15

1.817 Reputação

Autoria de 6 guias

Equipe

Cal Poly, Team 21-24, Maness Winter 2015 Membro de Cal Poly, Team 21-24, Maness Winter 2015

CPSU-MANESS-W15S21G24

4 Membros

Autoria de 36 guias

0Comentários do guia

Comentar

Visualizações:

Últimas 24 horas: 0

Últimos 7 dias: 2

Últimos 30 dias: 14

Ao todo: 2,715