Introdução
This guide is for the Asus Q524U (Asus Q524UQ). It aims to help those seeking to replace the battery. The battery is what stores the charge and distributes it to the rest of the computer in order for it to power on. Below is a link to our troubleshooting page regarding the Asus Q524U.
O que você precisa
-
-
Remove ten 3 mm screws using a Phillips #0 screwdriver.
 Pergunte ao FixBot
-
-
-
-
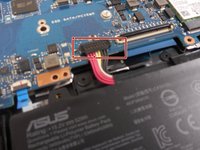
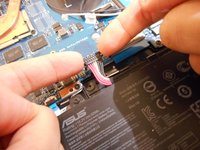
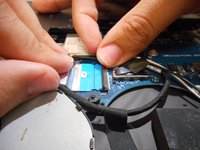
Using your fingers, grip onto both sides of the wire harness and push it upwards.
-
-
-
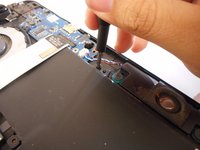
Remove the five 3 mm screws holding the battery in place using a Phillips #0 screwdriver.
-
-
-
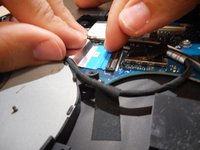
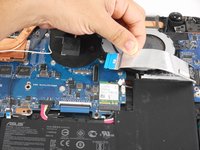
Tilt the small black tab up which will allow the blue tape to be slid out.
-


To reassemble your device, follow these instructions in reverse order.
Cancelar: não concluí este guia.
Uma outra pessoa concluiu este guia.

Equipe

University of New Orleans, Team 3-1, McDonald Spring 2023 Membro de University of New Orleans, Team 3-1, McDonald Spring 2023
UNO-MCDONALD-S23S3G1
2 Membros
Autoria de 5 guias