Ir para o conteúdo principal
Participe da comunidade de reparos - Criar conta

Asus Eee PC 900 Touchpad Replacement

O que você precisa

  1. Asus Eee PC 900 Touchpad Replacement, Battery: passo 1, imagem 1 %32 Asus Eee PC 900 Touchpad Replacement, Battery: passo 1, imagem 2 %32 Asus Eee PC 900 Touchpad Replacement, Battery: passo 1, imagem 3 %32
    • Slide the battery's locking tabs from the locked position to unlocked positions.

    • The right tab is unlocked when a red dot is showing.

    • The left tab will have to be held in the unlocked position in order to release the battery.

    Pergunte ao FixBot

    Comentar

  2. Asus Eee PC 900 Touchpad Replacement: passo 2, imagem 1 %32
    • Slide the battery out while holding the left locking tab in the unlocked position.

    Pergunte ao FixBot

    Comentar

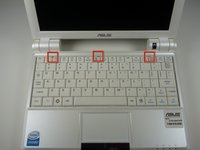
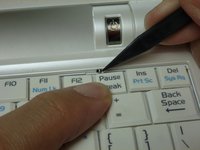
  3. Asus Eee PC 900 Touchpad Replacement, Keyboard: passo 3, imagem 1 %32 Asus Eee PC 900 Touchpad Replacement, Keyboard: passo 3, imagem 2 %32
    • Caution Follow this step to detach the upper portion of the keyboard, but do not remove it from the laptop. Damage to the keyboard's ribbon cable may result if improperly executed.

    • Identify the three metal tabs holding down the laptop's keyboard.

    • Using a spudger, depress each metal tab to remove the keyboard.

    • The upper part of the keyboard should "pop up" from its holder.

    Pergunte ao FixBot

    Comentar

  4. Asus Eee PC 900 Touchpad Replacement: passo 4, imagem 1 %32 Asus Eee PC 900 Touchpad Replacement: passo 4, imagem 2 %32
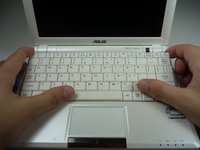
    • Clips hold the bottom portion of the keyboard to the laptop. Gently lift the upper portion of the keyboard and then move the entire keyboard towards the computer's screen until the ribbon cable is visible.

    Pergunte ao FixBot

    Comentar

  5. Asus Eee PC 900 Touchpad Replacement: passo 5, imagem 1 %32
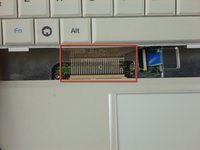
    • Using a spudger, gently push the two black pins holding the ribbon cable towards the computer's screen.

    • Slide the keyboard's ribbon cable from the connector.

    Pergunte ao FixBot

    Comentar

  6. Asus Eee PC 900 Touchpad Replacement: passo 6, imagem 1 %32
    • Remove the keyboard by lifting upwards.

    Pergunte ao FixBot

    Comentar

  7. Asus Eee PC 900 Touchpad Replacement, Top Cover: passo 7, imagem 1 %32 Asus Eee PC 900 Touchpad Replacement, Top Cover: passo 7, imagem 2 %32
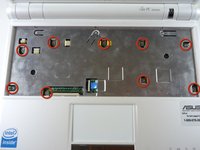
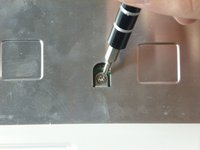
    • Remove the nine 4.76mm Phillips #0 screws on the top cover of the laptop.

    Pergunte ao FixBot

    Comentar

  8. Asus Eee PC 900 Touchpad Replacement: passo 8, imagem 1 %32 Asus Eee PC 900 Touchpad Replacement: passo 8, imagem 2 %32
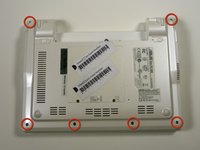
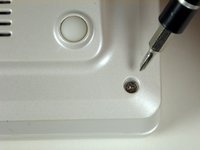
    • Remove the six 4.76 mm Phillips #0 screws on the back of the laptop.

    Pergunte ao FixBot

    Comentar

  9. Asus Eee PC 900 Touchpad Replacement: passo 9, imagem 1 %32 Asus Eee PC 900 Touchpad Replacement: passo 9, imagem 2 %32 Asus Eee PC 900 Touchpad Replacement: passo 9, imagem 3 %32
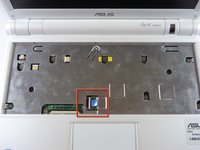
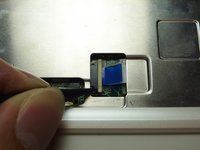
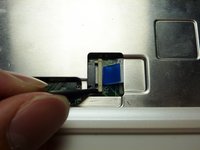
    • Flip the laptop back over and identify the touchpad ribbon.

    • Unlock the tan locking pin from the black connector by pushing the pin to the right with a spudger.

    Pergunte ao FixBot

    Comentar

  10. Asus Eee PC 900 Touchpad Replacement: passo 10, imagem 1 %32
    • Slide out the touchpad's ribbon connector by pulling the blue tab to the right.

    Pergunte ao FixBot

    Comentar

  11. Asus Eee PC 900 Touchpad Replacement: passo 11, imagem 1 %32
    • Use a plastic opening tool to gently detach the top cover from the laptop's base. See the next step for removing the cover.

    Pergunte ao FixBot

    Comentar

  12. Asus Eee PC 900 Touchpad Replacement: passo 12, imagem 1 %32 Asus Eee PC 900 Touchpad Replacement: passo 12, imagem 2 %32 Asus Eee PC 900 Touchpad Replacement: passo 12, imagem 3 %32
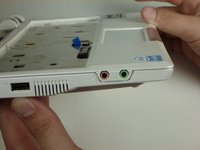
    • Caution: To clear the audio and microphone, lift the right half and move the cover to the left (as shown in the second picture) to prevent cover damage.

    • Remove the laptop cover.

    Pergunte ao FixBot

    Comentar

  13. Asus Eee PC 900 Touchpad Replacement, Touchpad: passo 13, imagem 1 %32 Asus Eee PC 900 Touchpad Replacement, Touchpad: passo 13, imagem 2 %32
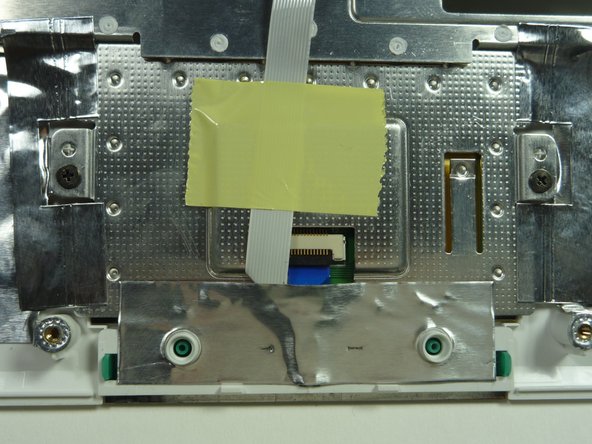
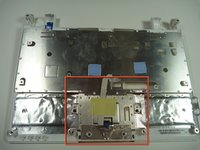
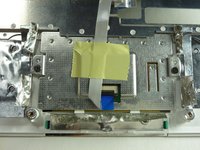
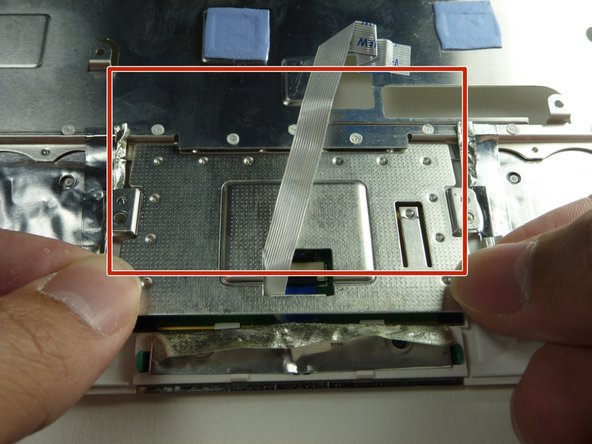
    • Flip the top cover over and identify the touchpad back plate.

    Pergunte ao FixBot

    Comentar

  14. Asus Eee PC 900 Touchpad Replacement: passo 14, imagem 1 %32 Asus Eee PC 900 Touchpad Replacement: passo 14, imagem 2 %32 Asus Eee PC 900 Touchpad Replacement: passo 14, imagem 3 %32
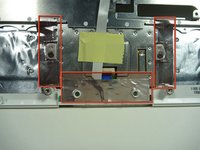
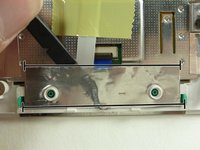
    • Identify the conductive foil.

    • Caution: Do not completely remove conductive foil.

    • Fold back the conductive foil from the touchpad back plate using a spudger.

    Pergunte ao FixBot

    Comentar

  15. Asus Eee PC 900 Touchpad Replacement: passo 15, imagem 1 %32 Asus Eee PC 900 Touchpad Replacement: passo 15, imagem 2 %32
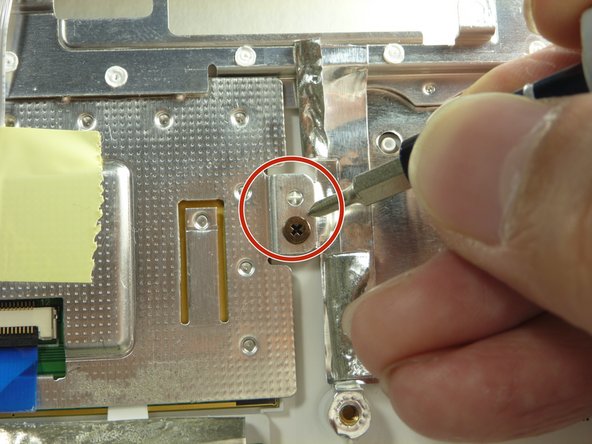
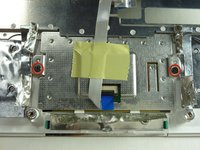
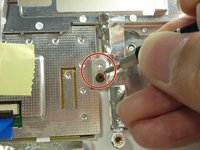
    • Remove the two 4.76mm Phillips #0 screws securing the touchpad back plate.

    Pergunte ao FixBot

    Comentar

  16. Asus Eee PC 900 Touchpad Replacement: passo 16, imagem 1 %32
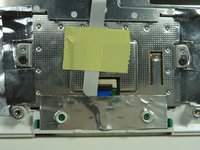
    • Remove the yellow tape holding the touchpad's ribbon connector with a spudger.

    Pergunte ao FixBot

    Comentar

  17. Asus Eee PC 900 Touchpad Replacement: passo 17, imagem 1 %32 Asus Eee PC 900 Touchpad Replacement: passo 17, imagem 2 %32 Asus Eee PC 900 Touchpad Replacement: passo 17, imagem 3 %32
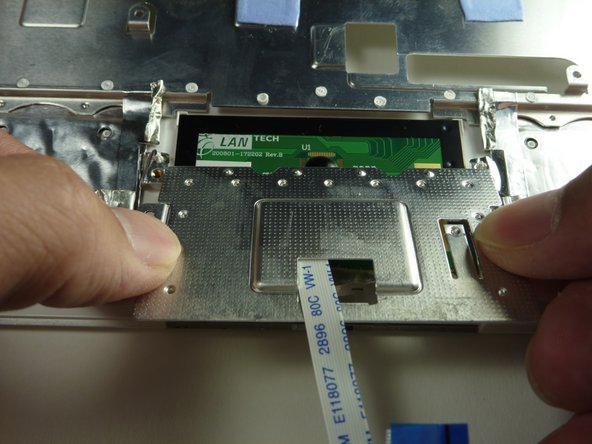
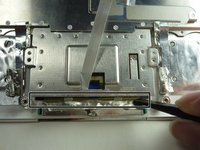
    • Use a spudger to lift the front edge of the touchpad back plate.

    • Gently grasp the edges of the back plate and pull towards you to remove.

    Pergunte ao FixBot

    Comentar

  18. Asus Eee PC 900 Touchpad Replacement: passo 18, imagem 1 %32
    • Lift the touchpad out of its placeholder.

    Pergunte ao FixBot

    Comentar

Conclusão

To reassemble your device, follow these instructions in reverse order.

Cancelar: não concluí este guia.

6 outras pessoas executaram este guia.

Sheldon Chu

Membro desde: 01/24/12

1.176 Reputação

Autoria de 3 guias

Equipe

Cal Poly, Team 3-27, Amido Winter 2012 Membro de Cal Poly, Team 3-27, Amido Winter 2012

CPSU-AMIDO-W12S3G27

4 Membros

Autoria de 16 guias

2Comentários do guia

Where is STEP 2 1/2? my keyboard dosnt just fall out nice, how do you remove the keyboard?

Support Services - Responder Compartilhar
Yeah I don't know how to remove keyboard. Also once I get to step 14.. What do I do? You tell me how to identify the broken piece but is it replaceable or fixable?

el jay - Responder Compartilhar
Comentar

Visualizações:

Últimas 24 horas: 2

Últimos 7 dias: 6

Últimos 30 dias: 42

Ao todo: 10,784