Ir para o conteúdo principal
AlphaSmart Pro Keyboard Replacement

AlphaSmart Pro Keyboard Replacement

Ulysses Ramirez

Ulysses Ramirez e 2 outros colaboradores

Última atualização em November 3, 2022

5 - 10 minutos
Moderado

Introdução

Ir para o passo 1

Defective keyboard? This guide will allow you to replace your entire keyboard in a snap!

O que você precisa

Ferramentas

  • Phillips #00 Screwdriver
    Phillips #00 Screwdriver
  • Spudger
    Spudger
  1. AlphaSmart Pro Keyboard Replacement, Separating Panels: passo 1, imagem 1 %32 AlphaSmart Pro Keyboard Replacement, Separating Panels: passo 1, imagem 2 %32 AlphaSmart Pro Keyboard Replacement, Separating Panels: passo 1, imagem 3 %32
    • Power off your AlphaSmart Pro device and remove the batteries before beginning disassembly.

    • Remove all eight 1 cm Phillips head screws from the back panel of the AlphaSmart Pro with the Phillips #00 Screwdriver.

    • Carefully separate the front panel from the back panel.

    • Notice that the front and back panels are still connected by a ribbon cable.

  2. AlphaSmart Pro Keyboard Replacement, Detaching Ribbon Cable: passo 2, imagem 1 %32 AlphaSmart Pro Keyboard Replacement, Detaching Ribbon Cable: passo 2, imagem 2 %32 AlphaSmart Pro Keyboard Replacement, Detaching Ribbon Cable: passo 2, imagem 3 %32
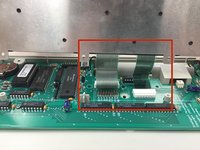
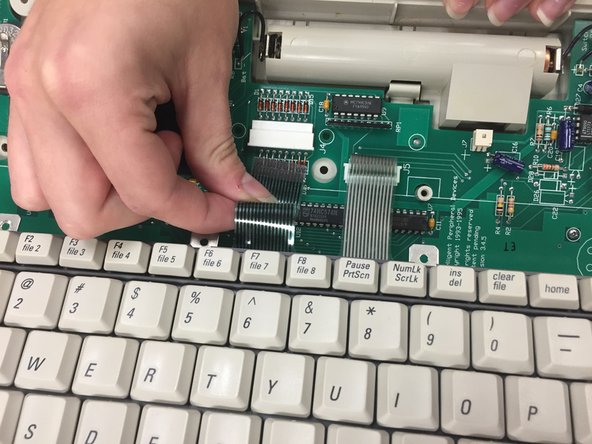
    • To remove the ribbon cable, use the spudger to lift each side of the connector from the socket.

    • Gently pull up on the connector to completely remove the connector from the socket.

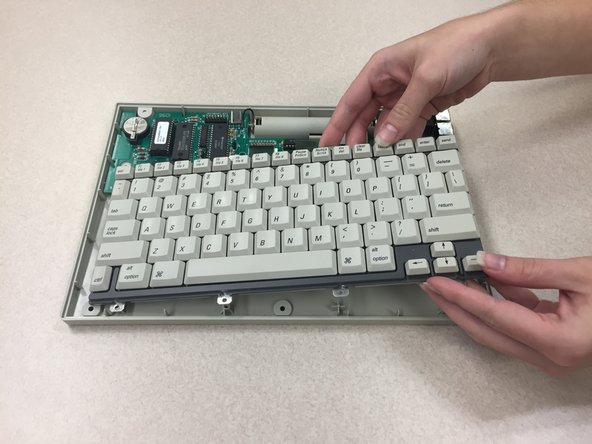
    • Remove front panel from the motherboard.

  3. AlphaSmart Pro Keyboard Replacement, Prepping Keyboard For Removal: passo 3, imagem 1 %32 AlphaSmart Pro Keyboard Replacement, Prepping Keyboard For Removal: passo 3, imagem 2 %32 AlphaSmart Pro Keyboard Replacement, Prepping Keyboard For Removal: passo 3, imagem 3 %32
    • Use the Phillips #00 Screwdriver to remove the four 1 cm screws from each corner of the keyboard.

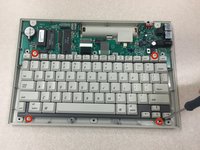
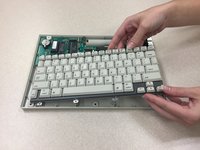
    • Gently lift the keyboard from the rear panel.

    • Notice that the keyboard is still connected to the motherboard by two ribbon cables.

  4. AlphaSmart Pro Keyboard Replacement, Detaching keyboard Ribbon Cables: passo 4, imagem 1 %32 AlphaSmart Pro Keyboard Replacement, Detaching keyboard Ribbon Cables: passo 4, imagem 2 %32 AlphaSmart Pro Keyboard Replacement, Detaching keyboard Ribbon Cables: passo 4, imagem 3 %32
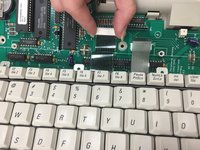
    • To remove the ribbon cable, gently pull the connector in the direction of the ribbon cable.

    • Pull the ribbon cable to remove it from the connector.

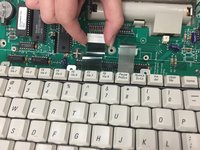
    • Repeat the exact steps above for the other ribbon cable.

    • While the large connector on the left must be pulled toward you in order to remove the ribbon cable, the smaller connector on the right must be pushed away from you.

  5. AlphaSmart Pro Keyboard Replacement: passo 5, imagem 1 %32
    • Remove keyboard from motherboard.

Conclusão

To reassemble your device, follow these instructions in reverse order.

Uma outra pessoa concluiu este guia.

Ulysses Ramirez

Membro desde: 10/13/14

67 Reputação

Autoria de 2 guias

Equipe

Clemson, Team 1-1, Benson Fall 2014 Membro de Clemson, Team 1-1, Benson Fall 2014

CLEM-BENSON-F14S1G1

4 Membros

Autoria de 16 guias

0Comentários do guia

Comentar

Visualizações:

Últimas 24 horas: 0

Últimos 7 dias: 1

Últimos 30 dias: 6

Ao todo: 832