Ir para o conteúdo principal
Participe da comunidade de reparos - Criar conta

Alienware P18G M14X R1 Optical Drive Replacement

O que você precisa

    1. Alienware P18G M14X R1 Optical Drive Replacement, Back Cover: passo 1, imagem 1 %32
      • Loosen the top left and top right 6.5mm PH1 screws that hold down the back cover.

      • The screws will not be able to be removed from the back cover. They can only be loosened or tightened.

      Pergunte ao FixBot

      Comentar

    2. Alienware P18G M14X R1 Optical Drive Replacement: passo 2, imagem 1 %32
      • Slide back cover forward using your thumbs.

      Pergunte ao FixBot

      Comentar

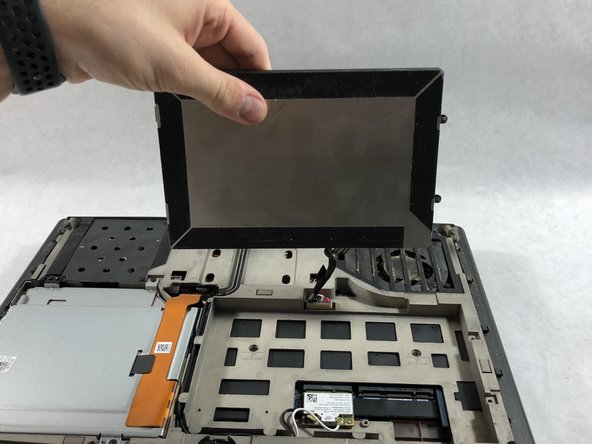
    3. Alienware P18G M14X R1 Optical Drive Replacement: passo 3, imagem 1 %32
      • Lift up the cover and set aside exposing the internals of the computer.

      Pergunte ao FixBot

      Comentar

    1. Alienware P18G M14X R1 Optical Drive Replacement, Battery: passo 4, imagem 1 %32
      • Make sure the laptop is turned off before starting.

      • Using PH1 screwdriver loosen the two screws on the right of the battery.

      • The screws will not be able to be removed from the battery. They can only be loosened or tightened.

      Pergunte ao FixBot

      Comentar

    2. Alienware P18G M14X R1 Optical Drive Replacement: passo 5, imagem 1 %32 Alienware P18G M14X R1 Optical Drive Replacement: passo 5, imagem 2 %32
      • Pull battery up using the tab provided.

      Pergunte ao FixBot

      Comentar

    3. Alienware P18G M14X R1 Optical Drive Replacement: passo 6, imagem 1 %32
      • Disconnect the clip connecting the battery to the computer.

      • Set battery aside.

      Pergunte ao FixBot

      Comentar

    1. Alienware P18G M14X R1 Optical Drive Replacement, Optical Drive: passo 7, imagem 1 %32
      • Unscrew the four 6.35mm screws using the PH1, that hold down the optical drive.

      Pergunte ao FixBot

      Comentar

    2. Alienware P18G M14X R1 Optical Drive Replacement: passo 8, imagem 1 %32
      • Using the plastic opening tool unclip the white connector holding down the orange cable.

      Pergunte ao FixBot

      Comentar

    3. Alienware P18G M14X R1 Optical Drive Replacement: passo 9, imagem 1 %32
      • Using the tab on the optical drive, lift the optical drive out of the computer and set it aside.

      Pergunte ao FixBot

      Comentar

Conclusão

To reassemble your device, follow these instructions in reverse order.

Cancelar: não concluí este guia.

Andonaq Grozdani

Membro desde: 03/01/18

892 Reputação

Autoria de 5 guias

Equipe

0Comentários do guia

Comentar

Visualizações:

Últimas 24 horas: 2

Últimos 7 dias: 7

Últimos 30 dias: 38

Ao todo: 764