Introdução
Sometimes we forget to post images with our answers, or we want to add images later because we got more information. This will show how to add those images. The procedure is the same to add images to existing questions.
-
-
To get into the Edit window, click the "Edit" link
-
The edit window is now open. Click on the orange "Images" tab in the bottom left corner
-
This opens an approximately quarter screen size window with am upload symbol. This particular window may be empty, or it may have multiple images already present. This depends on if one has previously posted images. This is where the images are stored until they are going to be posted.
 Pergunte ao FixBot
-
-
-
-
To open the import image dialog, click the "Upload Icon", this will open up a upload dialog window. From here images can be either placed into the question, by "drag&drop", only if they are already in the image repository. Most of the time it will require using the "Browse Files" icon. .
-
When it is clicked on, it will access the users computer and list the directories. Choose the directory that contains the image to be imported. It is possible to select multiple images at once. Hold the "Ctrl" key down and left click on individual image files allow for this.
-
Once the file(s) is selected, click the "open" key. This will now upload the file to the image repository. Once the file(s) is uploaded, it will show in the repository.
-
-
-
With the file showing in the bottom window, left click and hold on the image. Then drag the image into the question text window. This action will be noticeable since the background of the edit text window changes. Release the left mouse button once the cursor is in the question text window.
-
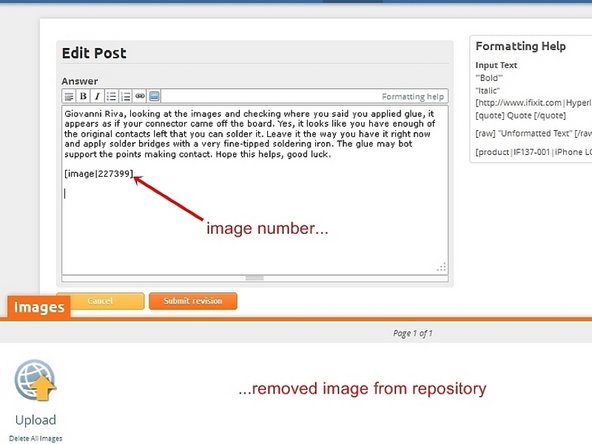
Once the image is dragged to the question, it will show up as a number in the edit text box, but can be viewed in the preview. The image will now have been removed out of the repository as well.
-
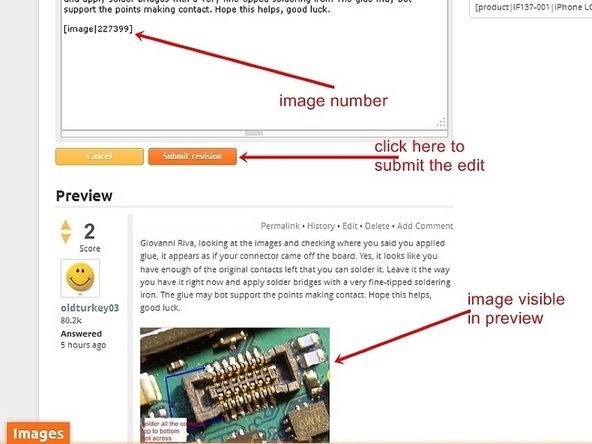
Close the upload image window by clicking on the orange "Image" tab. If the position of the image, as well as the rest of the edit is satisfactory, click the orange "Submit revision" tab. This will post the edited answer with the image.
-


Hope this helps, good luck
Cancelar: não concluí este guia.
6 outras pessoas executaram este guia.

2Comentários do guia
Thanks for a much needed guide addition! Great work!
Thanks oldturkey for helping me upload pics really easy.
Gina, Sept 13