Ir para o conteúdo principal
Participe da comunidade de reparos - Criar conta

Acer Iconia Tab A200 Screen Replacement

O que você precisa

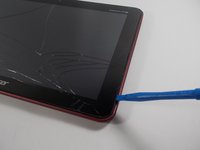
    1. Acer Iconia Tab A200 Screen Replacement, Battery: passo 1, imagem 1 %32 Acer Iconia Tab A200 Screen Replacement, Battery: passo 1, imagem 2 %32
      • With the plastic opening tool pry open the grey plastic siding on both sides of the tablet.

      Pergunte ao FixBot

      Comentar

    2. Acer Iconia Tab A200 Screen Replacement: passo 2, imagem 1 %32 Acer Iconia Tab A200 Screen Replacement: passo 2, imagem 2 %32
      • Using a Phillips #00 screwdriver remove the 4.0 mm screws on the sides of the tablet.

      • There are two screws on each side of the tablet that need to be removed before the back casing can be removed.

      Pergunte ao FixBot

      Comentar

    3. Acer Iconia Tab A200 Screen Replacement: passo 3, imagem 1 %32 Acer Iconia Tab A200 Screen Replacement: passo 3, imagem 2 %32
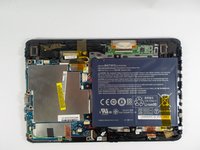
      • Once the 4 screws have been removed use the plastic opening tool to pry open the device on the side of the device.

      • Be careful prying on the sides where you removed the screw as the plastic casing is not very strong and may break.

      • After prying open the case with the plastic opening tool carefully remove the case from the device and place the device face down on its screen.

      Pergunte ao FixBot

      Comentar

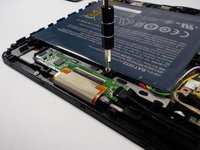
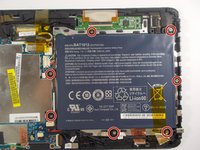
    4. Acer Iconia Tab A200 Screen Replacement: passo 4, imagem 1 %32 Acer Iconia Tab A200 Screen Replacement: passo 4, imagem 2 %32
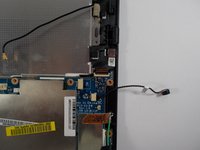
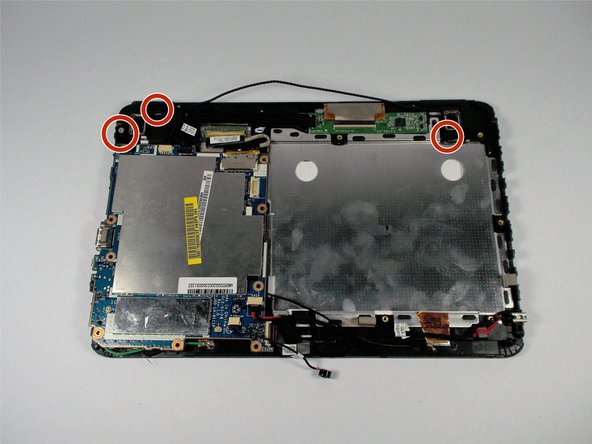
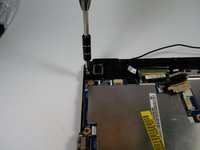
      • Using a Phillips #00 screwdriver remove the 4.0 mm screws holding the battery in place.

      Pergunte ao FixBot

      Comentar

    5. Acer Iconia Tab A200 Screen Replacement: passo 5, imagem 1 %32 Acer Iconia Tab A200 Screen Replacement: passo 5, imagem 2 %32
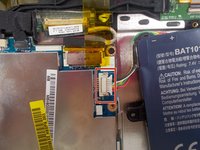
      • Lift the battery out of the device, and disconnect the cable attached to the motherboard by pulling it out to the side not lifting it up.

      Pergunte ao FixBot

      Comentar

    1. Acer Iconia Tab A200 Screen Replacement, DC Power Jack Component: passo 6, imagem 1 %32
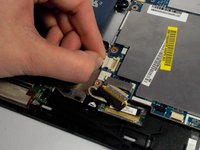
      • Using the plastic opening tool gently lift up the charging component out of its slot in the case.

      Pergunte ao FixBot

      Comentar

    2. Acer Iconia Tab A200 Screen Replacement: passo 7, imagem 1 %32
      • Continue to lift up the cord until it is free from the case and only attached to the motherboard.

      • You may need to continue using the plastic opening tool to lift the cord out of the case due to limited hand space.

      Pergunte ao FixBot

      Comentar

    3. Acer Iconia Tab A200 Screen Replacement: passo 8, imagem 1 %32
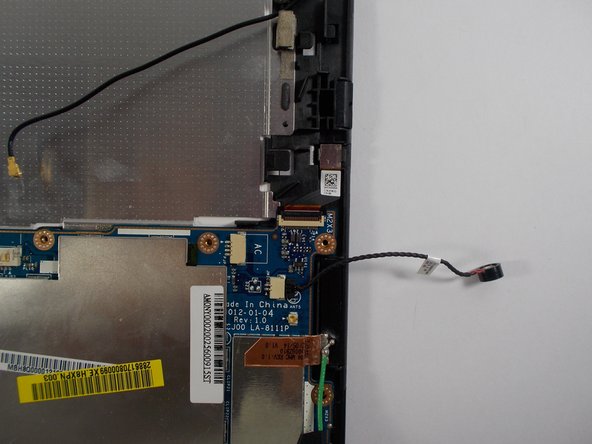
      • Disconnect the power component from the motherboard by pulling it out horizontally. Do not pull up on the cord only pull out

      Pergunte ao FixBot

      Comentar

    1. Acer Iconia Tab A200 Screen Replacement, Microphone: passo 9, imagem 1 %32 Acer Iconia Tab A200 Screen Replacement, Microphone: passo 9, imagem 2 %32
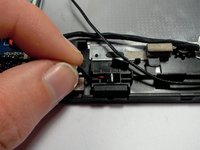
      • Lift up on the microphone cable to lift the microphone component away from the case.

      Pergunte ao FixBot

      Comentar

    2. Acer Iconia Tab A200 Screen Replacement: passo 10, imagem 1 %32
      • Once the microphone has been lifted away from the case, disconnect the microphone cable from the motherboard by pulling the cable out horizontally. Do not lift up to remove.

      Pergunte ao FixBot

      Comentar

    1. Acer Iconia Tab A200 Screen Replacement, Speaker: passo 11, imagem 1 %32 Acer Iconia Tab A200 Screen Replacement, Speaker: passo 11, imagem 2 %32
      • After removing the battery use a Phillips head #00 screwdriver to remove the 3.0 mm screws holding the dual speakers in place.

      Pergunte ao FixBot

      Comentar

    2. Acer Iconia Tab A200 Screen Replacement: passo 12, imagem 1 %32
      • Once the screws are removed, lift up on the speakers to remove them from the case.

      Pergunte ao FixBot

      Comentar

    3. Acer Iconia Tab A200 Screen Replacement: passo 13, imagem 1 %32
      • Once you have removed the speakers from the case, disconnect the speakers from the motherboard by pulling the cable out horizontally. Do not pull up on the cable.

      Pergunte ao FixBot

      Comentar

    1. Acer Iconia Tab A200 Screen Replacement, Motherboard: passo 14, imagem 1 %32
      • Using the plastic opening tool unplug the green cable by placing the tool under where the cable meets the plug and lifting up.

      • After unplugging the green cable remove the black tape that secures the green cable to motherboard.

      • Only unplug the end connected to the motherboard. Do not disconnect the soldered end of the cable.

      Pergunte ao FixBot

      Comentar

    2. Acer Iconia Tab A200 Screen Replacement: passo 15, imagem 1 %32
      • Using the plastic opening tool unplug the black cable by placing the tool under where the cable meets the plug and lift up.

      Pergunte ao FixBot

      Comentar

    3. Acer Iconia Tab A200 Screen Replacement: passo 16, imagem 1 %32 Acer Iconia Tab A200 Screen Replacement: passo 16, imagem 2 %32
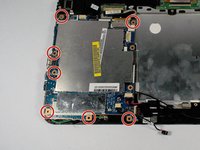
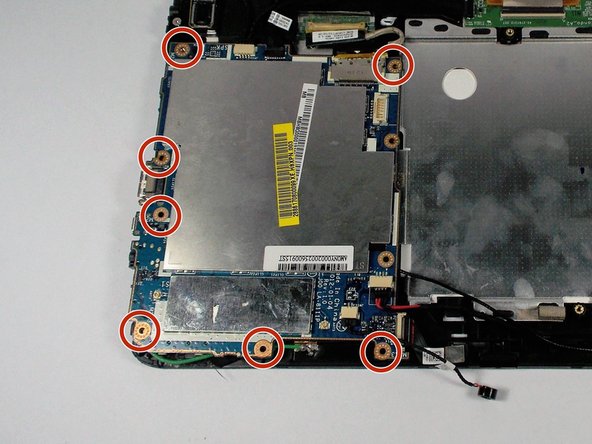
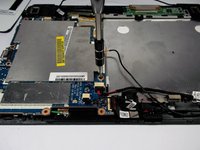
      • Once all cables have been disconnected from the motherboard, remove the seven remaining 3.0 mm screws with a Phillips head screwdriver size #00.

      • After the screws have been removed lift up on the motherboard to remove it from the case.

      • If you feel any pull when removing the motherboard, check to see if you did not disconnect a cable connected to the board.

      Pergunte ao FixBot

      Comentar

    1. Acer Iconia Tab A200 Screen Replacement, Screen: passo 17, imagem 1 %32 Acer Iconia Tab A200 Screen Replacement, Screen: passo 17, imagem 2 %32
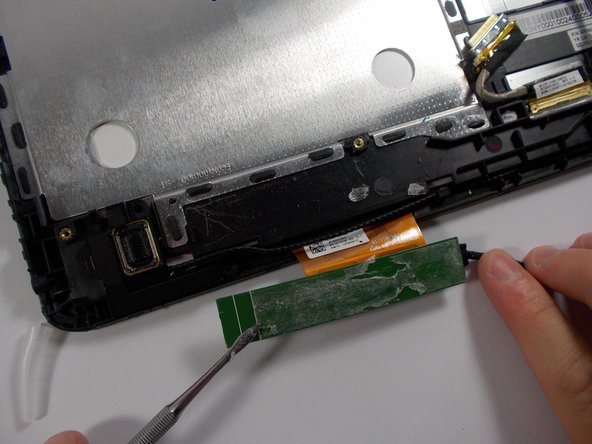
      • Using the pointed tip of the nylon spudger, pry the unit board off the case

      • When working with electronics, it's important to choose a tool that's ESD-safe to avoid accidental damage to the device. The metal spudger is great when you need serious prying power, but the regular black nylon spudger or a plastic opening tool should be used whenever possible.

      Pergunte ao FixBot

      Comentar

    2. Acer Iconia Tab A200 Screen Replacement: passo 18, imagem 1 %32
      • Flip the device over, so that the screen is face up.

      • Using the metal spudgers pry apart and separate the screen from the device.

      • Be careful when using the metal spudger as it may damage the device.

      • You may need to use several spudgers or opening tools to keep the screen seperated as you continue to pry the screen away from the device.

      Pergunte ao FixBot

      Comentar

Conclusão

To reassemble your device, follow these instructions in reverse order.

Cancelar: não concluí este guia.

4 outras pessoas executaram este guia.

Steve Chiu

Membro desde: 03/11/16

253 Reputação

Autoria de 2 guias

Equipe

2Comentários do guia

Looking forward to fixing this tablet a friend had given up on then gave to me. So funny how easily ppl give up!Thank you for this spectacular set of directions. Looks like it will be the one that works for the tablet I have.

MichelleE1 - Responder Compartilhar
how can i tell if there is any water damage?

Samuel Gentry - Responder Compartilhar
Comentar

Visualizações:

Últimas 24 horas: 1

Últimos 7 dias: 7

Últimos 30 dias: 34

Ao todo: 2,043