Ir para o conteúdo principal
Participe da comunidade de reparos - Criar conta

ASUS X550LB-DS71 Fan Replacement

O que você precisa

  1. ASUS X550LB-DS71 Fan Replacement, Fan: passo 1, imagem 1 %32 ASUS X550LB-DS71 Fan Replacement, Fan: passo 1, imagem 2 %32 ASUS X550LB-DS71 Fan Replacement, Fan: passo 1, imagem 3 %32
    • Make sure to switch off your laptop before starting.

    • Place the laptop on a flat surface with the bottom side facing upwards.

    • Using the Phillips #1 Screwdriver, remove the four 4mm screws in the back panel.

    • Using both hands, slide the back panel away from the laptop horizontally.

    Pergunte ao FixBot

    Comentar

  2. ASUS X550LB-DS71 Fan Replacement: passo 2, imagem 1 %32
    • Using the Phillips #0 Screwdriver, remove the ten 2mm screws at the marked locations.

    • At this point, it is advised to disconnect the hard drive from the motherboard.

    Pergunte ao FixBot

    Comentar

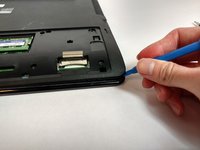
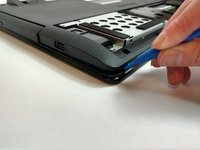
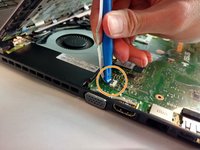
  3. ASUS X550LB-DS71 Fan Replacement: passo 3, imagem 1 %32 ASUS X550LB-DS71 Fan Replacement: passo 3, imagem 2 %32 ASUS X550LB-DS71 Fan Replacement: passo 3, imagem 3 %32
    • Using the plastic opening tool, open the back cover of the laptop.

    • It is recommended that you start from a corner and run the tool along the edge of the cover.

    • Be careful not to bend or crack the cover.

    Pergunte ao FixBot

    Comentar

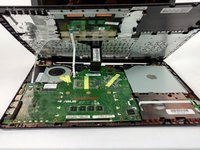
  4. ASUS X550LB-DS71 Fan Replacement: passo 4, imagem 1 %32 ASUS X550LB-DS71 Fan Replacement: passo 4, imagem 2 %32
    • Locate the three ribbon connectors.

    • Using the plastic opening tool, flip up all three gray tabs and remove the ribbon connectors from the motherboard.

    • Once the tabs are released, the ribbons will be easy to remove. Do not pull on the ribbons.

    Pergunte ao FixBot

    Comentar

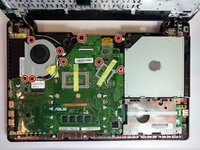
  5. ASUS X550LB-DS71 Fan Replacement: passo 5, imagem 1 %32 ASUS X550LB-DS71 Fan Replacement: passo 5, imagem 2 %32
    • Using the Phillips #0 Screwdriver, remove the nine 2mm screws at the marked locations.

    Pergunte ao FixBot

    Comentar

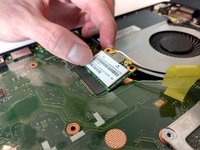
  6. ASUS X550LB-DS71 Fan Replacement: passo 6, imagem 1 %32 ASUS X550LB-DS71 Fan Replacement: passo 6, imagem 2 %32
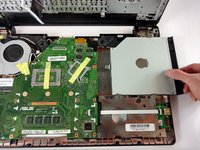
    • Disconnect the WLAN Card from the motherboard by pulling the connector upwards.

    • Disconnect the optical drive from the motherboard by sliding it to the right.

    Pergunte ao FixBot

    Comentar

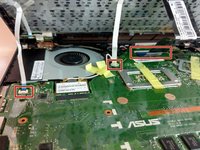
  7. ASUS X550LB-DS71 Fan Replacement: passo 7, imagem 1 %32 ASUS X550LB-DS71 Fan Replacement: passo 7, imagem 2 %32 ASUS X550LB-DS71 Fan Replacement: passo 7, imagem 3 %32
    Ferramenta utilizada neste passo:
    Tweezers
    $4.99
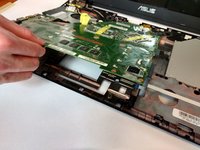
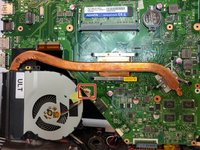
    • Flip the motherboard to show the underside.

    • Locate the square fan connection attached to the motherboard.

    • Disconnect it using the tweezers (blunt).

    Pergunte ao FixBot

    Comentar

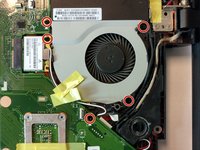
  8. ASUS X550LB-DS71 Fan Replacement: passo 8, imagem 1 %32
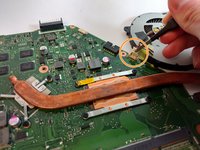
    • Remove the black tape from the fan as seen in the marked location.

    • At this point, the fan is now disconnected from the motherboard.

    Pergunte ao FixBot

    Comentar

Conclusão

To reassemble your device, follow these instructions in reverse order.

Cancelar: não concluí este guia.

Uma outra pessoa concluiu este guia.

Nathan Dyer

Membro desde: 09/25/17

550 Reputação

Autoria de 5 guias

Equipe

USF Tampa, Team S16-G1, Eyestone Fall 2017 Membro de USF Tampa, Team S16-G1, Eyestone Fall 2017

USFT-EYESTONE-F17S16G1

4 Membros

Autoria de 5 guias

1Comentário do guia

my mouse of laptop not working pls guide to repaire

Parneet Bhatti (Mantri) - Responder Compartilhar

Comentar

Visualizações:

Últimas 24 horas: 0

Últimos 7 dias: 3

Últimos 30 dias: 30

Ao todo: 1,505