Ir para o conteúdo principal

ASUS Vivobook Q301LA-BSI5T17 Charging Port Replacement

O que você precisa

  1. ASUS Vivobook Q301LA-BSI5T17 Charging Port Replacement, Battery: passo 1, imagem 1 %32
    • Unscrew the (10) screws on the bottom of the computer chassis using the JIS #0 screwdriver.

  2. ASUS Vivobook Q301LA-BSI5T17 Charging Port Replacement: passo 2, imagem 1 %32 ASUS Vivobook Q301LA-BSI5T17 Charging Port Replacement: passo 2, imagem 2 %32
    • Slightly lift the lower case and push it toward the rear of the computer to free the mounting tabs.

  3. ASUS Vivobook Q301LA-BSI5T17 Charging Port Replacement: passo 3, imagem 1 %32 ASUS Vivobook Q301LA-BSI5T17 Charging Port Replacement: passo 3, imagem 2 %32 ASUS Vivobook Q301LA-BSI5T17 Charging Port Replacement: passo 3, imagem 3 %32
    • Remove the (6) six screws attaching the battery to the frame using the JIS #0 screwdriver.

    • Use the black plastic spudger to remove the battery from the device.

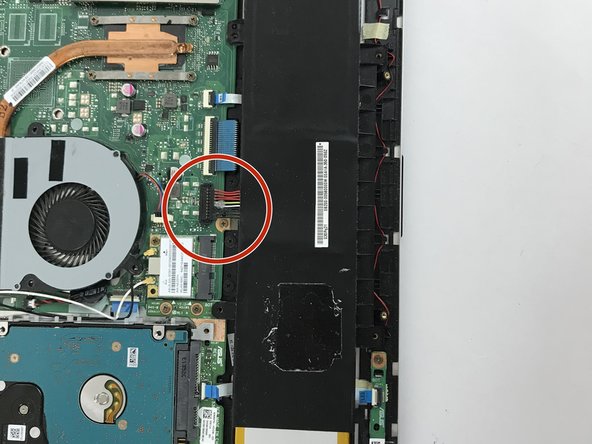
  4. ASUS Vivobook Q301LA-BSI5T17 Charging Port Replacement: passo 4, imagem 1 %32 ASUS Vivobook Q301LA-BSI5T17 Charging Port Replacement: passo 4, imagem 2 %32 ASUS Vivobook Q301LA-BSI5T17 Charging Port Replacement: passo 4, imagem 3 %32
    • Gently take the battery out of the laptop, making sure that all wires connecting to it are disconnected.

  5. Cuidado: as etapas de 5 a 6 são provenientes de um guia marcado como em andamento.

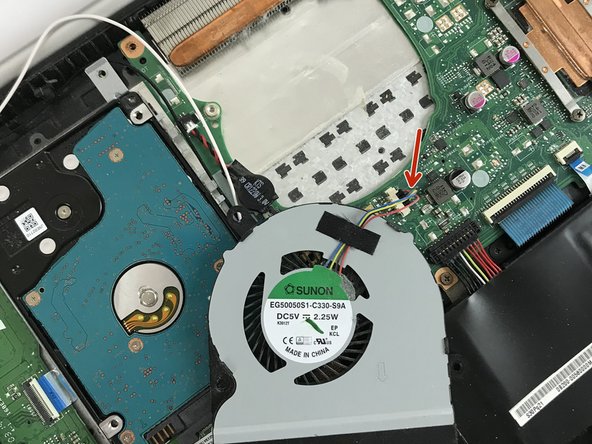
    ASUS Vivobook Q301LA-BSI5T17 Charging Port Replacement, Motherboard: passo 5, imagem 1 %32 ASUS Vivobook Q301LA-BSI5T17 Charging Port Replacement, Motherboard: passo 5, imagem 2 %32
    • When removing the cooling fan, carefully unplug the cable that is connected to the motherboard.

    • Once you have carefully unplugged the cable, the cooling fan should just come off with ease.

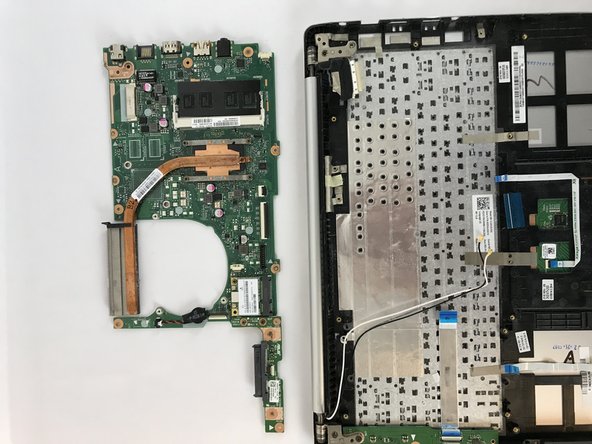
  6. ASUS Vivobook Q301LA-BSI5T17 Charging Port Replacement: passo 6, imagem 1 %32 ASUS Vivobook Q301LA-BSI5T17 Charging Port Replacement: passo 6, imagem 2 %32
    • Carefully remove the motherboard.

    • You can now replace it with a new motherboard or perform any necessary modifications to it.

  7. ASUS Vivobook Q301LA-BSI5T17 Charging Port Replacement, Charging Port: passo 7, imagem 1 %32
Conclusão

To reassemble your device, follow these instructions in reverse order.

Equipe

USF Tampa, Team S5-G1, Walkup Fall 2017 Membro de USF Tampa, Team S5-G1, Walkup Fall 2017

USFT-WALKUP-F17S5G1

Membros da 4

Autoria de 6 guias

0 comentários

Adicione um comentário

Exibir estatísticas:

Últimas 24 horas: 0

Últimos 7 dias: 0

Últimos 30 dias: 1

Duração total: 996