Ir para o conteúdo principal

1999-2002 Suzuki SV650 Tank Replacement

O que você precisa

  1. 1999-2002 Suzuki SV650 Tank Replacement, Seat: passo 1, imagem 1 %32 1999-2002 Suzuki SV650 Tank Replacement, Seat: passo 1, imagem 2 %32
    • If you have frame covers below your seat, remove them by removing the 4 mm allen bolts holding them on. Use a 4 mm allen wrench to turn the screws counter-clockwise until they come off.

    • Once the frame covers are off, remove the 4 mm allen seat bolts on both sides of the seat. Use the 4 mm allen wrench to turn the screws counter-clockwise until they come off.

    • The bolt in the picture is not stock.

    • Lift the front of the seat, then pull it off the frame.

  2. 1999-2002 Suzuki SV650 Tank Replacement, Tank: passo 2, imagem 1 %32 1999-2002 Suzuki SV650 Tank Replacement, Tank: passo 2, imagem 2 %32 1999-2002 Suzuki SV650 Tank Replacement, Tank: passo 2, imagem 3 %32
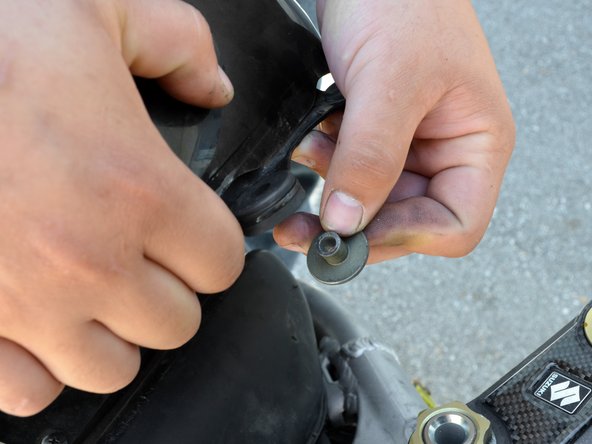
    • Turn the two 4mm allen bolts in the front tank mounts counter-clockwise with an allen wrench until they come out.

    • The bolts shown in the picture are not stock.

    • Turn the two 12mm hex bolts in the tank's hinge base counter-clockwise with a socket wrench or box end wrench until they come out.

  3. 1999-2002 Suzuki SV650 Tank Replacement: passo 3, imagem 1 %32 1999-2002 Suzuki SV650 Tank Replacement: passo 3, imagem 2 %32 1999-2002 Suzuki SV650 Tank Replacement: passo 3, imagem 3 %32
    • Disconnect the fuel level sensor connector, located near the tank hinge base. It will be a three wire connector and one side of the wire will be traceable to the underside of the tank.

    • Carefully lift the front of the tank to gain access to the hoses attached to the tank.

    • Do not lift the tank too much, or you risk damaging fuel lines, vacuum lines and spilling fuel.

    • There are small metal inserts that go into the front tank mounts. Make sure these do not fall out and get lost while working with the tank.

  4. 1999-2002 Suzuki SV650 Tank Replacement: passo 4, imagem 1 %32 1999-2002 Suzuki SV650 Tank Replacement: passo 4, imagem 2 %32 1999-2002 Suzuki SV650 Tank Replacement: passo 4, imagem 3 %32
    • Locate the petcock on the left underside of the tank. It hill have 2 hoses attached to it and will be next to the fuel level sensor.

    • Disconnect the vacuum hose from the petcock.

    • It is advisable to always remove this hose first to reduce the amount of fuel spilled.

    • Disconnect the fuel hose from the petcock

    • Disconnect the tank breather hose from the base of the tank.

  5. 1999-2002 Suzuki SV650 Tank Replacement: passo 5, imagem 1 %32 1999-2002 Suzuki SV650 Tank Replacement: passo 5, imagem 2 %32
    • Carefully lift the tank up and off the frame of the bike, being sure that the fuel level sensor wire does not get caught in the frame.

    • When you set your tank aside, be mindful of the petcock hose fittings, especially the vacuum fitting on the bottom. These fittings can easily be broken by the weight of the tank and are costly to replace.

Conclusão

To reassemble your device, follow these instructions in reverse order.

4 outras pessoas executaram este guia.

Phillip Takahashi

Membro desde: 08/22/11

86.617 Reputação

Autoria de 87 guias

Um comentário

Thanks . I have to reassemble the tank and I was not the one that took it apart so this tutorial is quite helpful. I had to buy a new rubber tank mount as they fall off easily also.

robert zuckerman - Responder

Adicione um comentário

Exibir estatísticas:

Últimas 24 horas: 2

Últimos 7 dias: 23

Últimos 30 dias: 73

Duração total: 14,642