Ir para o conteúdo principal

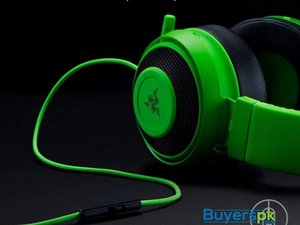
Product number: RZ04-02050600-R3M1 Available in green, white, black and quartz (pink) edition.

4 Perguntas Visualizar todos

Chewed wire. Tiny wires hard to see. Does not appear solder-able.

Block Image

We’ve had our Razer Kraken Pro headset cable chewed up by our cat. I’ve watched a few videos in repair but it appears highly flammable and we are looking for a proper repair method. Please help.

Responder a esta pergunta Também tenho esse problema

Esta é uma boa pergunta?

Pontuação 3
Adicionar um comentário

2 respostas

Wires should be able to be stripped of outter sheathing then seperated, stripped, and could be soldered (forgive me if i spelled that incorrectly).

If you can add a picture, i can possibly walk you through more as i have to do this more often then I'd like to admit.

Esta resposta foi útil?

Pontuação 0

2 comentários:

Hi there, see image.

por

@juliannecl so sodering and shrink wrapping each soder point would be the cleanest. Otherwise using butt connectors could serve as a way to get it to work but usually make the connection points overly bulky and may not be able to find with wire gauge. The tubes are easily found everywhere (most hardware stores, amazon, even walmart might carry them). You'll want to ensure you have a wire stripper that can easiley remove sheathing from each wire (One that go frome 22-32gauge should suffice).

https://youtu.be/qxqZJH3SfN4 goes into a lot more detail on propper soldering techniques. You dont need all the resin and silicon. But good way to try and set up since you are dealing with such small wires.

The other option (i cant remember if the pro v2 s usb or not) is replace the entire cable with any new USB cable. Remove speaker and then remove wiring taking note of what wire goes where. And utilizing a usb cable to replace and soder directly to board behind headset speaker.

por

Adicionar um comentário

If this is a USB one, get a new USB cable. If it’s a HEADPHONE and MIC connector, get one of those. To open up the headset, turn the ear cover on the left towards you. Simply unscrew the tiny screws at the bottom and under the sticker. When you get in there, un-saughter the cable. Now, saughter the new cable. Sometimes, this works successfully, sometimes it doesn’t. If it doesnt, try re-saughtering some stuff and make sure the cable isn’t bad (that you ordered). Hopefully this helps!

Hoping I didn’t type this after you fixed/bought it.

Esta resposta foi útil?

Pontuação 0
Adicionar um comentário

Adicionar a sua resposta

Julianne será eternamente grato(a).
Exibir estatísticas:

Últimas 24 horas: 0

Últimos 7 dias: 4

Últimos 30 dias: 23

Duração total: 2,034