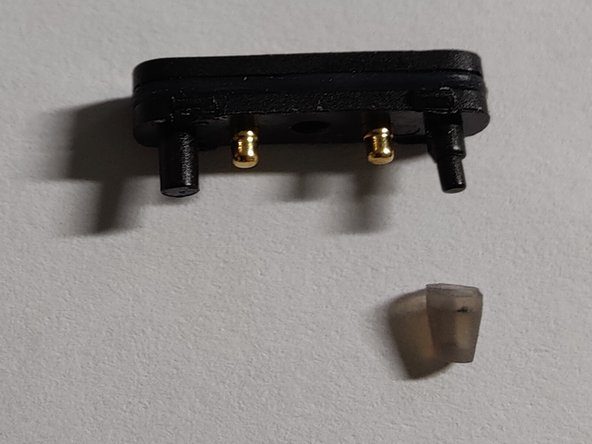
Ir para o conteúdo principal

O que você precisa

Este teardown (desmontagem analítica) não é um guia de reparo. Para reparar seu/sua VOOM, use o nosso manual de serviço.

  1. vixt VOOM re-fillable pod Teardown, Step one, go to step two.: passo 1, imagem 1 %32 vixt VOOM re-fillable pod Teardown, Step one, go to step two.: passo 1, imagem 2 %32 vixt VOOM re-fillable pod Teardown, Step one, go to step two.: passo 1, imagem 3 %32
    • Remove the cap.

    • There is a small filter/padding at the top, inside, the cap. It is very fragile after the pod has been used, and will disintegrate if removed.

  2. vixt VOOM re-fillable pod Teardown, Removing the bottom.: passo 2, imagem 1 %32 vixt VOOM re-fillable pod Teardown, Removing the bottom.: passo 2, imagem 2 %32 vixt VOOM re-fillable pod Teardown, Removing the bottom.: passo 2, imagem 3 %32
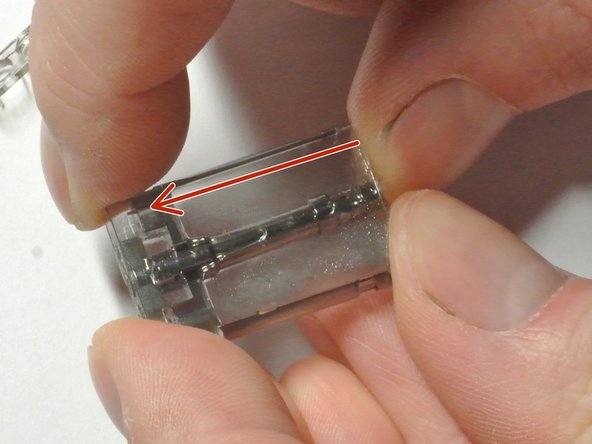
    • Pry the four tabs on the back of the pod

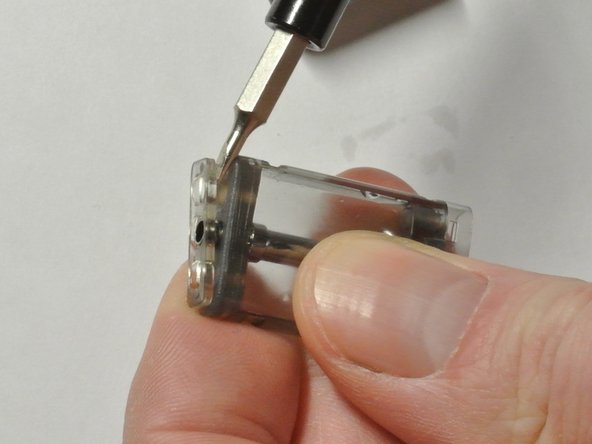
    • When one of the corners lift, start working on the next one.

    • Heads-up. The bottom part might fly away from you when it releases.

  3. vixt VOOM re-fillable pod Teardown: passo 3, imagem 1 %32 vixt VOOM re-fillable pod Teardown: passo 3, imagem 2 %32 vixt VOOM re-fillable pod Teardown: passo 3, imagem 3 %32
    • The tank has a thru-hole on one of the sides, sealed off with one of the legs of the bottom plate and a rubber cone.

  4. vixt VOOM re-fillable pod Teardown, Removing the top and seal.: passo 4, imagem 1 %32 vixt VOOM re-fillable pod Teardown, Removing the top and seal.: passo 4, imagem 2 %32 vixt VOOM re-fillable pod Teardown, Removing the top and seal.: passo 4, imagem 3 %32
    • Go in between the clear plastic and the silicone/rubber with the flathead and pry upwards, it's clipped on to the stem in the middle but it shouldn't be on with much force.

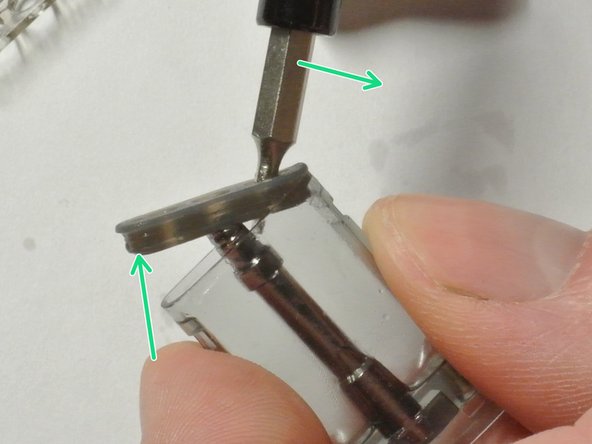
    • Insert the flathed into one of the holes of the rubber and bend away from the pod, and the rubber seal will pop off, there should be no resistance.

  5. vixt VOOM re-fillable pod Teardown: passo 5, imagem 1 %32 vixt VOOM re-fillable pod Teardown: passo 5, imagem 2 %32
    • The transparent plastic clips over the stem, other parts removed for clarity

  6. vixt VOOM re-fillable pod Teardown, Removing stem.: passo 6, imagem 1 %32 vixt VOOM re-fillable pod Teardown, Removing stem.: passo 6, imagem 2 %32 vixt VOOM re-fillable pod Teardown, Removing stem.: passo 6, imagem 3 %32
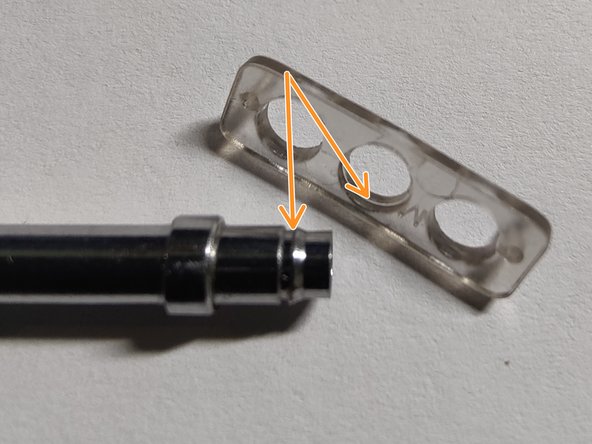
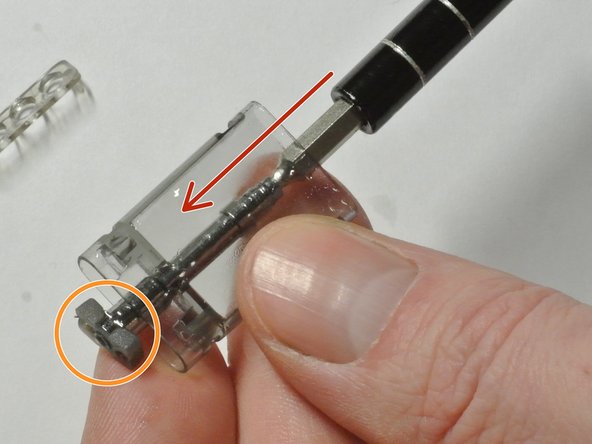
    • Push on the stem from the top of the pod towards the bottom, when it releases use something to push the stem further, from the top of the pod.

    • Do not pull on the rubber part that come out of the bottom (orange), this is the coil and has hairline wires attached between the rubber and the coil.

  7. vixt VOOM re-fillable pod Teardown, Removing coil, and cleaning.: passo 7, imagem 1 %32 vixt VOOM re-fillable pod Teardown, Removing coil, and cleaning.: passo 7, imagem 2 %32 vixt VOOM re-fillable pod Teardown, Removing coil, and cleaning.: passo 7, imagem 3 %32
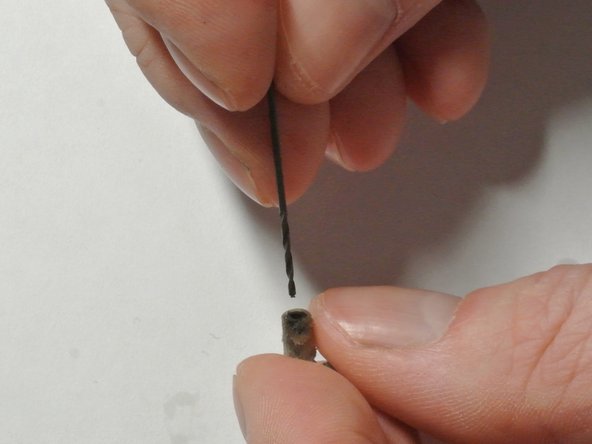
    • Use the back of a drillbit, or something similar, around 1-2mm dia. to push out the coil from the top of the stem.

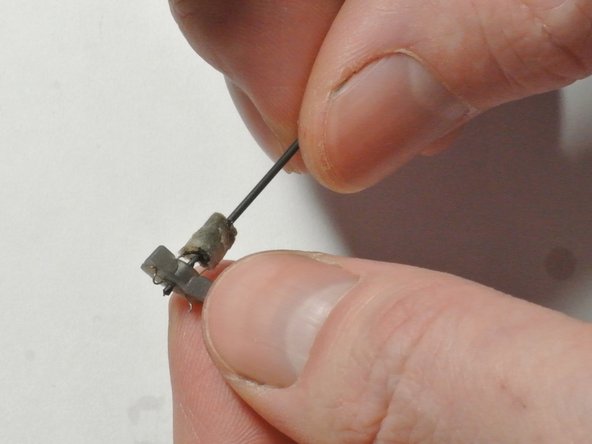
    • Try to push it out by scraping the edge of the stem until you reach the top edge of the coil. Pushing in the center can cause damage to the coil itself.

    • Use a 1mm drillbit to de-clog the center bore of the coil, very carefully.

    • Sensitive parts, be very careful.

  8. vixt VOOM re-fillable pod Teardown, Finished.: passo 8, imagem 1 %32
    • Here are the parts laid to bare

David

Membro desde: 08/21/11

921 Reputação

Autoria de 4 guias

0 comentários

Adicione um comentário

Exibir estatísticas:

Últimas 24 horas: 0

Últimos 7 dias: 0

Últimos 30 dias: 10

Duração total: 536