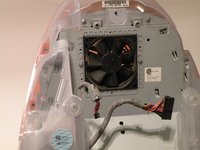
Ir para o conteúdo principal

O que você precisa

Este teardown (desmontagem analítica) não é um guia de reparo. Para reparar seu/sua iMac G3 Model M4984, use o nosso manual de serviço.

  1. iMac G3 Model M4984 Teardown, Logic Board: passo 1, imagem 1 %32
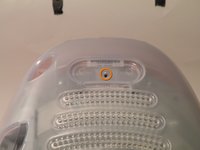
    • The iMac G3. This was a great computer for the time, and had plenty of features.

  2. iMac G3 Model M4984 Teardown: passo 2, imagem 1 %32
    • Start by flipping the iMac upside-down. It may help to lay it on a towel, so you don't damage the screen, or scratch the face.

  3. iMac G3 Model M4984 Teardown: passo 3, imagem 1 %32 iMac G3 Model M4984 Teardown: passo 3, imagem 2 %32 iMac G3 Model M4984 Teardown: passo 3, imagem 3 %32
    • Remove this Phillips screw.

    • Using a flathead screwdriver, work your way around the bottom cover, until it comes off.

    • Then, lift the bottom cover up and out, and set it aside.

  4. iMac G3 Model M4984 Teardown: passo 4, imagem 1 %32 iMac G3 Model M4984 Teardown: passo 4, imagem 2 %32 iMac G3 Model M4984 Teardown: passo 4, imagem 3 %32
    • Now, remove the DB-15 Video connector from the logic board.

    • It may be helpful to use a Phillips screwdriver to remove the thumbscrews.

  5. iMac G3 Model M4984 Teardown: passo 5, imagem 1 %32 iMac G3 Model M4984 Teardown: passo 5, imagem 2 %32 iMac G3 Model M4984 Teardown: passo 5, imagem 3 %32
    • Remove the power cable from the logic board assembly.

  6. iMac G3 Model M4984 Teardown: passo 6, imagem 1 %32 iMac G3 Model M4984 Teardown: passo 6, imagem 2 %32
    • Remove the front panel connector. (You may also need to remove an additional screw that connects the front panel connector to the logic board assembly).

  7. iMac G3 Model M4984 Teardown: passo 7, imagem 1 %32 iMac G3 Model M4984 Teardown: passo 7, imagem 2 %32 iMac G3 Model M4984 Teardown: passo 7, imagem 3 %32
    • Now, remove these Phillips screws.

    • Now, grab the logic board assembly by the piece of plastic, and lift it out.

  8. iMac G3 Model M4984 Teardown: passo 8, imagem 1 %32
    • The logic board assembly. This is the heart of the computer, it contains the motherboard, CPU, RAM, V-RAM, PRAM battery, the hard drive, and the optical drive.

  9. iMac G3 Model M4984 Teardown, Bottom Cover: passo 9, imagem 1 %32
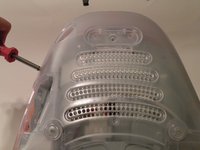
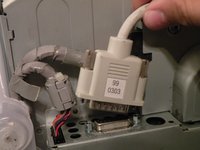
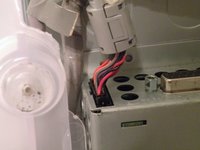
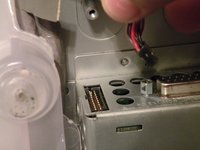
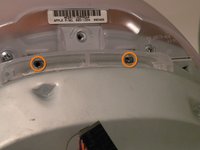
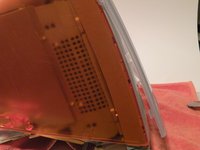
    • To remove the bottom cover, remove these phillips screws, and pull the bottom cover off the iMac. (Start with the very back and use a flat head screwdriver to pop the main clip. The rest will come off relatively easily.)

  10. iMac G3 Model M4984 Teardown: passo 10, imagem 1 %32 iMac G3 Model M4984 Teardown: passo 10, imagem 2 %32 iMac G3 Model M4984 Teardown: passo 10, imagem 3 %32
    • Removing the faceplate:

    • Remove these phillips screws.

    • Now, pivot the faceplate up about 60 degrees and pull it away from the imac, with some wiggleing, it should come free

Chris Green

Membro desde: 10/11/09

38.086 Reputação

Autoria de 49 guias

Equipe

Master Techs Membro de Master Techs

Community

329 Membros

Autoria de 1.452 guias

2Comentários do guia

yo what happened to this lmao

Crystal Haugh - Responder

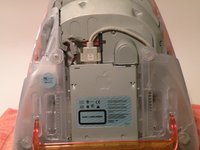
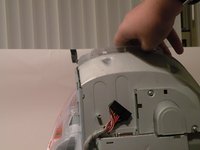
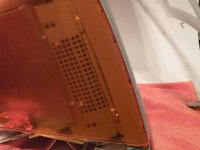
The last step was left off by the previous post. The last plastic piece to pull is tricky. Do not try and pry it off because there are literal hooks that link with the inner shroud. You CAN get it off with a little muscle once you understand how they hook inside. Here is a video from MOOT that explains. Basically, the trick is (with the iMac on it's bottom, CRT facing you), you must yank the sides upwards to unhook them. then you can work them out.

novagiant - Responder

Comentar

Visualizações:

Últimas 24 horas: 3

Últimos 7 dias: 20

Últimos 30 dias: 86

Ao todo: 10,911