Ir para o conteúdo principal

Este teardown está em andamento – Atualizar periodicamente para ver as últimas alterações!

O que você precisa

  1. Sony Xperia U Teardown, Sony Xperia U Teardown: passo 1, imagem 1 %32
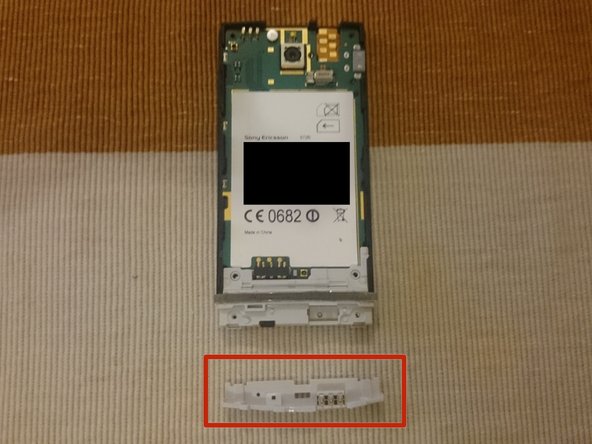
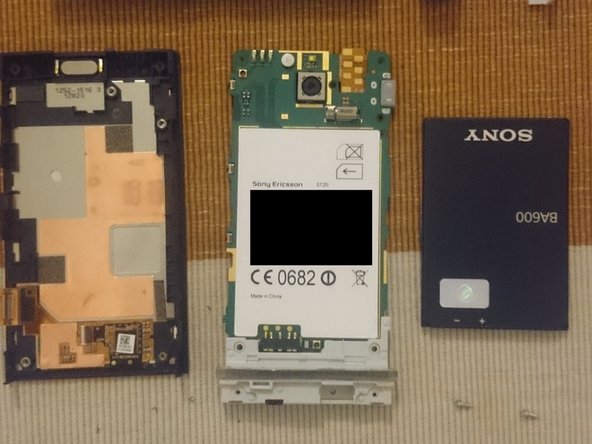
    • Remove the back cover and the bottom clip. And also remove the sim card and battery.

  2. Sony Xperia U Teardown: passo 2, imagem 1 %32
    • Remove the 6 T5 screws

  3. Sony Xperia U Teardown: passo 3, imagem 1 %32
    • Remove the back piece, reveiling the headphone jack, speaker and the Liquid contact indicator.

    • Camera and flash

    • Vibrating motor

    • Headphone jack

    • Speaker

    • Liquid contact indicator

  4. Sony Xperia U Teardown: passo 4, imagem 1 %32 Sony Xperia U Teardown: passo 4, imagem 2 %32
    • Remove the 2 T5 screws.

    • Remove the lower antenna.

  5. Sony Xperia U Teardown: passo 5, imagem 1 %32 Sony Xperia U Teardown: passo 5, imagem 2 %32
    • Carefully remove the motherboard being aware on the lower left edge, there is the display connector.

    • Be aware of the display connector on the lower left.

  6. Sony Xperia U Teardown: passo 6, imagem 1 %32 Sony Xperia U Teardown: passo 6, imagem 2 %32 Sony Xperia U Teardown: passo 6, imagem 3 %32
    • Removal back and bottom cap

    • Screen + main case, motherboard + antenna, battery

    • Back casing holding the headphone jack, speaker and liquid contact indicator.

Anthony

Membro desde: 07/29/14

201 Reputação

Autoria de 1 guia

0 comentários

Adicione um comentário

Exibir estatísticas:

Últimas 24 horas: 0

Últimos 7 dias: 0

Últimos 30 dias: 4

Duração total: 3,086