Ir para o conteúdo principal

O que você precisa

Este teardown (desmontagem analítica) não é um guia de reparo. Para reparar seu/sua Sega CD, use o nosso manual de serviço.

  1. Sega CD Teardown, Sega CD Plastic Housing Removal: passo 1, imagem 1 %32 Sega CD Teardown, Sega CD Plastic Housing Removal: passo 1, imagem 2 %32
    • Using a Phillips head screwdriver remove six screws from the bottom of the console.

    • The six screws are marked.

  2. Sega CD Teardown: passo 2, imagem 1 %32
    • Remove the two screws that attach the Genesis' connector to the rest of the console.

    • The two screws are marked in the diagram.

  3. Sega CD Teardown: passo 3, imagem 1 %32
    • Slide the lock tab to the left to separate the halves of the console.

  4. Sega CD Teardown: passo 4, imagem 1 %32
    • Lift from the left side to remove the top of the case.

  5. Sega CD Teardown: passo 5, imagem 1 %32
    • Using the spudger, pry the cover off of the Genesis attachment.

  6. Sega CD Teardown: passo 6, imagem 1 %32
    • Lift the top of the case to remove the cover.

  7. Sega CD Teardown: passo 7, imagem 1 %32
    • Remove the faceplate by pulling it up, then out.

  8. Sega CD Teardown, Genesis Connector: passo 8, imagem 1 %32 Sega CD Teardown, Genesis Connector: passo 8, imagem 2 %32
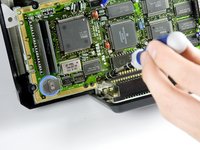
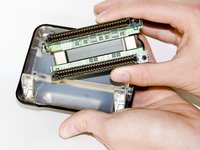
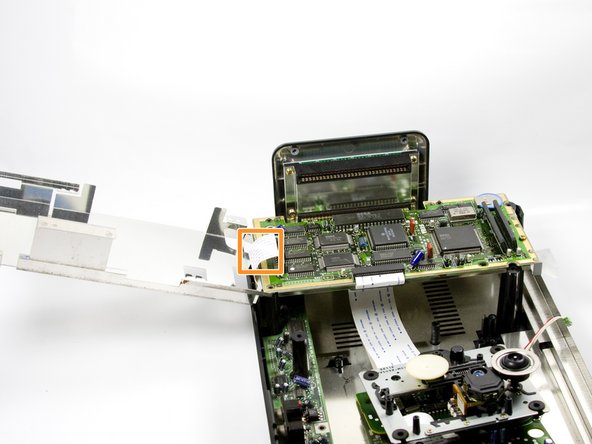
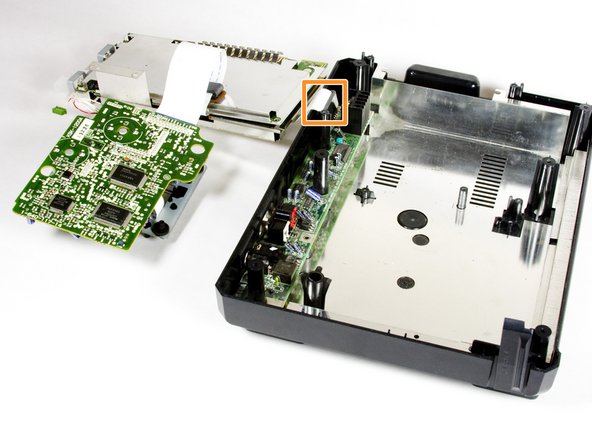
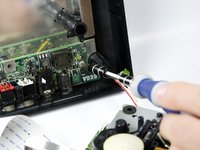
    • Using a #00 Philips screwdriver remove the two screws that attach the Genesis adapter to the console.

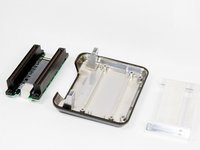
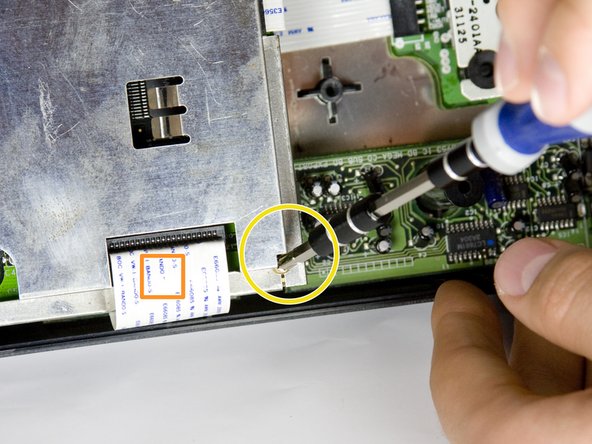
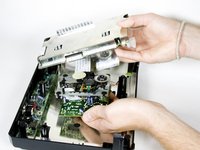
    • Disconnect the adapter from the console by carefully pulling the adapter out.

  9. Sega CD Teardown: passo 9, imagem 1 %32
    • Remove the four screws from the metal plate as shown using a #00 Philips screwdriver.

    • The four half inch bronze screws are indicated by the yellow marking circles.

  10. Sega CD Teardown: passo 10, imagem 1 %32 Sega CD Teardown: passo 10, imagem 2 %32
    • Carefully remove the metal cover from the connector by sliding the cover up and out.

  11. Sega CD Teardown: passo 11, imagem 1 %32 Sega CD Teardown: passo 11, imagem 2 %32
    • Remove the connector from the housing.

  12. Sega CD Teardown, CD Tray: passo 12, imagem 1 %32 Sega CD Teardown, CD Tray: passo 12, imagem 2 %32
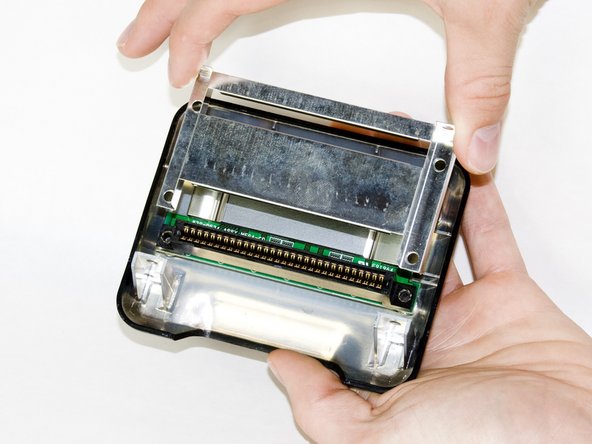
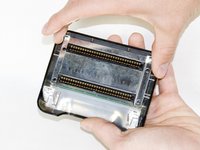
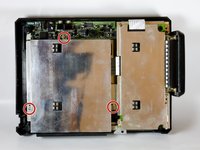
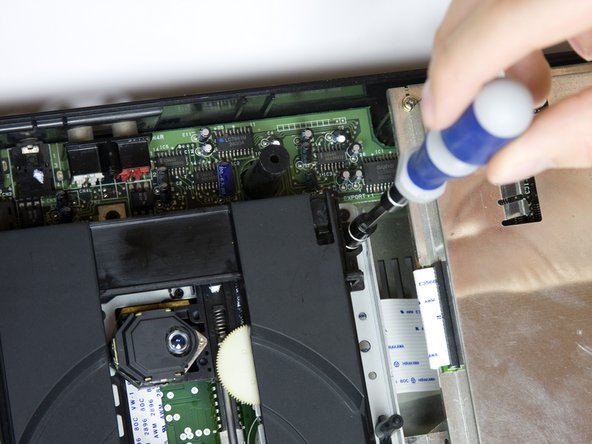
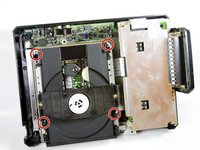
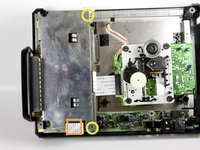
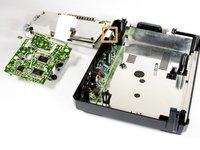
    • Remove metal plate by unscrewing the three screws with the Phillips head screwdriver and then lifting the plate.

    • The three screws are shown on the diagram.

  13. Sega CD Teardown: passo 13, imagem 1 %32 Sega CD Teardown: passo 13, imagem 2 %32
    • Remove the two screws from the plastic bar.

    • The two screws are shown pictured.

  14. Sega CD Teardown: passo 14, imagem 1 %32 Sega CD Teardown: passo 14, imagem 2 %32
    • To remove the CD tray

    • Remove the four screws with the Phillips head screwdriver.

  15. Sega CD Teardown: passo 15, imagem 1 %32
    • Carefully unplug the wire connected to optical reader.

  16. Sega CD Teardown: passo 16, imagem 1 %32 Sega CD Teardown: passo 16, imagem 2 %32
    • Remove the four screws on the underside of the CD tray with a small Phillips head screwdriver.

    • The four screws are highlighted on the diagram.

    • The four springs below the circuit board are attached to the screws, so be careful not to lose them when you remove the screws.

  17. Sega CD Teardown: passo 17, imagem 1 %32
    • Carefully remove the CD tray from circuit board.

  18. Sega CD Teardown, Motherboard/AC Power Board: passo 18, imagem 1 %32 Sega CD Teardown, Motherboard/AC Power Board: passo 18, imagem 2 %32 Sega CD Teardown, Motherboard/AC Power Board: passo 18, imagem 3 %32
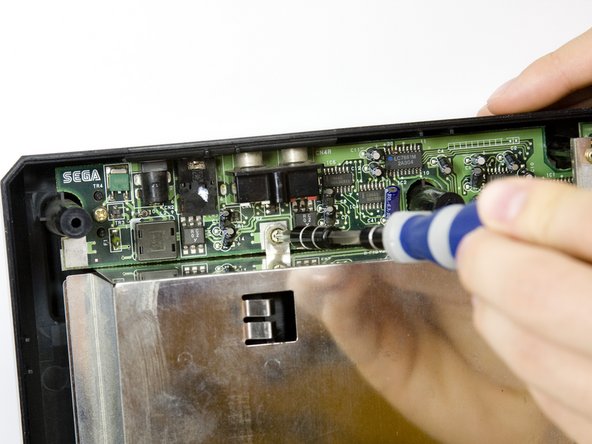
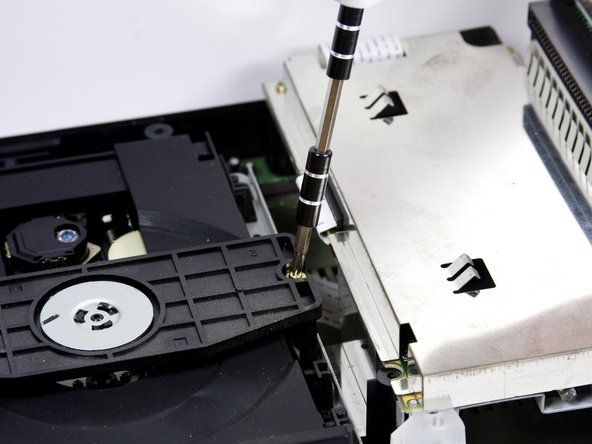
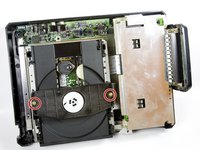
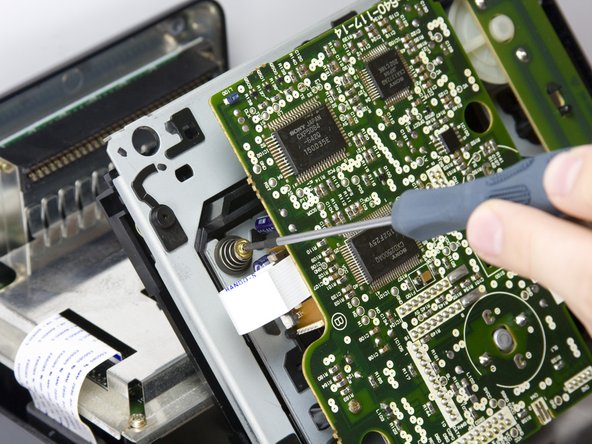
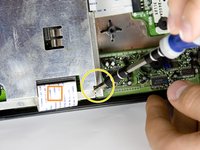
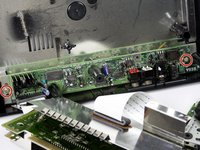
    • Remove the two bronze screws from the metal plate with a medium Phillips head screwdriver.

    • The screws are marked on the diagram.

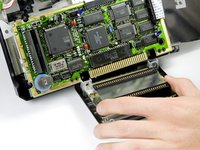
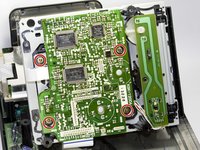
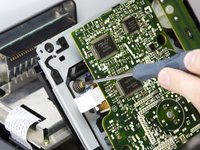
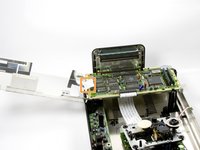
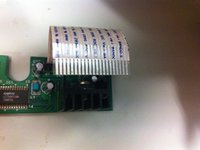
    • Carefully lift the metal plate up to expose the motherboard.

    • There is a wire strip running through the metal plate that is soldered to motherboard and power supply board. The plate cannot be completely removed. Do NOT force plate upwards. All the ribbon cables can be safely unplugged by simply pulling them out of their slots.

  19. Sega CD Teardown: passo 19, imagem 1 %32 Sega CD Teardown: passo 19, imagem 2 %32
    • Carefully lift off the metal plate, the motherboard, and the CD tray circuit board. Then, flip each piece over, as pictured.

  20. Sega CD Teardown: passo 20, imagem 1 %32 Sega CD Teardown: passo 20, imagem 2 %32 Sega CD Teardown: passo 20, imagem 3 %32
    • Remove the two screws from the power supply using a medium Phillips head screwdriver.

    • The two screws are marked on the diagram.

  21. Sega CD Teardown: passo 21, imagem 1 %32
    • Remove the power supply unit from the console by lifting the unit up.

  22. Sega CD Teardown: passo 22, imagem 1 %32
    • This is what the motherboard unit will look like once removed.

  23. Sega CD Teardown, Sega CD Teardown: passo 23, imagem 1 %32
    • Teardown complete!

Ryan Kotzebue

Membro desde: 10/07/10

271 Reputação

Autoria de 4 guias

Equipe

Cal Poly, Team 5-14, Maness Fall 2010 Membro de Cal Poly, Team 5-14, Maness Fall 2010

CPSU-MANESS-F10S5G14

Membros da 4

Autoria de 12 guias

0 comentários

Adicione um comentário

Exibir estatísticas:

Últimas 24 horas: 2

Últimos 7 dias: 14

Últimos 30 dias: 90

Duração total: 16,255