Introdução
Today we turn our tools on a rather inconspicuous phone—one of the newest members in Samsung’s mid-tier Galaxy J series, the J6. It debuted alongside the J4 and J8, so what makes it special? Well for one thing, it’s getting the teardown treatment.
Its predecessors, the J3 and J5, seem to be particularly popular amongst our Latin American and Spanish-speaking fixer friends. Since they asked with a polite por favor, we are only too happy to answer. Let’s give them what they want, and peek inside the J6.
To keep up-to-date on all of our teardown exploits, follow us on Instagram, Twitter, and Facebook.
O que você precisa
-
-
With annual updates for the J3, J5 and J7 phones, the J6 has its debut this year.
-
A short spec check shows:
-
5.6" Super AMOLED display with a resolution of 720 × 1480
-
Octa-core, 1.6 GHz Cortex-A53 Exynos 7870 processor, paired with 3 GB of RAM
-
Built-in 32 GB storage (with an additional 256 GB available via microSD card expansion)
-
13 MP primary rear-facing camera, plus an 8 MP selfie cam
-
149.3 × 70.2 × 8.2 mm in size, and 154 g on the scale
-
Android 8.0
-
-
-
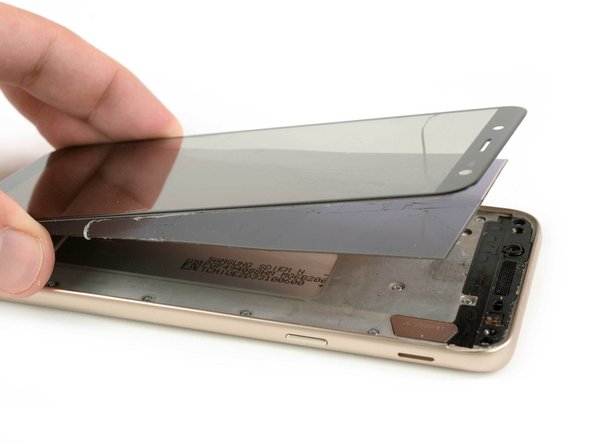
With no exterior screws to guide the way, we attack the back cover as a possible point of entry—but after some unsuccessful heating and prying, we give up and try our luck on the display.
-
After some iOpener and iSclack action, the touch panel seems to separate pretty cleanly. Is this a repairable, non-bonded display like back in the old days?
-
Sadly, no—it seems we were foiled by some extra-strong adhesive under the sAMOLED panel, which held fast while the touch panel glue gave way. End result: busted display.
-
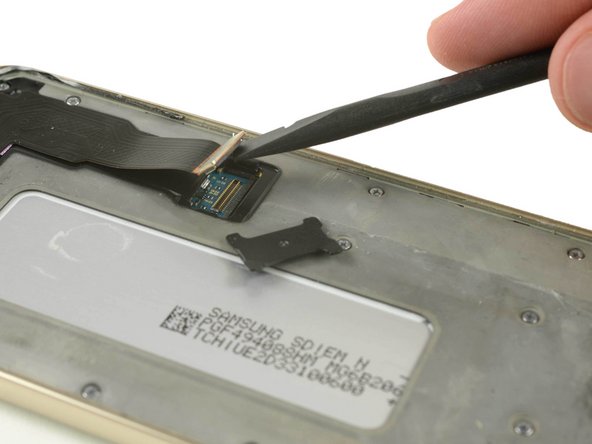
We unplug the protected connector and remove the newly unfused display assembly to continue our journey.
-
-
-
It seems those screws we hoped to see on the outside were already used up on the midframe.
-
So we bring out our Mako Driver Kit to remove a bunch of Phillips screws …
-
… and finally pop out the midframe.
-
-
-
-
On the other side of the midframe, we finally find the battery—glued in place.
-
After a little heat and some gentle convincing, we can push out the power pack for inspection.
-
Coming in at 11.55 Wh (3,000 mAh at 3.85 V), this is on par with last year's J5—and a bit weaker than the 2017 J7 Pro (3,600 mAh).
-
-
-
On the front of the motherboard, we find:
-
Samsung KLMBG2JETD-B041 32 GB NAND Flash Memory
-
Samsung K4EHE304EC-AGCF ? 3 GB Memory layered over the Exynos 7870 chip
-
And on the back, we have:
-
Samsung Shannon 515 power management IC
-
Samsung Shannon 925 RF Tranceiver
-
Skyworks Multiband Power Amplifier SKY77656-11
-
- The only screws used are standard Phillips screws (granted, there are almost too many).
- Display repair is prioritized, since it is the first part out—but at the cost of probably damaging it, making repairs to other components risky.
- The battery is buried beneath the motherboard and adhered to the midframe, hindering its replacement.
- The high-wear USB port is soldered to the motherboard, requiring a high level of skills and equipment for this all-too-common repair.


Considerações finais
Índice de reparabilidade


(10 é o mais fácil de reparar)

Equipe

Tobias Isakeit - Repairability Engineer Membro de Tobias Isakeit - Repairability Engineer
Business
1 Membro
Autoria de 1.092 guias
12 comentários
Where is the Simms card reader?
Cara, que aparelho complicado. Apliquei todos os métodos que conheço e a tela quebrou da mesma maneira que com vcs… Muito ruim! naõvou receber estes nem para troca de bateria… Alto risco de prejuízo…
Design feito para não facilitar manutenção. Se mantivessem o acesso dos parafusos pela parte traseira se conseguiria soltar a estrutura intermediária com o display ainda acoplado e depois, retirada a bateria, se removeria a cola sem destruir tudo… Design medíocre.. Ou bem planejado para ser descartável.
J6 não quer ligar
Aqui em nossa assistência, esquentamos a tela na maquina um pouco e após feito isso, começamos o trabalho da retirada do display, com a ajuda de sucção descolamos uma pequena fresta, e introduzimos pouco a pouco álcool 99,8% , e com a ajuda de uma espátula, para que possamos retirar o display sem maiores transtornos…paciência é de grande importância para abrir esse tipo de aparelho. Fazemos isso com todos os dispositivos que precisa retirar o display, e que seja amoled ( super amoled, oled, etc ) devido não correr o risco de manchar com o álcool, como acontece nos aparelhos com display LCD que mancha com o álcool que acaba penetrando nas camadas do lcd.