O que você precisa
-
Este passo não foi traduzido. Ajude a traduzi-lo
-
Keep track of all pieces removed from the device.
-
Gently pull off the device cover. The cover snaps on and off easily where the cover attaches to the Palm IIIc device
-
-
Este passo não foi traduzido. Ajude a traduzi-lo
-
Using a Phillips head screwdriver, take out the four screws on the back of the device. You may have to pull them out with your hands once they are unscrewed.
-
-
Este passo não foi traduzido. Ajude a traduzi-lo
-
Using a spudger, carefully pry open the front and back covers along the side seam.
-
-
Este passo não foi traduzido. Ajude a traduzi-lo
-
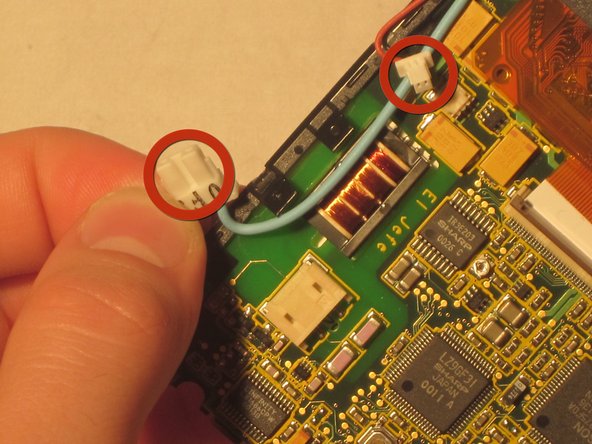
Unhook battery cable from the motherboard and remove the battery.
-
-
-
Este passo não foi traduzido. Ajude a traduzi-lo
-
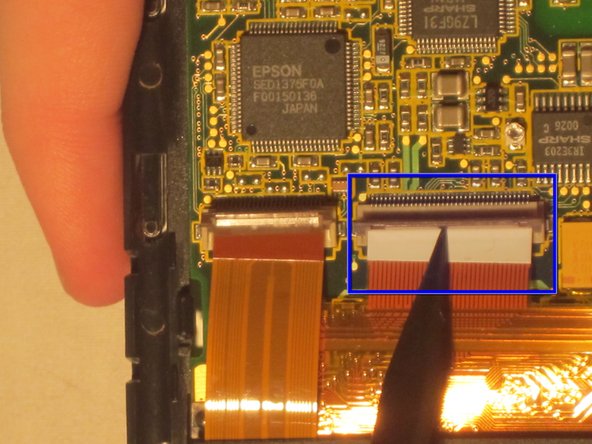
Behind the motherboard remove the brown plastic clamp and remove the front screen cover.
-
-
Este passo não foi traduzido. Ajude a traduzi-lo
-
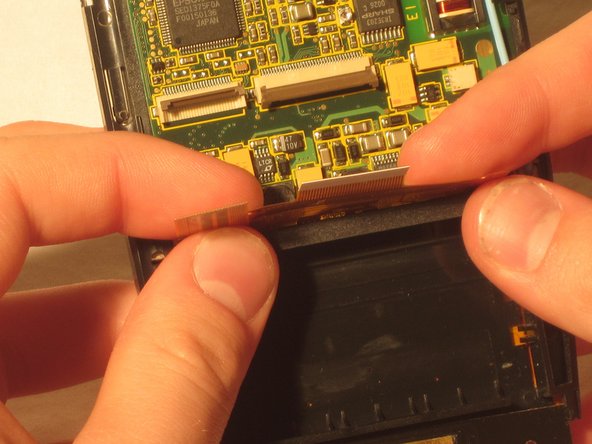
Pop out the other two brown plastic clamps to release the screen and buttons.
-
-
Este passo não foi traduzido. Ajude a traduzi-lo
-
The black clips on the edges of the device (see picture) must be unclipped to remove the motherboard.
-
Carefully remove the motherboard from the device, pulling the motherboard away from the clips.
-


Equipe

Cal Poly, Team 20-69, Walters Spring 2011 Membro de Cal Poly, Team 20-69, Walters Spring 2011
CPSU-WALTERS-S11S20G69
Membros da 5
Autoria de 8 guias