Introdução
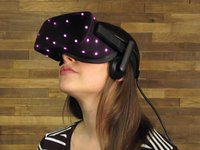
Alright, Palmer—you asked, and we answered. Last week we tore down the Oculus Rift CV1, and today we turn our heads to Constellation—Rift's counterpart IR camera. Did Oculus shoot for the stars like in their high-powered headset, or will their design decisions leave the Constellation virtually unrepairable? Only a teardown will tell.
Hungry for more? Feast your eyes on the latest teardowns and more by following us on Instagram, Twitter, or Facebook.
O que você precisa
-
-
We don't know too much about the Constellation sensor itself, but here are some specs:
-
Infrared sensor
-
Sweet stand
-
Standard USB 3.0 cable
-
-
Ferramenta utilizada neste passo:Jimmy$7.95
-
Separation of the crew capsule complete!
-
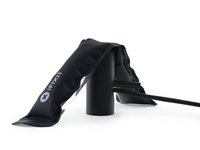
We locked our keys in the Constellation, so we're gonna try to Jimmy the door open.
-
And with just a few plastic clips holding the back panel in place, it pops off with in a snap.
-
And look! Promising screws... that go nowhere.
-
-
-
Let's try to smoke it out the other end. iOpener to full!
-
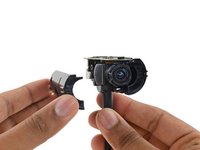
Hats off to the smallest suction cup we could find! With one good tug, the modestly adhered visible-light filter gives way to reveal the eye of the IR camera.
-
Because the Constellation sensor's job is to track LEDs that only give off infrared light, any other wavelength is just noise, making it harder for it to operate. This filter blocks out everything but IR, making it easier to pick out the LEDs.
-
-
-
-
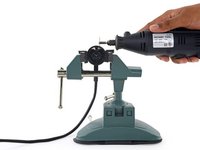
Okay, we asked nicely twice, but the components still won't budge—time for some aggressive negotiations.
-
We shuck the (well-rotary-tooled) outer casing and find an inner shell secured with some fiercely-glued screws.
-
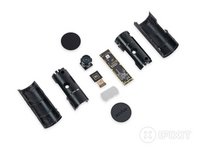
Whipping that away in short order, all that's left are the real guts of this sensor.
-
-
-
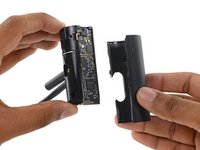
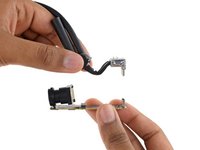
First out: that USB 3.0 Cable.
-
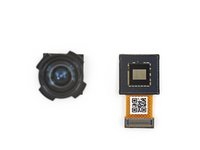
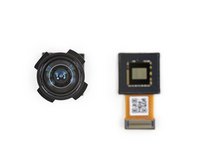
We remove the camera from the board, and the heat sink from the camera, and then the lens from the image sensor, and well, here we are.
Hello,
I have had a catastrophic failure! Any idea where I can buy a cable like this to the UK with a right angle connector so I could try and get the casing back on afterwards?
Thanks!
-
-
-
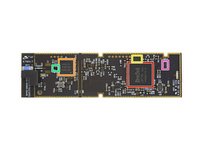
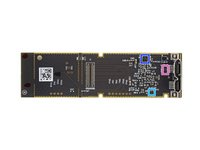
We're at the end of the line—let's take a peek at the silicon!
-
EtronTech eSP770U Webcam Controller
-
Nordic Semiconductor nRF51822 Bluetooth Smart and 2.4GHz proprietary SoC (also found in the Oculus Rift Headset)
-
Macronix MX25L1006E 1 Mb serial flash memory
-
STMicroelectronics BALF-NRF01D3 50 Ω Bluetooth balun
-
ON Semiconductor NC7SB3157L6X SPDT analog switch (likely)
-
ON Semiconductor NCP1529MUTBG adjustable 1 A DC-DC step down converter
-
ON Semiconductor ESD7004 4-ch. TVS diode array
is there a schematic or explanation on what the yellow holes are for? mby debugg pins? but still i would like to know if they are mby for USB?
-
-
-
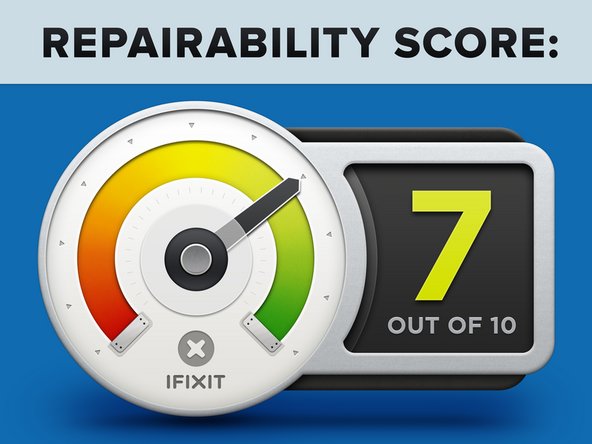
Oculus Rift Constellation Sensor Repairability Score: 7 out of 10 (10 is easiest to repair)
-
Stand and visible light filter are removable and can be replaced if damaged.
-
All main components (motherboard, camera, lens, and filter) are discrete and modular, making repairs fairly low cost and straightforward.
-
The USB cable plugs directly into the motherboard and can be swapped out quickly.
-
Strong adhesive holds the visible light filter in place.
-
Stand hardware takes significant force to remove and is not obviously removable without instructions.
-


17 comentários
But how do they assemble the thing together in the factory if you can't undo it without causing permanent damage?
Because it's meant to be bought again.
jvelez -
Glue. It's easy to glue things together. Hard to unglue them.
Ultrasonic welding, not glue.
Turns out you can pull it apart without cutting it open https://twitter.com/PalmerLuckey/status/...
karlww -
Are the cables supplied by S7 ?
This is what you got out of Luckey's comment? How about the microphone in the headset, the HDMI chip, or the fantastic contraption that magically tells the software what IPD you have as you change the lens separation? Oh yeah, HOW ABOUT THE BLOODY HEADPHONE DRIVERS?! Nobody should have to tell you to be thorough, good god iFixit, get your tools together.
LOL, it looks like you need to do a little more research before getting on your high-horse. Way to make iFixIt look like amateurs.
So now that Palmer has told you the real way to do it, when are you going to pull this faulty guide?
Note that you could glomp this thing back together with duct tape and hot glue and it would still function, as long as everything was plugged in and you kept stray light off the camera. Would be ugly but you don't see it when you're using it.
It turns out that in order to remove the outer shell, you simply pull the stand out of the tilt mount: http://imgur.com/a/5CIjH. No cutting required! The Repair Rating probably needs an update due to this.
Wow, April 28th, and still no update? BOO!
I guess they are just never going to update this article to acknowledge that cutting the casing in half was totally unnecessary and consequently their rating is completely wrong...
U3 looks like a i2c eeprom
this is an ordinary usb 3.0 webcam with some RF stuff to sync frames with the other cams / headset.
when connecting to pc it sends the usb descriptors, which would be normally “Hi im a webcam”
but it sends “Hi im a special device, dont &&^&^$^ touch me scum” windows ignores it and OVRserver process detects this and reads the standard UVC based data off it like a normal webcam.
i bet in the u3 eeprom there are the non standard descriptors, firmware and the mipi csi / camera module definitions for the etrontech controller.