Ir para o conteúdo principal

O que você precisa

Este teardown (desmontagem analítica) não é um guia de reparo. Para reparar seu/sua Adapter, use o nosso manual de serviço.

  1. Nokia AC-16U USB Power Adapter Teardown, Crack Open The Case: passo 1, imagem 1 %32 Nokia AC-16U USB Power Adapter Teardown, Crack Open The Case: passo 1, imagem 2 %32 Nokia AC-16U USB Power Adapter Teardown, Crack Open The Case: passo 1, imagem 3 %32
    • This power supply is slim and unusually attractive.

    • That white case is 39mm in diameter, and 15mm thick: pretty small for this power level (see heat sinks later).

    • The case is glued together, so you're not going to get into this one cleanly. I sawed a slot in the side, and used a screwdriver to crack the glue.

  2. Nokia AC-16U USB Power Adapter Teardown, What's Inside?: passo 2, imagem 1 %32 Nokia AC-16U USB Power Adapter Teardown, What's Inside?: passo 2, imagem 2 %32 Nokia AC-16U USB Power Adapter Teardown, What's Inside?: passo 2, imagem 3 %32
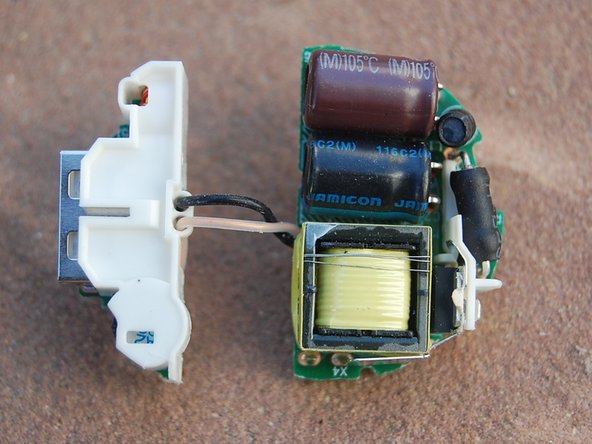
    • The wall power pins lead to two spring contacts.

    • There's a plastic barrier between the low voltage and high voltage sides (you can't get much better than that!).

  3. Nokia AC-16U USB Power Adapter Teardown, How about some detailed PCB Photos?: passo 3, imagem 1 %32 Nokia AC-16U USB Power Adapter Teardown, How about some detailed PCB Photos?: passo 3, imagem 2 %32
    • Pretty tight layout.

    • Note the heat sink with thermal interface material, and the landing pads for the line voltage springs.

Bryce Nesbitt

Membro desde: 11/30/14

1.023 Reputação

Autoria de 9 guias

Um comentário

Nice teardown

Omeke - Responder

Adicione um comentário

Exibir estatísticas:

Últimas 24 horas: 0

Últimos 7 dias: 7

Últimos 30 dias: 12

Duração total: 2,533