Introdução
The cream of the season's Android crop is here—it's Google's own showstopping phablet, the Nexus 6P. In an historical first, this device comes to us via Chinese manufacturer Huawei—and since we've never had a Huawei offering on the teardown table, we're excited to get cracking! Will the cream rise to the top of the repairability bottle—or will the Nexus 6P give us sour milk face? Let's find out.
There's more teardown on tap—follow along on Facebook, Instagram, and Twitter for all the disassembly shenanigans!
O que você precisa
Vídeo de Apresentação
-
-
Now that we've (un)wrapped up the opening act, it's time for the main event! Here's what Google has to say about its latest Android flagship:
-
Qualcomm Snapdragon 810 v2.1, 2.0 GHz octa-core 64-bit processor with Adreno 430 GPU
-
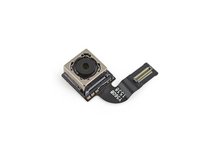
12.3 MP/4K rear-facing camera with laser-assisted autofocus and electronic image stabilization, 8 MP front-facing camera
-
5.7” WQHD 2560 × 1440 (518 ppi) AMOLED display
-
3 GB LPDDR4 RAM with 32 GB, 64 GB, or 128 GB of internal storage
-
USB Type-C Port
-
Nexus Imprint fingerprint reader and Android Sensor Hub
-
Android 6.0 Marshmallow
-
-
-
The all-metal, aeronautical-grade anodized aluminum chassis is another first for a Nexus device.
-
We're fairly certain that the 6P isn't designed to function as a ramp for your Tech Deck.
-
The raised camera mesa is apparently Huawei's strategy for squeezing a 4K camera into the new phone. Or, like us, they could just be obsessed with mesas.
-
Coming in for a closer look, we see that the glass lens cover slopes to a smooth curve at either end. Fancy!
-
-
-
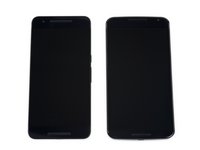
Compared with its fraternal twin, the Nexus 5X (top), the 6P shines through with its Wide Quad HD AMOLED display.
-
Just for fun, we also line up the 6P next to ye olde Nexus 6. With its nearly identical footprint, you get triple bonus points if you can tell which is which!
-
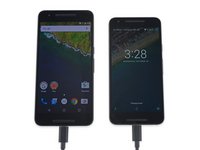
No word yet on what happens if you umbilical two 6Ps that are both at 50% power. We assume they'll both charge to 100%. Perpetual power, solved.
-
-
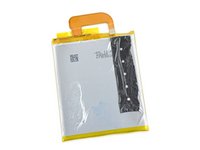
Ferramenta utilizada neste passo:iOpener$17.99
-
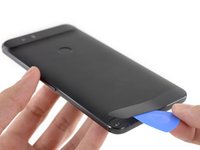
Like the Nexus 6, there are no visible screws on the rear cover. Unlike the Nexus 6, this is a unibody device, so there won't be any handy peel-off rear cover.
-
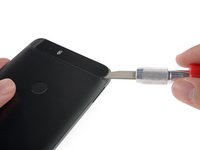
The 6P's smooth enclosure is broken only by this small, suspicious plastic panel at the bottom. Let's pile a hot iOpener on it and see what's inside.
-
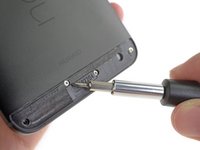
With enough heat, the panel is easily pried and peeled off, exposing four screws.
-
-
Ferramenta utilizada neste passo:iSclack$24.99
-
Getting to the screws under the plastic cover wasn't too hard, but signs now point to screws under the camera mesa cover too...
-
The panel in question is made of tight-fitting, easily shattered, glass. Removing this won't be any fun at all.
-
Several frustrating minutes later, we are able to deploy the iSclack, and pop the phone out of its rear enclosure.
-
-
-
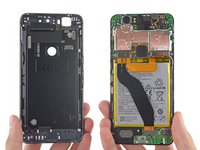
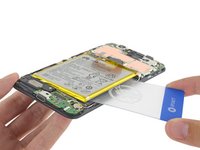
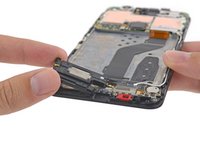
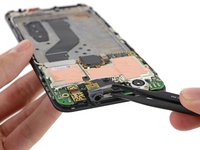
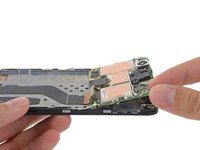
With the initial adhesive adventures behind us, the 6P has finally come out of its shell.
-
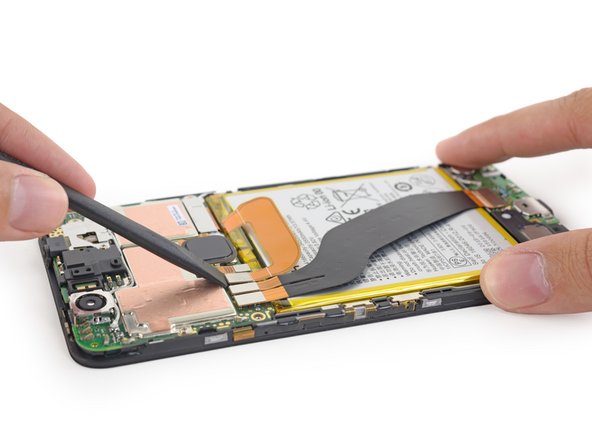
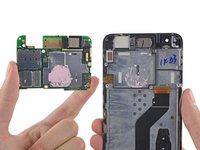
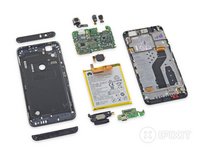
Unlike other phones we've seen lately, there's no discrete display assembly or easily removed rear cover here. Instead, the 6P's internals come out of the rear case in one mega-sized component assembly, leaving only the NFC antenna behind.
-
On the bright side, it looks like a daughterboard interconnect cable is all that stands between us and the battery!
-
-
-
-
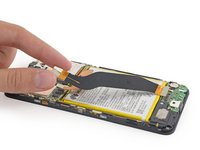
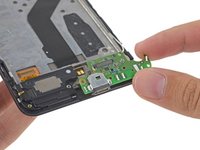
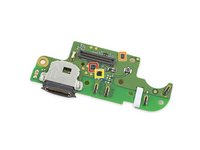
Next up, we pull out one of the smallest daughterboards we've ever seen. It's only a little more than a simple USB-C board.
-
The front side of the daughterboard features some control hardware and spring contacts for the LTE antenna...
-
Texas Instruments TUSB320 USB type-C port controller
-
AKM Semiconductor AK8789 hall sensor
-
Skyworks SKYxxxx antenna tuner (likely)
-
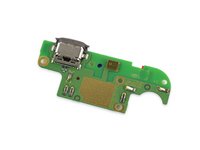
...And on the back we spy one of the 6P's three noise canceling microphones and a couple more contacts, for the vibrating motor and speaker.
-
-
-
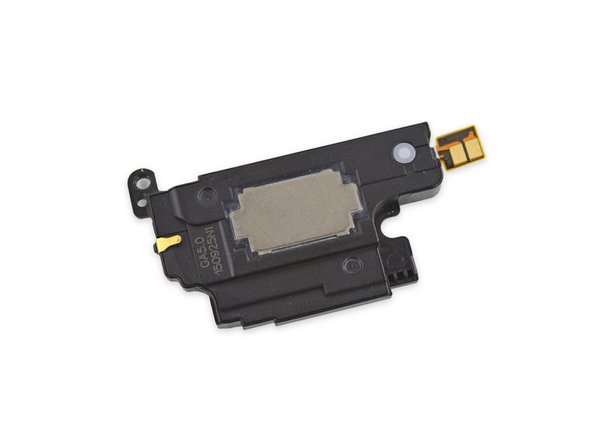
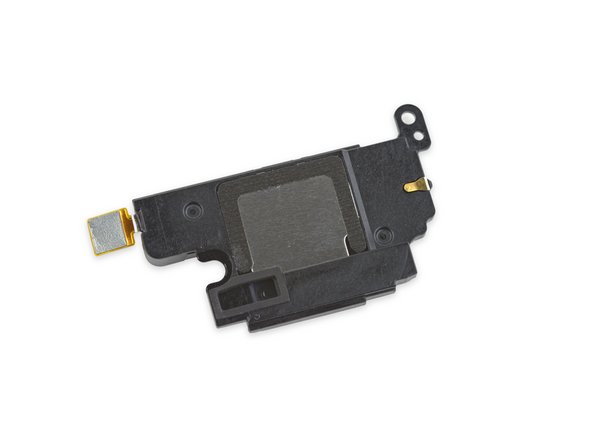
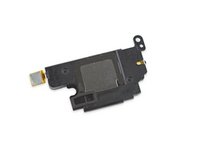
We continue our sleuthing along the bottom of the phone and come across what appears to be a speaker box.
-
We suspect Google's motive for including these front-facing speakers is simple enough: people prefer speakers that face them.
-
Of course that says nothing about how it actually sounds. We'll have to wait until we put our 6P back together to give it a listen.
-
-
-
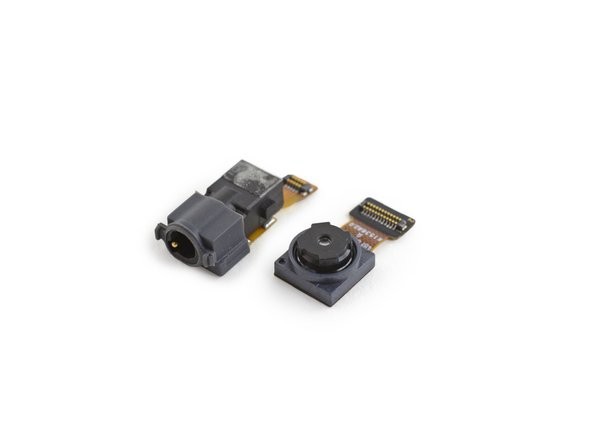
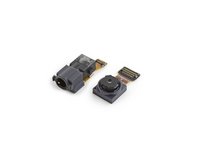
Next to fly free is the headphone jack, which we find encased in a little rubber sleeve. Hmmm.
-
While we've been watching carefully for signs of
lifewaterproofing, this small sleeve alone doesn't indicate whether Google might be preparing for rising tides. -
Moving along, we pull out the front-facing (i.e. selfie) camera. This 8 MP, ƒ/2.4 camera is up 3 MP from its counterpart on the 5X, but still maintains the same 1.4 micron pixel size.
-
We snap a few photos of our new-found peripheral friends and head for the core.
-
-
-
Most of the peripherals are out of the way, allowing us to focus on the motherboard—glue-free and topped off with a glob of
bubblegumthermal paste, just the way we like it. -
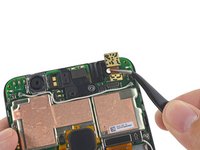
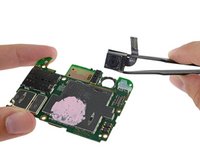
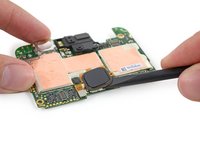
Well, this is awkward. Although the front-facing camera didn't put up much of a fight, it appears the main camera is soldered in place.
-
-
-
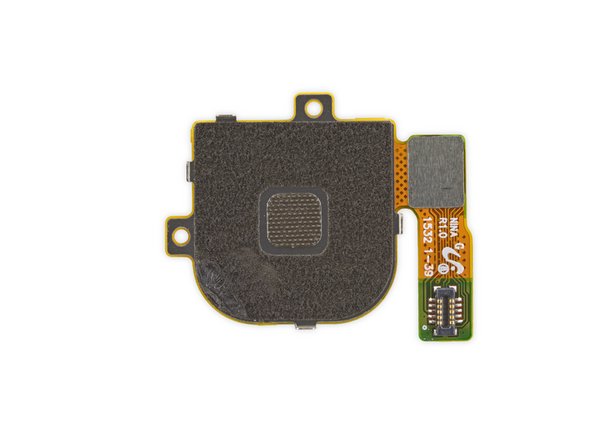
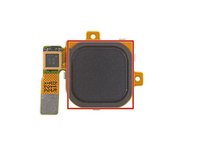
Spudger ready, we turn our attention to the square Nexus Imprint sensor.
-
It turns out this version of the Imprint sensor is quite different from the one we found in the 5X. The circular profile of this fingerprint reader is solely due to the round hole in the 6P's rear case.
-
Fingerprints FPC1020 fingerprint sensor
-
Fingerprints FPC2050 fingerprint controller (likely)
-
-
-
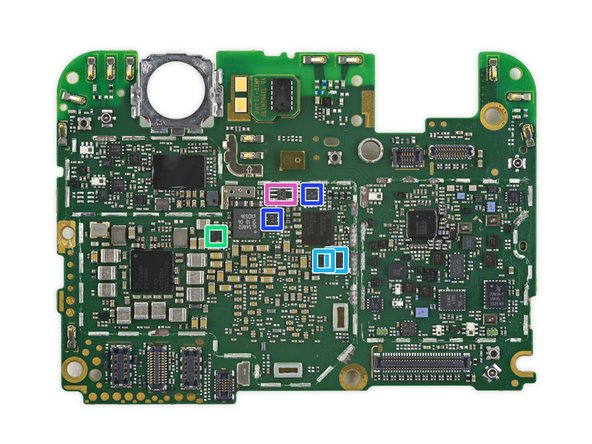
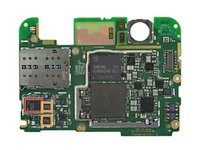
We smell chips! With the motherboard free and the EMI shielding pulled away, it's time for a look at the silicon:
-
Micron MT53B384M64D4NK-062 3 GB LPDDR4 RAM, layered over Qualcomm Snapdragon 810 v2.1, 2.0 GHz octa-core 64-bit CPU
-
Samsung KLMBG4GEND-B031 32 GB eMMC 5.0 NAND flash
-
Qualcomm PMI8994 power management IC (found in many 2015 Android smartphones including the Nexus 5X)
-
Qualcomm SMB1351 Quick Charge IC (Likely an iteration of SMB1358 found in the Nexus 5X)
-
Qualcomm QFE1100 envelope tracking IC
-
ST Microelectronics STM32F411CE 32-bit 100 MHz ARM Cortex-M4 RISC microcontroller
-
Maxim Integrated MAX98925 audio amplifier
-
-
-
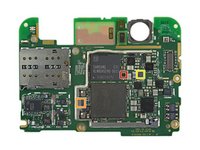
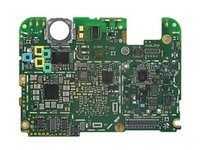
The back of the motherboard is brimming with even more control hardware:
-
Broadcom BCM4358 5G WiFi 802.11ac client
-
Qualcomm PM8994 power management IC (as seen in the Nexus 5X and HTC One M9)
-
NXP PN548 NFC controller
-
Qualcomm WCD9330 audio codec
-
Qualcomm WTR3925 RF transceiver
-
RF Microdevices RF1891 antenna switch module
-
Skyworks SKY77814-11 power amplifier module for LTE
-
-
-
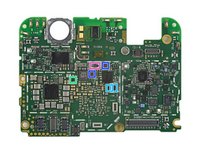
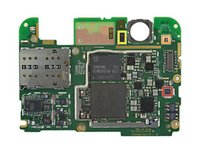
IC Identifications, pt. 2:
-
ON Semiconductor FAN53526UC89X 3.0 A step-down switching regulator
-
Texas Instruments display power supply (likely)
-
Texas Instruments TLV62084 step-down converter
-
Texas Instruments TPS61256A boost converter
-
Texas Instruments INA231 output current/voltage/power monitor
-
ON Semiconductor NLAS2750 dual SPDT analog switch and NCN1154 DP3T analog switch
-
Texas Instruments LMV7275 comparator
-
-
-
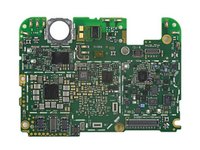
IC Identification, pt. 3:
-
Qorvo (formerly TriQuint) RF8117V RF power amplifier
-
Qorvo (formerly RF Micro Devices) RF7302 and RF7305 power amplifier module
-
Skyworks SKY15203 antenna switch
-
Skyworks SKY85608-11 5-Ghz, 802.11ac switch and low noise amplifier (likely)
-
NXP Semiconductor BGU80x9 GPS/GLONASS/Galileo/COMPASS LNA
-
-
-
Nexus 6P Repairability Score: 2 out of 10 (10 is easiest to repair)
-
Solid external construction improves durability.
-
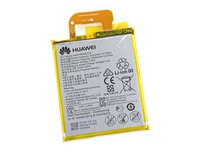
Once the arduous opening procedure is complete, the battery is immediately accessible.
-
It's very difficult—although not impossible—to open the device without damaging the glass camera cover. Because of the unibody design, this makes every component extremely difficult to replace.
-
The display assembly cannot be replaced without tunneling through the entire phone. This makes one of the most common repairs, a damaged screen, difficult to accomplish.
-
Tough adhesive holds the rear cover panels and battery in place.
-


48 comentários
For step 7, don't know if anyone has noticed the typo... You say the nexus 6p has 700mAh more battery than the iphone 6s... 6s has ~1750mAh and the 6p has 3450 mAh... That's almost double the battery size (1700 mAh difference). Just a stickler for an order of magnitude :D Thanks for the great teardown, sad to see the 6p isn't easily repaired...
We're actually comparing the battery in the Nexus 6P to the battery in the 6s Plus, not the 6s. The 6s Plus has a 2750 mAh battery :)
At least the battery is not "smaller than promised" like iPhone
The battery is Li-Po and not Li-ion tech which is more safer and lasts longer. I'd rather have the iPhone battery still. Lasts just as long in my experience.
Jake -
Li-Po means Li-polymer.Li-Po is included in Li-ion, which means lithium batteries.iPhone's batteries are the same Li-Po batteries,they're just written Li-ion.