Introdução
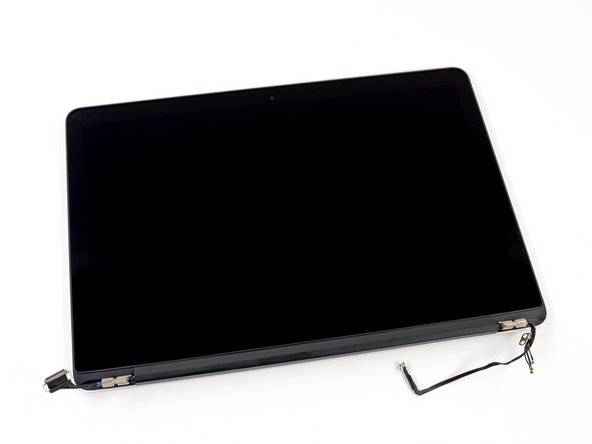
It's a teardown-o-rama! We're on teardown Round 3 this week, and we just won't stop. Our next contender: the newcomer MacBook Pro 13" Retina Display. This year's edition is a lightweight, but we're sure it'll pack a punch. No matter what it's packing, it's no match for our teeming teardown tacklers. Join us as we battle our way into Apple's latest laptop.
But wait, there's more: punch in your Facebook, jab(ber) on your Twitter, and catch a hook with your Instagram, and make sure you never miss a round.
O que você precisa
Vídeo de Apresentação
-
-
We've done this seven times before, but biting into a 13-inch professional-grade Apple is always a juicy treat.
-
Let's check out the latest tech specs:
-
13.3-inch 2560-by-1600 pixel (227 ppi) retina display
-
2.4 or 2.6 GHz dual-core Intel Core i5 processor (Optional 2.8 GHz dual-core Intel Core i7 available)
-
4, 8 or 16 GB DDR3L on-board RAM
-
128, 256, 512 GB or 1 TB SSD storage
-
Intel Iris Graphics
-
Thunderbolt 2, USB 3, and full-size HDMI I/O
-
-
-
Right away we spy something unfamiliar: Model A1502 has never before been seen in the wild. Does that mean this critter's all new? We're about to find out.
-
Starboard-side ports include:
-
SDXC Card Slot
-
Full-size HDMI with 1080p output
-
USB 3.0
-
More ports on the port side!
-
Another USB 3.0
-
2x Thunderbolt 2
-
-
-
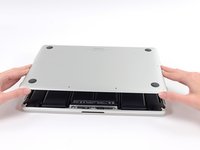
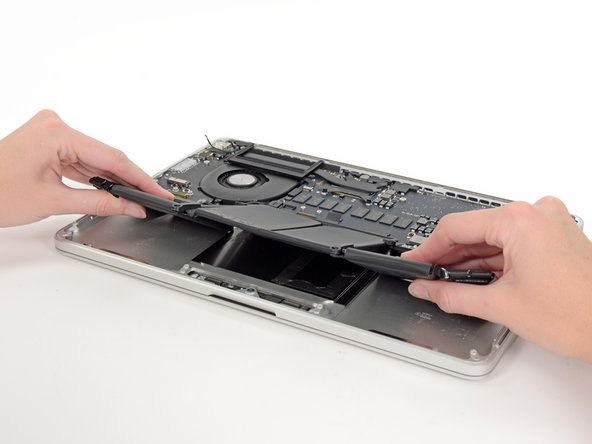
By now, we're not even surprised to find the lower case held in place by pentalobe screws. Just ... disappointed.
-
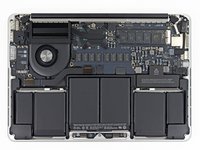
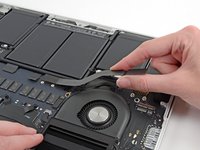
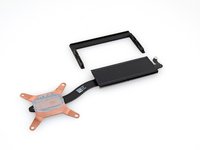
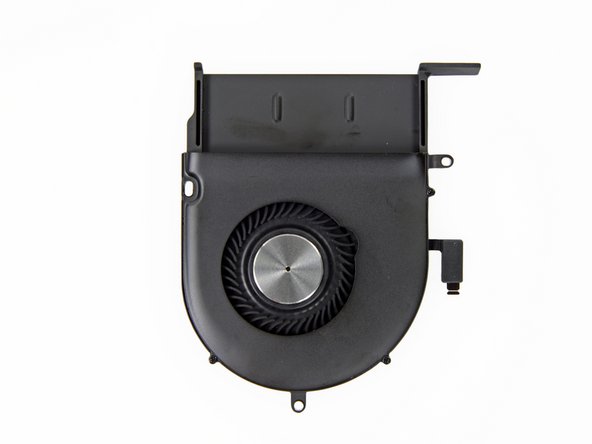
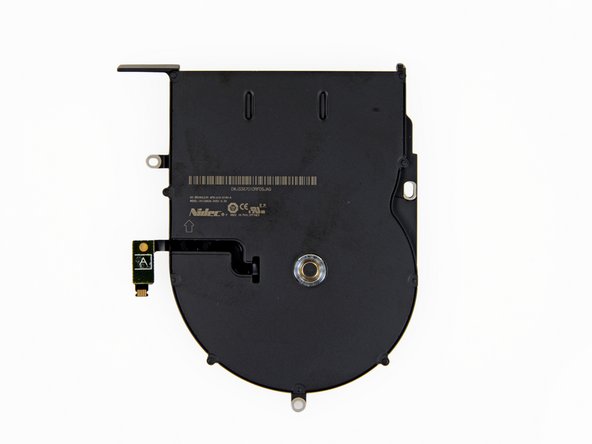
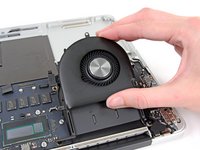
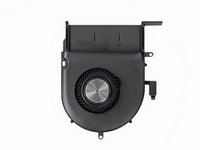
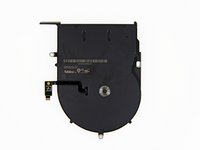
It looks like this new revision has lost its cool—or at least half of it, as we're now down to a single fan.
-
Apple's holiday redecorating didn't stop there: rearranged cabling, a displaced SSD, and a drastically revised battery now deck these halls.
-
-
-
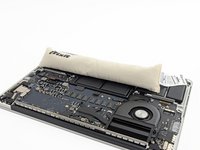
As ever, Apple warns of tragic consequences if we attempt to service, remove, or engage in polite conversation with the battery.
-
Warning, schmorning—you know how we feel about these labels.
-
First rule of disassembly: disconnect the power. There is no shock like forgetting where the power lies.
-
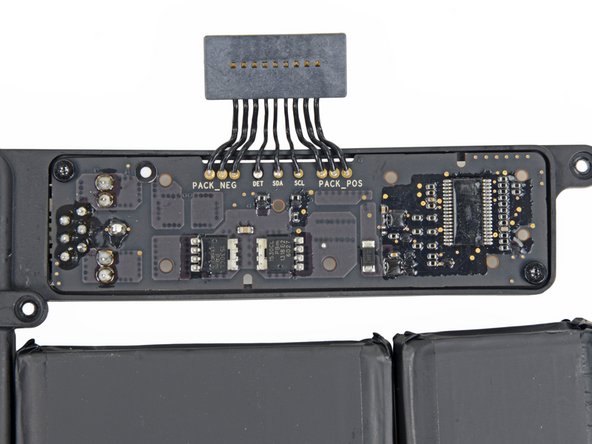
We pop off the battery connector, but that fancy new battery controller board ain't goin' nowhere.
-
Those little screws, they do nothing! The board hosts some tricky wires that are soldered and routed to hold it in place. This assembly is turning into a serious brain teaser.
-
-
-
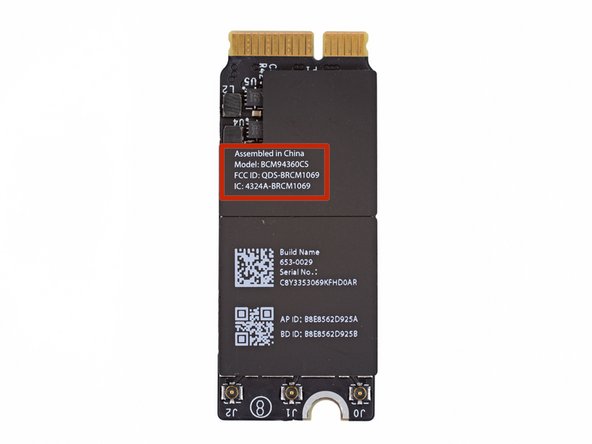
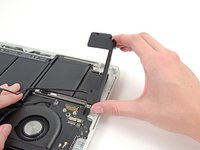
We spudger our way through the antenna cables and extract the slumbering AirPort card.
-
Don't worry—we promise to put it back before it wakes up.
-
It may reside in the same right-side location as ye olde model, but this here Broadcom BCM94360CS is a different animal.
-
New 802.11ac Wi-Fi tech claims triple the performance of 802.11n.
-
-
-
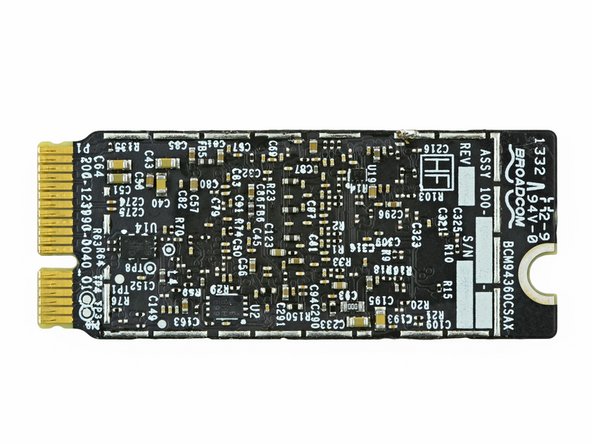
Taking a peek under the covers of the revised AirPort Card, we find:
-
Broadcom BCM4360 5G Wi-Fi 3-Stream 802.11ac Gigabit Transceiver
-
Broadcom BCM20702 Single-Chip Bluetooth Processor with a High Performance Integrated 2.4-GHz RF Transceiver
-
Skyworks SE5516 Dual-Band 802.11a/b/g/n/ac WLAN Front-End Module
-
-
-
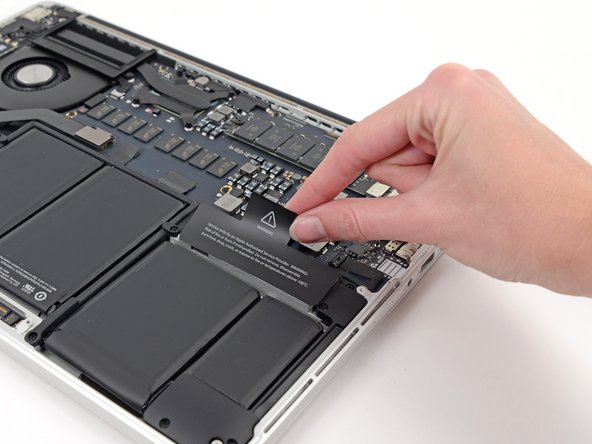
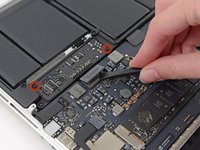
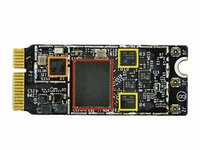
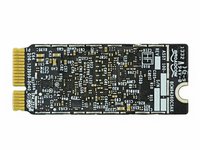
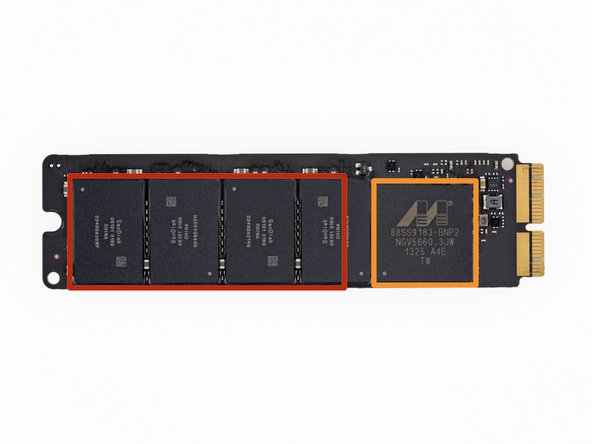
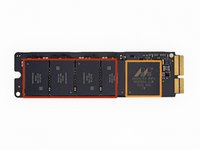
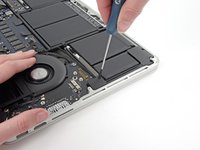
SSDs may not spin like other hard-disk drives, but the one in the 13" MacBook Pro Retina sure does like to hop around!
-
This Pro comes with a base 128 GB of flash storage, with the larger models sporting 256 or 512 GB.
-
Notable bits and pieces:
-
SanDisk 05131 016G 16 GB NAND Flash (total of 8 x 16 GB = 128 GB)
-
Marvell Semiconductor 88SS9183 SSD Controller
-
SK Hynix H5TQ2G63DFR DDR3-1600
-
-
-
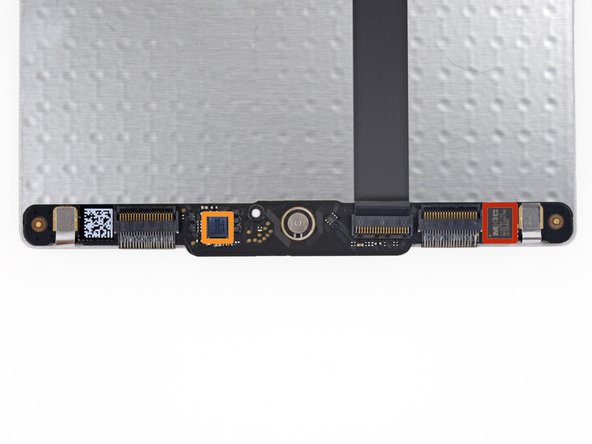
-
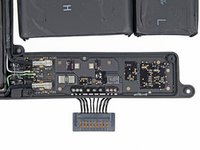
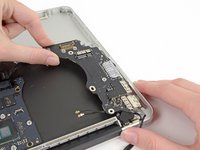
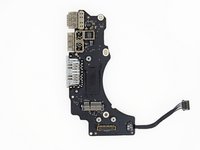
Wingardium leviosa! The I/O board cable practically floats out of its sockets.
-
Our handy-dandy
magic wandPro Tech Screwdriver makes speaker screw removal seem like magic. -
Another swish and flick and the speakers are charmed out of the rear case.
-
We're happy to report that these speakers-who-must-not-be-named are fairly easy to remove—no dark magic required.
-
-
Ferramenta utilizada neste passo:iOpener$17.99
-
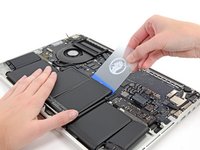
To make matters worse, the screwed-in battery caddies of yesteryear have moved over the trackpad, burying the poor thing alive.
-
We launch the rescue effort with our friends, iOpener and plastic card; after a hearty swig of patience, we set to work.
-
Victory! At long last, the awkward battery assembly is wrested from the case.
-
-
-
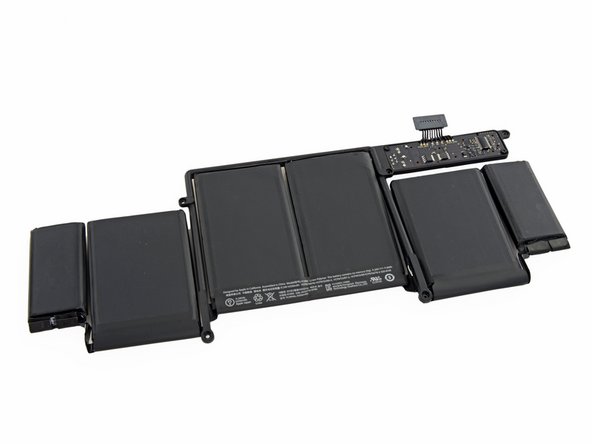
Take a look at that six pack!
-
Here's the muscle: coming in at 71.8 Wh this 11.34 V battery is ever-so-slightly down on oomph from last year. But thanks to other improvements, Apple claims a 9-hour battery life during normal use.
-
With the battery free, we finally get a better look at the connector.
-
It's certainly nice to see a more conventional battery connector, rather than the earlier revision's contact board shenanigans. But at what cost, Apple?
-
-
-
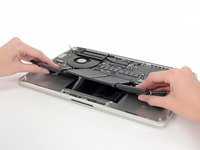
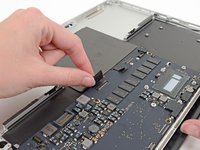
A few measly connectors are all that stand between us and total logic board liberation; they are dealt with harshly.
-
The MBP's secrets can run, but they can't hide. Also, they can't really run. That would be a cool upgrade, though.
-
-
-
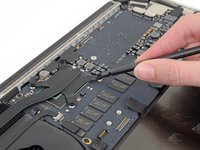
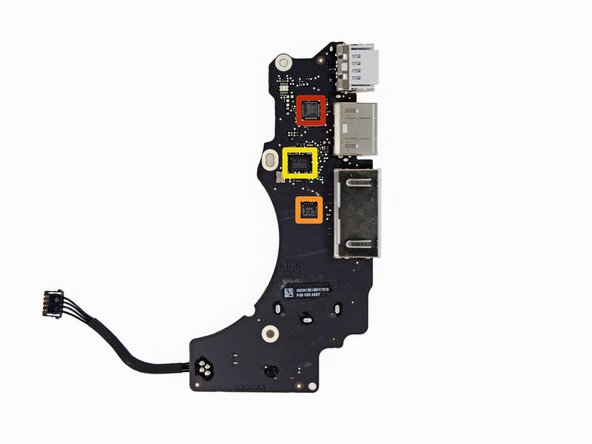
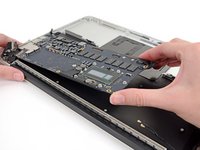
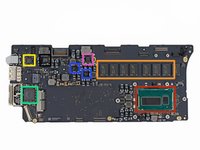
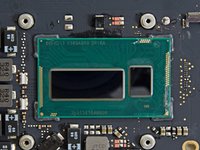
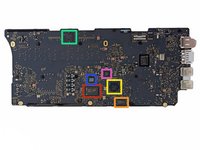
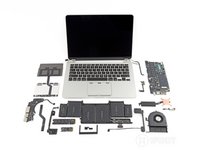
Here it comes, the component we've all been waiting for: the logic board! Here's what we've got for ICs:
-
Intel SR18A Core i5-4258U Processor
-
Micron D9PXV 4 Gb (512 MB) DDR3L SDRAM (total of 8 * 512 MB = 4 GB)
-
Cirrus 4208-CRZ Two-Channel Low Power HD Audio Codec
-
Intel DSL5520 Thunderbolt 2 Controller
-
Fairchild Semiconductor DD18BB 220A
-
Texas Instruments 58872D TI 37 CF61 E4
-
K03P0 2L4 62DP
-
-
-
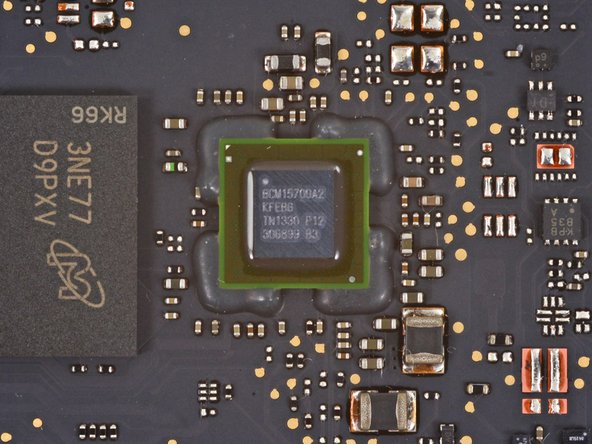
Back side of logic board:
-
Micron D9PXV 4 Gb (512 MB) DDR3L SDRAM
-
MXIC MX25L6406E 64M-bit CMOS Serial Flash
-
Texas Instruments Stellaris LM4FS1EH Microcontroller
-
Cypress CY8C24794-24LTXI Programmable System-on-Chip
-
Broadcom BCM15700A2
-
P13WVR 12612NEE
-
Linear Technology LT3957 B29255
-
-
-
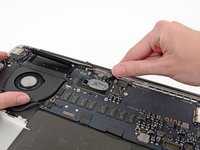
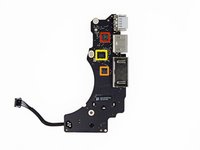
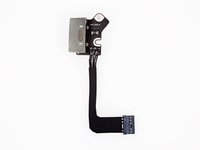
Next to come out is the MagSafe 2 port.
-
We're happy to see that the power adapter resides on its very own connector, meaning that if you need to replace it, you won't need to replace any extra parts along with it.
-
While it still holds the same MagSafe 2 technology, the connector has been updated slightly from previous versions.
-
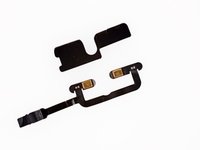
Flying through components, we come to the dual mic—hidden under a rubber cover. The time for eavesdropping is over, mic; you've been exposed.
-
-
-
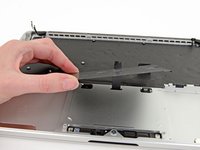
Don't worry—steel is weak to fire—we attack with iOpener; it's super effective!
-
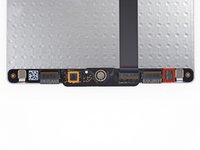
Under that hefty metal armor, we find much the same trackpad as in the 2012 edition.
-
ICs include:
-
Macronix MX25L2006E 16M-bit CMOS Serial Flash
-
Broadcom BCM5976 Touchscreen Controller (as found in the earlier versions and the iPhone 5)
-
-
-
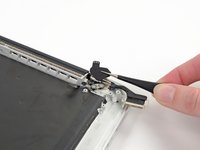
The usual black rubber conceals the display hinge screws and some new adhesive.
-
We let this display off with a warning, but if you're dying to see inside, how about a blast from the past?
-
This display, as with its predecessors, must be replaced as an assembly; there's no parting out this bad boy.
-
-
-
MacBook Pro with Retina Display 13" Late 2013 Repairability Score: 1 out of 10 (10 is easiest to repair)
-
Proprietary pentalobe screws continue to make opening the device unnecessarily difficult.
-
The battery assembly is now entirely, and very solidly, glued into the case, thus complicating replacement. Additionally, the battery now covers the screws and cable holding the trackpad in place. It is impossible to replace the trackpad without first removing the battery.
-
The Retina display is a fused unit with no protective glass. If anything ever fails inside the display, the entire ($$$) assembly will need to be replaced.
-
The RAM is soldered to the logic board, following the lead of the MacBook Air. Pay for the upgrade now, or be stuck with 4 GB forever. There is no chance of upgrade.
-
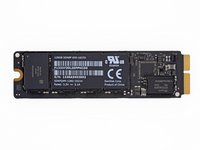
The proprietary SSD is now in a PCIe format, but still isn't a standard drive. Cross your fingers for future compatible drives; for now, you're stuck with what you've got.
-


32 comentários
Not sure if this is something you guys at iFixit have considered as far as environmental impact is concerned (and I could be wrong here as i don't know the process myself). If something needs to be replaced on an Apple product and is returned under warranty or Apple care then the entire unit is replaced for the customer. The defective unit is then repaired, refurbished and resold to the consumer at a refurbished price. That still results in that particular piece of technology being out there in use and not on a scrap heap.
Again I'm not sure if I am missing something in the process here but this seems like a decent way to keep technology in circulation and off the scrap heap, at least if it's covered under warranty or apple care.
Hello Garreth!
I think what’s missing is the ability to fix it yourself to save some cash when it’s out of warranty.
Abdoz A -