Ir para o conteúdo principal

HP 15-bs015dx Teardown

Vídeo de Apresentação

  1. HP 15-bs015dx Teardown, Remove the Battery - Part 1: passo 1, imagem 1 %32 HP 15-bs015dx Teardown, Remove the Battery - Part 1: passo 1, imagem 2 %32 HP 15-bs015dx Teardown, Remove the Battery - Part 1: passo 1, imagem 3 %32
    • Put the laptop facing down

    • Move the left battery safe lock to the right

  2. HP 15-bs015dx Teardown, Remove the Battery - Part 2: passo 2, imagem 1 %32 HP 15-bs015dx Teardown, Remove the Battery - Part 2: passo 2, imagem 2 %32 HP 15-bs015dx Teardown, Remove the Battery - Part 2: passo 2, imagem 3 %32
    • Slide the right battery safe lock to the left

    • This lock is harder than the previous, with this the battery should pop-up.

  3. HP 15-bs015dx Teardown, Remove the 6 visibles screws: passo 3, imagem 1 %32 HP 15-bs015dx Teardown, Remove the 6 visibles screws: passo 3, imagem 2 %32 HP 15-bs015dx Teardown, Remove the 6 visibles screws: passo 3, imagem 3 %32
    • Use a Philips 0 screwdriver

  4. HP 15-bs015dx Teardown, Remove the 4 hidden screws: passo 4, imagem 1 %32 HP 15-bs015dx Teardown, Remove the 4 hidden screws: passo 4, imagem 2 %32 HP 15-bs015dx Teardown, Remove the 4 hidden screws: passo 4, imagem 3 %32
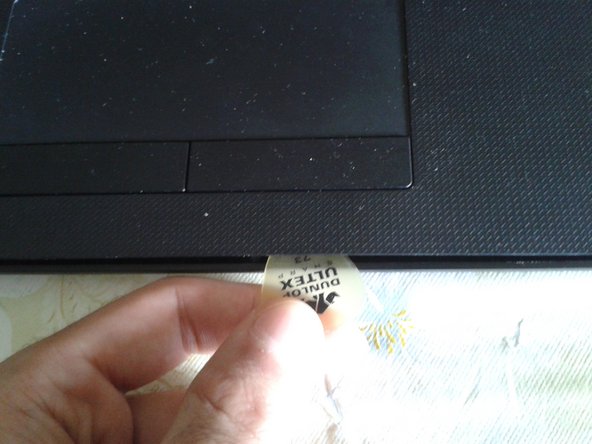
    • Use a straw to take off just enough of the rubber feet of the 4 corners

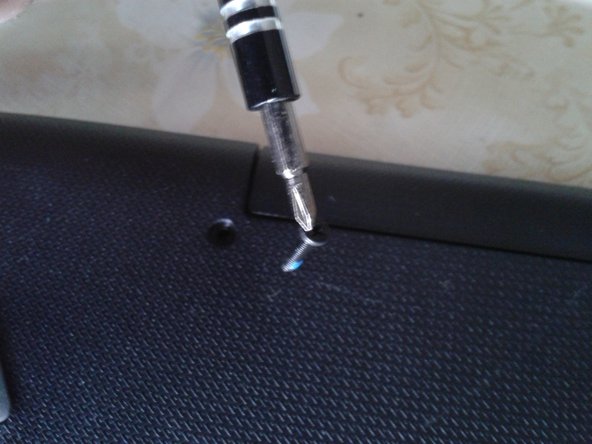
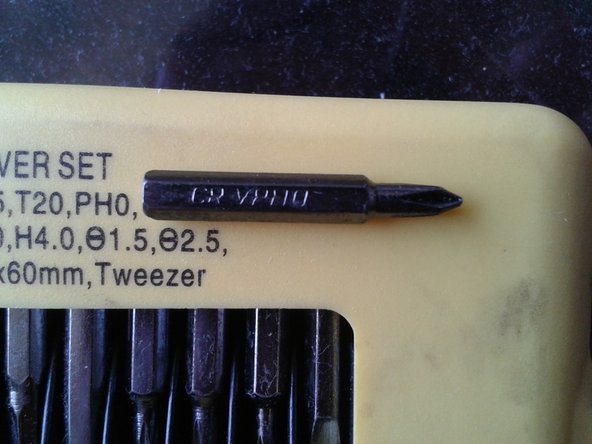
    • Use a Phillips screwdriver 0

    • Replace each rubber foot in place after removing the screws

    • You will have a total of 10 screws

  5. HP 15-bs015dx Teardown, Remove the DVD unit: passo 5, imagem 1 %32 HP 15-bs015dx Teardown, Remove the DVD unit: passo 5, imagem 2 %32
    • It will go out easily with or without a straw

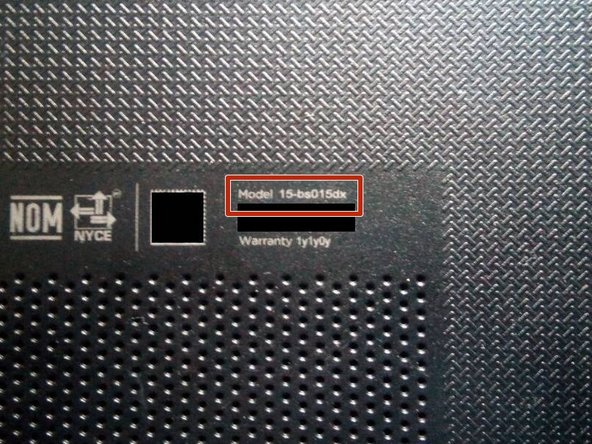
    • You can check the model number

  6. HP 15-bs015dx Teardown, Separate the pieces of the chassis part 1: passo 6, imagem 1 %32 HP 15-bs015dx Teardown, Separate the pieces of the chassis part 1: passo 6, imagem 2 %32 HP 15-bs015dx Teardown, Separate the pieces of the chassis part 1: passo 6, imagem 3 %32
    • Flip the laptop and open it

    • Use a plastic tool or a straw to separate the pieces of the chassis

  7. HP 15-bs015dx Teardown, Separate the pieces of the chassis part 2: passo 7, imagem 1 %32 HP 15-bs015dx Teardown, Separate the pieces of the chassis part 2: passo 7, imagem 2 %32 HP 15-bs015dx Teardown, Separate the pieces of the chassis part 2: passo 7, imagem 3 %32
    • Flip the laptop and separate the inferior cover of the chassis

    • Hard Drive 2.5" SATA

    • 2 RAM memory slots type DDR4 SO-DIMM

    • CPU Intel 7th generation

    • Active heat sink (fan)

    • Wireless card

    • Watch battery, 3V. CR2030

Conclusão

To reassemble your device, follow these instructions in reverse order.

39 outras pessoas executaram este guia.

Um agradecimento especial a esses tradutores:

es en

100%

Estes tradutores estão nos ajudando a consertar o mundo! Quer contribuir?
Comece a traduzir ›

Marcos Mora

Membro desde: 12/17/17

3.561 Reputação

Autoria de 11 guias

16 comentários

Se me rompio las bisagras … como se reemplazan ?

Javier Horacio Monti - Responder

No tengo la laptop a mano para tomarle fotos, aunque en el paso 7 se puede ver algo. Depende de la rotura, lo típico que se rompe es la rosca para los tornillos, hay que crear un nueva rosca con material adicional, sin embargo, desconozco el procedimiento. En todo caso, puedes contactarme a mis RRSS que están en mi perfil de ifixit.

Marcos Mora -

Your step by step guide is apt. Thanks

Perebowei Titus Otoru Nigeria

Perebowei Titus Otoru - Responder

Buenas podrías hacer un tutorial desarmando y ensamblando la webcam

Javier - Responder

Saludos, ya entregué la laptop al cliente.

Marcos Mora -

Adicione um comentário

Exibir estatísticas:

Últimas 24 horas: 34

Últimos 7 dias: 252

Últimos 30 dias: 1,220

Duração total: 82,683